소개
Use this guide to replace a faulty or broken display on your MacBook Air 13" Early 2015.
필요한 것
동영상 개요
-
-
Use a P5 Pentalobe driver to remove ten screws securing the lower case, of the following lengths:
-
Two 9 mm screws
-
Eight 2.6 mm screws
-
-
-
Grab the clear plastic pull tab attached to the battery connector and pull it parallel to the board toward the front edge of the Air.
-
-
-
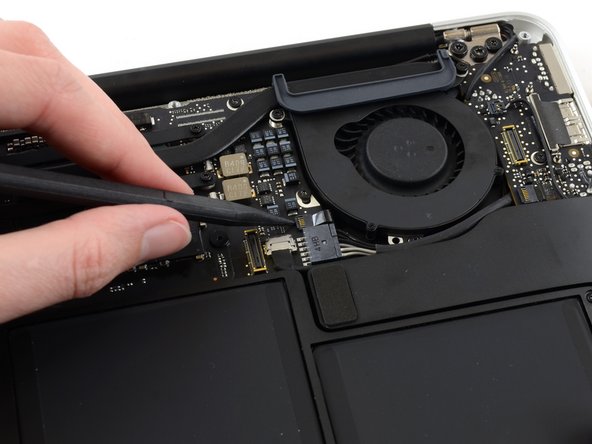
Use the flat end of a spudger to pry the I/O board cable connector up out of its socket on the I/O board.
-
-
-
-
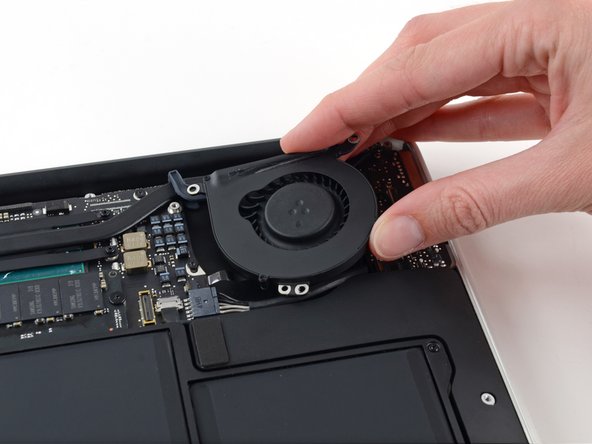
Disconnect the I/O board by pulling its power cable away from its socket on the logic board.
-
-
-
Use the flat end of a spudger to pry each of the antenna connectors up from their sockets on the AirPort/Bluetooth card.
-


To reassemble your device, follow these instructions in reverse order.
Take your e-waste to an R2 or e-Stewards certified recycler.
Repair didn’t go as planned? Try some basic troubleshooting, or ask our Answers community for help.
To reassemble your device, follow these instructions in reverse order.
Take your e-waste to an R2 or e-Stewards certified recycler.
Repair didn’t go as planned? Try some basic troubleshooting, or ask our Answers community for help.
다른 117명이 해당 안내서를 완성하였습니다.

댓글 34개
Followed this guide to replace a broken display assembly on my Macbook Air. Complete everything in 40 minutes with little problem. My only problem was ripping the tab off the microphone ribbon cable which made this part a little bit more difficult, but didn't end up being a huge deal.
Would you be able to replace the screen with a 13" macbook pro retina screen on the newest 2015 13" Macbook Air?
Not even close.
For people who need context with their answers rather than just receiving an ambiguous NO:
The screens from the MacBook Air models and the regular MacBook & MacBook Pro are NOT INTERCHANGEABLE BECAUSE:
they have different connectors. The air has 13 pins and the MacBooks have 20 pins.
(I think that is correct, might be 21 pins)
there is no realistic way to alter the hardware of device.
You would have to use some ritual magic and tweaker math.
We are talking about swapping different architectures in this scenario, so beyond that maybe there is a bridging connector but I would imagine that you would have to install some kind of accelerator to compensate for the difference and render the display properly.
However, on a lighter note:
•2010-2017 Airs have compatible LCDs 11 and 13 inch can be swapped for testing purposes.
•2013-2017 Airs are fully compatible.
•2010-2011 11" Airs have a shorter WIFI cable. •2012 is usable on 2010-2012.
LD GROUP -