이 버전에는 잘못된 편집 사항이 있을 수 있습니다. 최신 확인된 스냅샷으로 전환하십시오.
필요한 것
-
-
P5 펜타로브 드라이버를 사용하여 하난 케이스를 고정하는 다음 길이의 나사 10개를 풀어주세요:
-
9mm 나사 두 개
-
2.6mm 나사 여덟 개
-
-
이 단계는 번역되지 않았습니다. 번역을 도와주십시오
-
Grab the clear plastic pull tab attached to the battery connector and pull it toward the front edge of the Air to disconnect the battery from the logic board.
-
-
이 단계는 번역되지 않았습니다. 번역을 도와주십시오
-
Use the flat end of a spudger to pry the I/O board cable connector upward out of its socket on the I/O board.
-
-
이 단계는 번역되지 않았습니다. 번역을 도와주십시오
-
While gently pulling the I/O board cable upward near its connection to the logic board, use the tip of a spudger to pry upward on alternating sides of the connector to help "walk" it out of its socket.
-
Remove the I/O board cable.
-
-
이 단계는 번역되지 않았습니다. 번역을 도와주십시오
-
Use the tip of a spudger to carefully flip up the retaining flap on the fan cable ZIF socket.
-
-
-
이 단계는 번역되지 않았습니다. 번역을 도와주십시오
-
Remove the following three screws securing the fan to the upper case:
-
One 3.6 mm T5 Torx screw
-
One 2.7 mm T5 Torx screw
-
One 3.6 mm T5 Torx screw with a short head
-
-
이 단계는 번역되지 않았습니다. 번역을 도와주십시오
-
Lift the fan out of the upper case and carefully pull the fan ribbon cable out of its socket as you remove it from the Air.
-
-
이 단계는 번역되지 않았습니다. 번역을 도와주십시오
-
Disconnect the I/O board by pulling the power cable away from its socket on the logic board.
-
-
이 단계는 번역되지 않았습니다. 번역을 도와주십시오
-
Pull the camera cable parallel to the face of the I/O board toward the corner of the Air to disconnect it from its socket, using the tip of a spudger to help push the connector out of its socket.
-
-
이 단계는 번역되지 않았습니다. 번역을 도와주십시오
-
Use the flat end of a spudger to pry the left speaker cable connector up and out of its socket on the I/O board.
-
De-route the left speaker cable from its retainer on the I/O board.
-
-
이 단계는 번역되지 않았습니다. 번역을 도와주십시오
-
Use the flat end of a spudger to pry the microphone cable connector up and out of its socket on the I/O board.
-
-
이 단계는 번역되지 않았습니다. 번역을 도와주십시오
-
Remove the single 3.6 mm T5 Torx screw securing the I/O board to the upper case.
-
-
이 단계는 번역되지 않았습니다. 번역을 도와주십시오
-
Carefully lift the I/O board from its edge nearest the logic board and remove it from the upper case.
-
-
이 단계는 번역되지 않았습니다. 번역을 도와주십시오
-
Remove the two 4.9 mm T8 Torx screws securing the antenna cable retainer on the left display hinge to the upper case.
-
-
이 단계는 번역되지 않았습니다. 번역을 도와주십시오
-
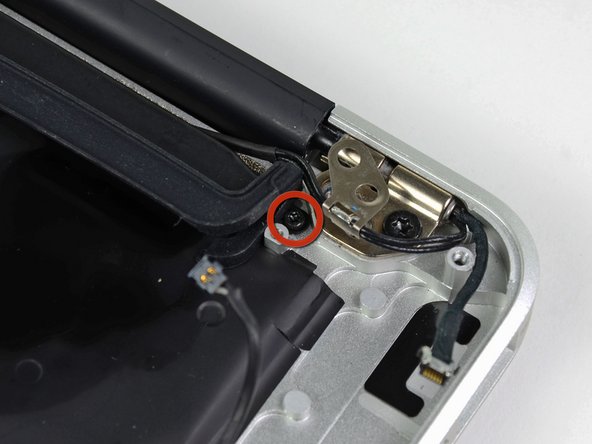
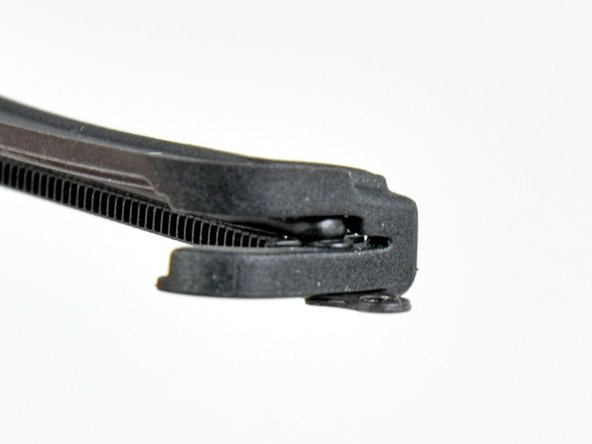
Push the antenna cable retainer out of the way and remove the 3 mm T5 Torx screw securing the end of the heat sink to the upper case.
-
-
이 단계는 번역되지 않았습니다. 번역을 도와주십시오
-
Remove the four 2.5 mm T5 Torx screws securing the heat sink to the logic board.
-
다른 30명이 해당 안내서를 완성하였습니다.
댓글 4개
Excellent instructions / guide. Replaced both heat sink and fan without a hitch. Thank you!
I wanted to bring my old 2011 MBA back to life since its still running strong, so I followed this with a new thermal paste, good cleaning and a new battery, its like a brand new computer now. Glad I got the ifixit kit as well when I ordered the battery. Hope to keep this MBS going another year or two before I upgrade. Now I need to do the same with my MBP 2010 for fun.
I have a mid-2011 MacBook Air identical to the model in the instructions, and it frequently gets up to 80C when running under a heavier load. I am planning to disassemble it entirely and repaste the machine, and fully blow out the inside. I will post on here when I get it done and see how it runs! Thanks for the guide!
thanks alot.. I followed the procedure to replace the thermal paste and it was great.but i didn’t realise a difference in heat and sound of fan.


