소개
Here’s the guide of speaker replacement of MacBook Pro 2016/2017. In October 2016, Apple launched a new MacBook Pro, which had a whole new design and functions including Touch Bar, new butterfly keyboard, display and speakers. However these features annoyed the users because they were really frangible. Apple announced the replacement program of keyboard and display but speakers even many people have been suffering speakers muffling issue. Apple says it costs about $600 to replace the speaker because they glued to the top case and can't be replaced individually. So I decided to replace by myself and write a guide for those have the same issue.
필요한 것
-
-
Power on your Mac and launch Terminal.
-
Copy and paste the following command (or type it exactly) into Terminal:
-
sudo nvram AutoBoot=%00
-
Press [return]. If prompted, enter your administrator password and press [return] again. Note: Your return key may also be labeled ⏎ or "enter."
-
sudo nvram AutoBoot=%03
-
-
이 단계에 사용된 도구:Magnetic Project Mat$19.95
-
Close the display and flip the entire laptop upside-down.
-
Use a P5 Pentalobe driver to remove six screws securing the lower case, of the following lengths:
-
Four 4.7 mm screws
-
Two 6.6 mm screws
-
-
-
-
Remove the lower case.
-
Set it in place and align the sliding clips near the display hinge. Press down and slide the cover toward the hinge. It should stop sliding as the clips engage.
-
When the sliding clips are fully engaged and the lower case looks correctly aligned, press down firmly on the lower case to engage the four hidden clips. You should feel and hear them click into place.
-
-
-
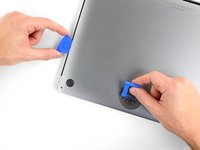
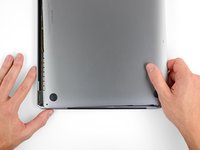
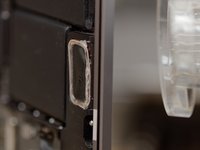
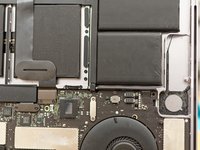
The speaker is glued to the enclosure with really hard tape, so I used hair dryer to make it easier to take it off.
-
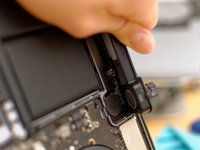
Use the hair dryer to heat the metal from the other side, next to the keyboard.
-
-
-
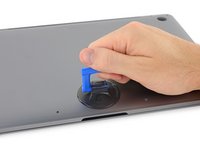
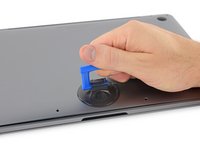
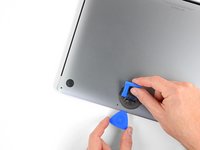
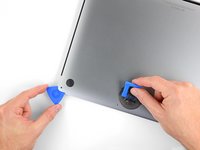
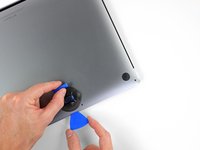
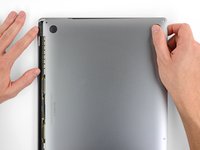
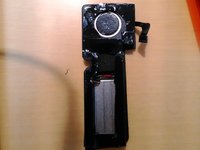
After that, insert a metal ruler between the speaker and the enclosure. Be careful not to damage the battery shells when you do that.
-
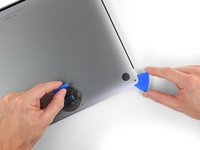
You can also try to use a guitar string on the rounded corner next to the battery.
-
It works best when you heat the case while trying to remove the speaker. Ask someone to hold the hair dryer while you pull.
-
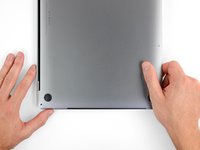
Only apply as much heat as you need until the glue slightly loosens.
-
-
-
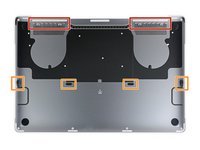
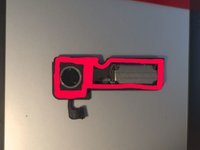
In my case, I used double-sided tape for this replacement. The most important thing in this step is not to make a gap when you cut and put it on the speaker. Even just a little gap will make sound distorted.
-
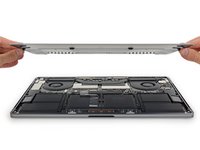
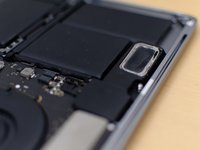
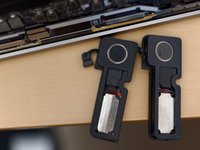
Also, I noticed the structural differences between 2016 and 2017models. The right one is 2017 model and the left one is 2016 model from iFixit. Sound absorbing material is slightly different as you can see at the third picture, but I couldn't tell the difference of sound quality.
-


Several month after this replacement, the battery drive time dropped so much, so I had my MBP checked at Genius Bar. I asked them if I could receive the battery replacement even I replaced the right speaker by myself, they said they could. Ultimately, the top case including battery and speakers was replaced. However I am afraid that the new speakers would break again because they sometimes make a cracking noise while playing music or something.
Several month after this replacement, the battery drive time dropped so much, so I had my MBP checked at Genius Bar. I asked them if I could receive the battery replacement even I replaced the right speaker by myself, they said they could. Ultimately, the top case including battery and speakers was replaced. However I am afraid that the new speakers would break again because they sometimes make a cracking noise while playing music or something.
다른 45명이 해당 안내서를 완성하였습니다.
댓글 26개
is battery draining is related to speaker replacement? as I get it’s not, but just wanted to double-check
I’ll need to do the same replacement after I’ve damaged my speaker when I was opening my MacBook to change thermal paste, so great news you can change to case after a repair like that, thank you
Has anyone done this repair and what there any problems?
I just did it and I did encounter one frustrating thing. In this tutorial it's not mentioned but I did unplug/pull out the power/data line or whatever it is in the middle of the machine. When I went to put it back in, the tab which is there so you can pull on it ripped off! So I was very scared I wasn't going to be able to hook it back in and with some frustration managed to get it. Just be very careful with every step of this process.
wangmeow -
Where can I buy the right-side speaker component, 2017 model? As you noted in the 3rd step section, you find the structural differences between 2016 and 2017models. When I search the 2017 model right-side speaker in ifixit. com here, the component seems to be only 2016 model as below:
MacBook Pro 15" Retina (Late 2016-2017) Right Speaker
Also, do you have a video tutorial of replacing speakers? If then, much appreciated!