이 버전에는 잘못된 편집 사항이 있을 수 있습니다. 최신 확인된 스냅샷으로 전환하십시오.
필요한 것
-
이 단계는 번역되지 않았습니다. 번역을 도와주십시오
-
Remove the two pieces of kapton tape covering the display data cable.
-
Remove the strip of tape securing the iSight cable to the LCD.
-
Peel the three antenna straps off the lower edge of the LCD.
-
-
이 단계는 번역되지 않았습니다. 번역을 도와주십시오
-
Disconnect the display data cable by pulling its connector toward the bottom edge of the display, away from the socket on the LCD.
-
-
이 단계는 번역되지 않았습니다. 번역을 도와주십시오
-
Remove the two Phillips screws securing the ground straps for the display data cable and LED driver board cable to the clutch cover.
-
-
-
이 단계는 번역되지 않았습니다. 번역을 도와주십시오
-
Remove the three Phillips screws behind antenna straps along the bottom edge of the display.
-
-
이 단계는 번역되지 않았습니다. 번역을 도와주십시오
-
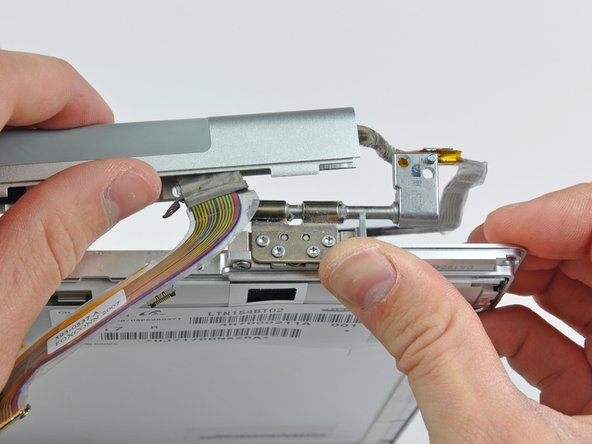
To remove the clutch assembly, first insert the flat end of a spudger into the gap between the clutch hinge and the clutch cover where the cables exit.
-
While prying the clutch assembly away from the clutch hinge with your spudger, use a plastic opening tool to increase the gap between the clutch cover and the front display bezel.
-
Work your way along the length of the clutch cover to fully separate the adhesive.
-
-
이 단계는 번역되지 않았습니다. 번역을 도와주십시오
-
Push the clutch assembly off each of the clutch hinges and remove it from the display.
-


다른 한 분이 해당 안내서를 완성하였습니다.
