주요 콘텐츠로 건너뛰기

MacBook Unibody Model A1278 Trackpad Replacement

필요한 것

  1. MacBook Unibody Model A1278 Trackpad Replacement, Access Door: 1 단계, 이미지 1/1
    • With the case closed, place the Unibody top-side down on a flat surface.

    • Depress the grooved side of the access door release latch enough to grab the free end. Lift the release latch until it is vertical.

  2. MacBook Unibody Model A1278 Trackpad Replacement: 2 단계, 이미지 1/1
    • The access door should now be raised enough to lift it up and out of the Unibody.

  3. MacBook Unibody Model A1278 Trackpad Replacement, Battery: 3 단계, 이미지 1/1
    • Be sure the access door release latch is vertical before proceeding.

    • Grab the white plastic tab and pull the battery up and out of the Unibody.

  4. MacBook Unibody Model A1278 Trackpad Replacement, Lower Case: 4 단계, 이미지 1/1
    • Remove the following eight screws securing the lower case to the chassis:

    • One 3 mm Phillips screw.

    • Three 13.5 mm Phillips screws.

    • Four 3.5 mm Phillips screws.

  5. MacBook Unibody Model A1278 Trackpad Replacement: 5 단계, 이미지 1/1
    • Using both hands, lift and remove the lower case off the upper case.

  6. MacBook Unibody Model A1278 Trackpad Replacement, Mid Wall: 6 단계, 이미지 1/1
    • Remove the four 10.3 mm Phillips screws securing the mid wall to the upper case.

  7. MacBook Unibody Model A1278 Trackpad Replacement: 7 단계, 이미지 1/1
    • Lift the mid wall out of the upper case.

  8. MacBook Unibody Model A1278 Trackpad Replacement, Trackpad: 8 단계, 이미지 1/2 MacBook Unibody Model A1278 Trackpad Replacement, Trackpad: 8 단계, 이미지 2/2
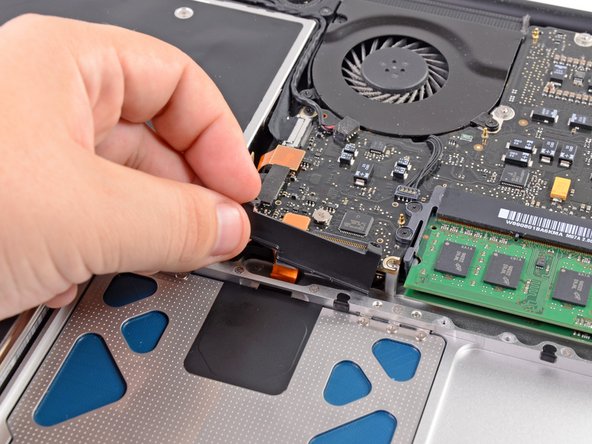
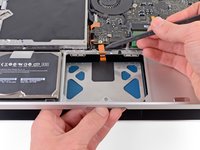
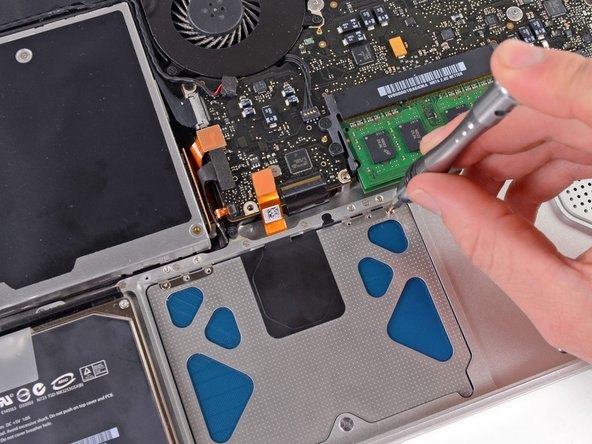
    • Remove the two 5 mm Phillips screws securing the keyboard flex bracket to the upper case.

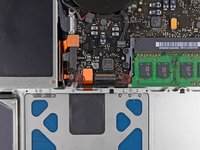
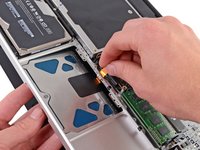
    • Lift the keyboard flex bracket out of the upper case.

  9. MacBook Unibody Model A1278 Trackpad Replacement: 9 단계, 이미지 1/1
    • Use the flat end of a spudger to pry the trackpad connector straight up off the logic board.

  10. MacBook Unibody Model A1278 Trackpad Replacement: 10 단계, 이미지 1/1
    • Remove the six 1.4 mm Y0 Tri-point screws securing the trackpad to the upper case.

  11. MacBook Unibody Model A1278 Trackpad Replacement: 11 단계, 이미지 1/2 MacBook Unibody Model A1278 Trackpad Replacement: 11 단계, 이미지 2/2
    • Carefully dislodge the edge of the trackpad closest to the keyboard from its recess in the upper case by pushing it away from the brackets attached to the upper case.

    • De-route the trackpad cable through its slot cut into the upper case.

  12. MacBook Unibody Model A1278 Trackpad Replacement: 12 단계, 이미지 1/1
    • Pull the trackpad away from the outer edge of the upper case.

    • Remove the old trackpad and set it aside.

  13. MacBook Unibody Model A1278 Trackpad Replacement: 13 단계, 이미지 1/2 MacBook Unibody Model A1278 Trackpad Replacement: 13 단계, 이미지 2/2
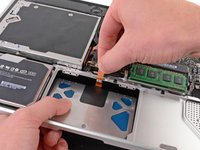
    • Carefully insert the cable from your new trackpad through its slot cut into the upper case.

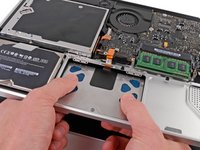
    • Use one hand to hold the trackpad cable in place as you insert the two retaining tabs on the outer edge of the trackpad under the lip on the upper case.

    • Pull the trackpad cable as you seat the trackpad into its void in the upper case.

  14. MacBook Unibody Model A1278 Trackpad Replacement: 14 단계, 이미지 1/1
    • Insert a 1.4 mm Tri-point screw into each of the outer holes drilled into the trackpad (two screws total).

    • You'll install the rest in a bit.

    • Tighten the screws all the way, then back them out about a quarter turn to aid in aligning your trackpad during the next few steps.

  15. MacBook Unibody Model A1278 Trackpad Replacement: 15 단계, 이미지 1/1
    • Before tightening, make sure that the trackpad is freely moving up and down. If you feel stiffness, try to very gently adjust it so that in its untightened position the lower part easily moves up and down.

    • While continually trying to click your trackpad, gently tighten the Tri-point set screw until the clicks return to their factory "feel".

    • You can tell when the screw is tightened just right by the noise it makes when the trackpad clicks. If the set screw is too loose, the trackpad will have excessive play before it clicks. If it is too tight, the trackpad will click too easily and won't make the characteristic loud mouse clicking noise.

  16. MacBook Unibody Model A1278 Trackpad Replacement: 16 단계, 이미지 1/1
    • Next, flip your upper case over so the keyboard side is facing up.

    • Align the trackpad so it is centered in its hole cut into the upper case.

  17. MacBook Unibody Model A1278 Trackpad Replacement: 17 단계, 이미지 1/1
    • Tighten the outer two screws along the inner edge of the trackpad and check the alignment of it on the outer side of the upper case.

    • If its alignment looks good, install the rest of the Tri-point screws along the inner edge of the trackpad.

    • Before reassembling your machine, verify that the set screw is still installed in a position so the mouse will click correctly.

결론

To reassemble your device, follow these instructions in reverse order.

다른 59명이 해당 안내서를 완성하였습니다.

Walter Galan

693,685 평판

안내서 1,203개 작성하였습니다

댓글 12개

The one thing I would be interested in: Where can I get the screwdriver this person is using in step 15? By this I am not referring to the low quality tools that are advertised alongside the tutorial.

--> can answer my own question. This is it: [연계 제품이 누락 또는 비활성화 됨: IF145-072]

chris - 답글

Is there a key to getting the front edge of the trackpad (side away from the keyboard) to sit up flush with the body? The trackpad is slightly recessed at the front edge of the unibody, but nice and flush near the keyboard. Any suggestions are appreciated.

domsmith - 답글

Before going to the trouble and expense of removing the trackpad make sure you don't just have a problem with the battery. My trackpad was giving me fits by not responding or needing excessive pressure, etc. The only problem was that the battery was swollen and putting pressure up on the trackpad. Replaced the battery and the problem was solved.

Rich M - 답글

I agree with Rich M - check the battery first! Swollen battery will impede the trackpad.

John Scott - 답글

awesome instructions, thank you!

Fred Oliff - 답글

댓글 쓰기

조회 통계:

24 시간 전: 5

7일 전: 20

30일 전: 95

전체 시간: 79,191