이 버전에는 잘못된 편집 사항이 있을 수 있습니다. 최신 확인된 스냅샷으로 전환하십시오.
필요한 것
-
이 단계는 번역되지 않았습니다. 번역을 도와주십시오
-
Use the flat end of a spudger to pry the AirPort/Bluetooth cable connector up off the logic board.
-
-
이 단계는 번역되지 않았습니다. 번역을 도와주십시오
-
Remove the following screws securing the right speaker assembly to the upper case:
-
One 12 mm Phillips screw.
-
One 3 mm Phillips screw.
-
-
이 단계는 번역되지 않았습니다. 번역을 도와주십시오
-
Remove the single 2.2 mm Phillips screw inserted horizontally into the side of the optical drive.
-
-
-
이 단계는 번역되지 않았습니다. 번역을 도와주십시오
-
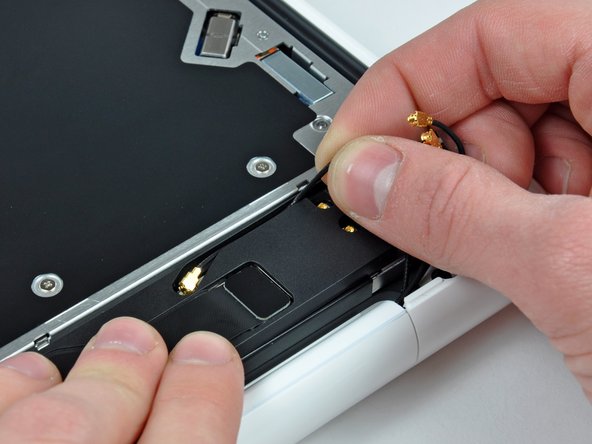
Pry the AirPort and Bluetooth antenna connectors (3 total) up off the AirPort/Bluetooth card.
-
De-route the long antenna from its channel in the rear speaker housing.
-
-
이 단계는 번역되지 않았습니다. 번역을 도와주십시오
-
Use the flat end of a spudger to pry the rear speaker cable connector up off the logic board.
-
-
이 단계는 번역되지 않았습니다. 번역을 도와주십시오
-
Carefully peel the AirPort/Bluetooth cable from its channel within the rear speaker assembly.
-
Use the flat end of a spudger to pry the AirPort/Bluetooth cable up off the rear speaker.
-
-
이 단계는 번역되지 않았습니다. 번역을 도와주십시오
-
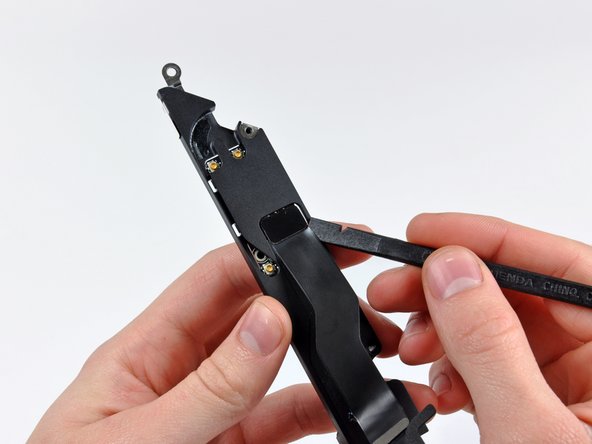
Remove three 3 mm Phillips screws securing the AirPort/Bluetooth board to the rear speaker assembly.
-