소개
Use this guide to replace a broken display on a Microsoft Surface Pro, or to remove the display for further repairs.
필요한 것
-
-
Use a heated iOpener or a heat gun to heat the edges of the display and soften its adhesive.
-
-
-
Apply a suction cup as close as possible to the edge of the display.
-
Use the suction cup to lift the edge of the display enough to insert an opening pick under the edge.
-
Slide the opening pick all the way around the edges of the display to cut through the adhesive on the bezel.
-
Ribbon cables and a circuit board are approx. 0.6 cm from the edge of the glass.
-
-
-
-
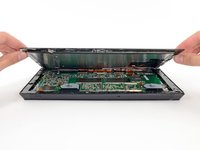
Starting from the top edge, lift the display slightly.
-
Before completely removing the display:
-
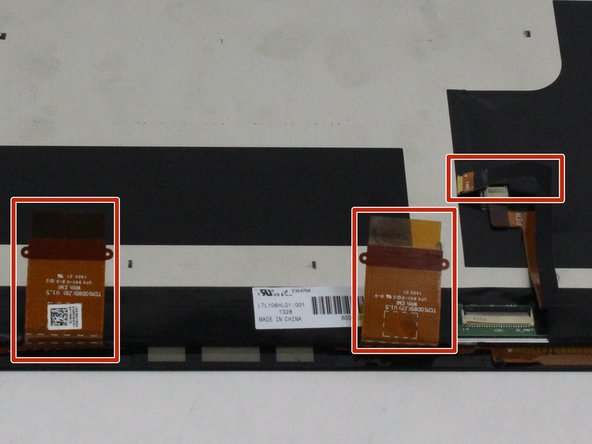
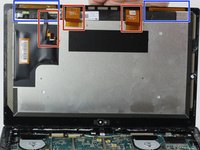
Disconnect the three display cables.
-
Gently peel from the frame 2 orange ribbon cables that are glued to it, as those should stay with the display. (e.g. use a thin plastic card to separate them)
-


To reassemble your device, follow these instructions in reverse order.
다른 4명이 해당 안내서를 완성하였습니다.
