소개
Follow this guide to remove and replace the motherboard for the Moto E4 Plus.
Before you begin, download the Rescue and Smart Assistant app to backup your device and diagnose whether your problem is software or hardware related.
필요한 것
-
-
Insert the edge of the spudger into the notch on the bottom right corner of the phone.
-
Twist the spudger to start releasing the back cover from the phone.
-
Slide the spudger along the bottom edge to separate the back cover from the phone.
-
-
-
Remove the nineteen 3.2 mm long T3 screws securing the plastic midframe.
-
-
-
Insert the flat end of a spudger into the midframe seam at the bottom left corner of the phone (near the microphone hole).
-
Twist the spudger to release the plastic clip.
-
Repeat the process for the clip near the top right corner of the phone.
-
-
-
-
Lift the bottom edge of the plastic midframe upwards until the clips along the top edge release.
-
Remove the plastic midframe.
-
-
-
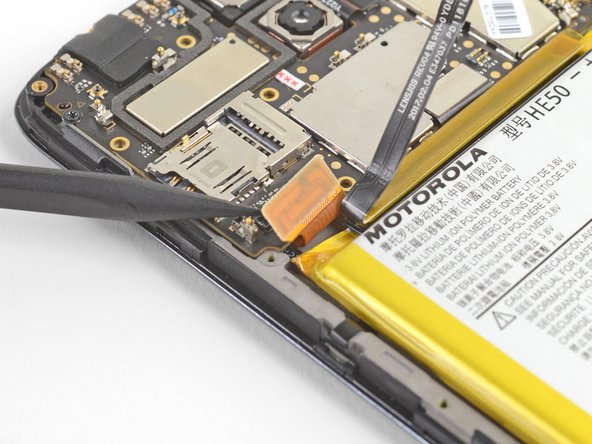
Use the point of a spudger to pry up and disconnect the battery connector from its motherboard socket.
-
-
-
Use the point of a spudger to pry up and disconnect the display cable from its motherboard socket, near the bottom left corner of the motherboard.
-
-
-
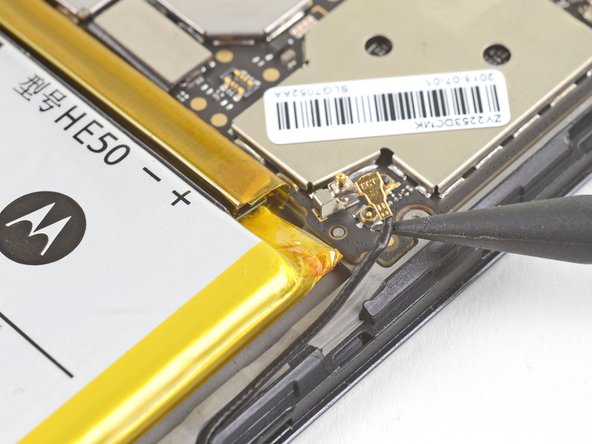
Use the point of a spudger to pry up and disconnect the antenna cable from its motherboard socket.
-
-
-
Use the point of a spudger to pry up and disconnect the interconnect cable from its motherboard socket.
-
-
-
Remove the two black 3.2 mm long T3 screws securing the motherboard.
-
-
-
Grasp the motherboard by the top corners and lift it out of the phone.
-
Remove the motherboard.
-


To reassemble your device, follow these instructions in reverse order.
Take your e-waste to an R2 or e-Stewards certified recycler.
Repair didn’t go as planned? Try some basic troubleshooting, or ask our Moto E4 Plus Answers community for help.
To reassemble your device, follow these instructions in reverse order.
Take your e-waste to an R2 or e-Stewards certified recycler.
Repair didn’t go as planned? Try some basic troubleshooting, or ask our Moto E4 Plus Answers community for help.
다른 3명이 해당 안내서를 완성하였습니다.

