주요 콘텐츠로 건너뛰기

Motorola Moto E6 Play Battery Replacement

필요한 것

  1. Motorola Moto E6 Play Battery Replacement, Back Cover: 1 단계, 이미지 1/2 Motorola Moto E6 Play Battery Replacement, Back Cover: 1 단계, 이미지 2/2
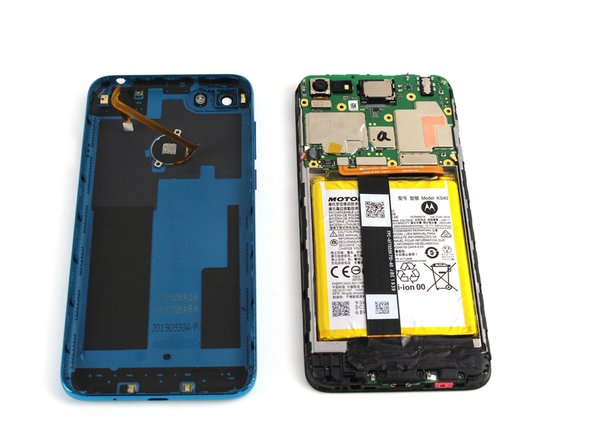
    • Run the halberd spudger along the edges of the device. The back cover should easily pop off.

    • Gently remove the back cover. Do not pull hard, as it is still connected to the fingerprint scanner inside the phone.

  2. Motorola Moto E6 Play Battery Replacement, Circuit Board Covers: 2 단계, 이미지 1/2 Motorola Moto E6 Play Battery Replacement, Circuit Board Covers: 2 단계, 이미지 2/2
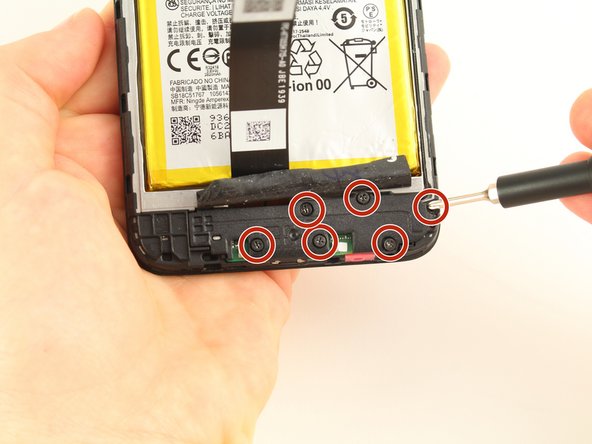
    • To remove the cover on the motherboard, remove the 10 silver 3.90 mm Phillips screws attaching the cover to the board using the Phillips #0 screwdriver.

    • One of these ten screws is covered by black tape located at the bottom left corner of the black cover. Peel back the black tape to access this screw.

  3. Motorola Moto E6 Play Battery Replacement: 3 단계, 이미지 1/2 Motorola Moto E6 Play Battery Replacement: 3 단계, 이미지 2/2
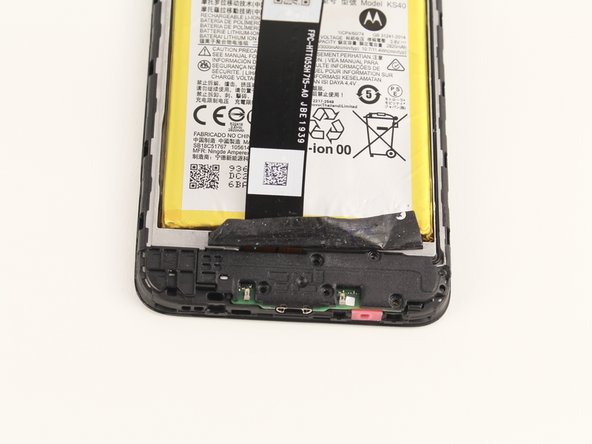
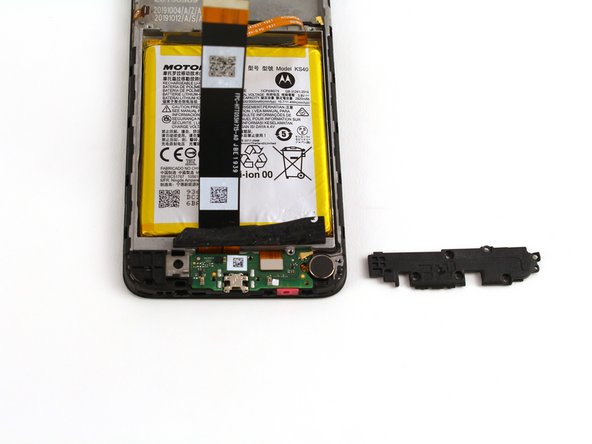
    • With the angled tweezers, remove the black cover to reveal the motherboard underneath.

    • Remove the black piece cover with caution to avoid puncturing the motherboard with the tweezers.

  4. Motorola Moto E6 Play Battery Replacement: 4 단계, 이미지 1/3 Motorola Moto E6 Play Battery Replacement: 4 단계, 이미지 2/3 Motorola Moto E6 Play Battery Replacement: 4 단계, 이미지 3/3
    • The bottom plastic piece covering the daughterboard can be seen by peeling back the tape covering the bottom section of the phone below the battery.

    • To remove the cover, unscrew the six black 3.45 mm Phillips screws holding the cover in place using the Phillips #0 screwdriver.

  5. Motorola Moto E6 Play Battery Replacement: 5 단계, 이미지 1/2 Motorola Moto E6 Play Battery Replacement: 5 단계, 이미지 2/2
    • Remove the black cover piece using the angled tweezers.

  6. Motorola Moto E6 Play Battery Replacement, Battery: 6 단계, 이미지 1/2 Motorola Moto E6 Play Battery Replacement, Battery: 6 단계, 이미지 2/2
    • With the angled tweezers, detach the fingerprint scanner connector from the motherboard by pulling the metal head up and away from the phone.

  7. Motorola Moto E6 Play Battery Replacement: 7 단계, 이미지 1/2 Motorola Moto E6 Play Battery Replacement: 7 단계, 이미지 2/2
    • With the angled tweezers, remove the horizontal and vertical connectors that link the battery to the motherboard together by pulling the metal heads on the connectors.

  8. Motorola Moto E6 Play Battery Replacement: 8 단계, 이미지 1/2 Motorola Moto E6 Play Battery Replacement: 8 단계, 이미지 2/2
    • Remove the battery by inserting the spudger under the battery and gently pulling it up from the device.

    • Continue to push the spudger towards the center of the compartment holding the battery, and gently pry the battery away from the device.

    • In this image, the metal spudger is used. However, you should NOT use a metal spudger to remove the battery. Use the plastic spudger instead, as this is less likely to puncture the battery.

    • In these images, both circuit boards are removed, but this isn't necessary to remove the battery.

결론

To reassemble your device, follow these instructions in reverse order.

다른 3명이 해당 안내서를 완성하였습니다.

Andy Cristales

회원 가입일: 02/10/20

187 평판

안내서 1개 작성함

Cal Poly, Team S22-G4, Regan Winter 2020 Cal Poly, Team S22-G4, Regan Winter 2020 회원

CPSU-REGAN-W20S22G4

4 회원들

안내서 14개 작성하였습니다

댓글 0개

댓글 쓰기

조회 통계:

24 시간 전: 0

7일 전: 15

30일 전: 55

전체 시간: 4,495