소개
Before proceeding with the replacement guide, make sure the headphones are unplugged from any device.
필요한 것
-
-
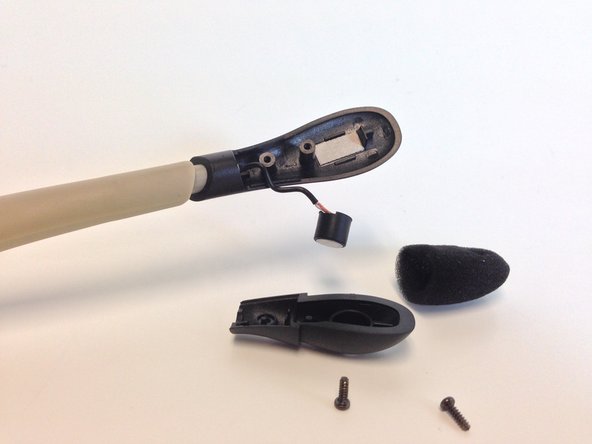
Remove star head screw from above base of the microphone with T6 Torx Screwdriver.
-
To prevent stripping, use an appropriate bit and ensure screwdriver is oriented perpendicular to the face of the screw.
-
-
-
-
Clip both wires to remove defective microphone.
-
Be sure to clip as close to the base of the microphone as possible in order to have enough wire for the new microphone.
-
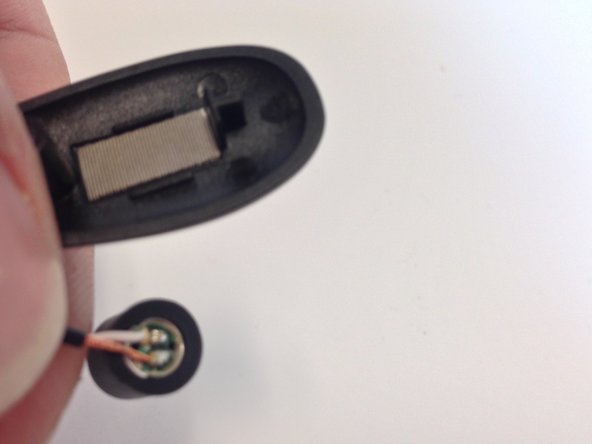
Align wires with corresponding pads on new microphone and solder in place.
-
For soldering, see the Ifixit soldering guide: How To Solder and Desolder Connections
-


To reassemble your device, follow these instructions in reverse order.
To reassemble your device, follow these instructions in reverse order.
다른 한 분이 해당 안내서를 완성하였습니다.
팀

Michigan Tech, Team 5-1, Lauer Spring 2014 Michigan Tech, Team 5-1, Lauer Spring 2014 회원
MTU-LAUER-S14S5G1
2 회원들
안내서 3개 작성하였습니다