주요 콘텐츠로 건너뛰기

Nikon Coolpix S230 Lens Assembly Replacement

필요한 것

  1. Nikon Coolpix S230 Lens Assembly Replacement, LCD Screen: 1 단계, 이미지 1/3 Nikon Coolpix S230 Lens Assembly Replacement, LCD Screen: 1 단계, 이미지 2/3 Nikon Coolpix S230 Lens Assembly Replacement, LCD Screen: 1 단계, 이미지 3/3
    • Ensure the camera is turned off and the battery is removed.

    • Using a Phillips #000 screwdriver, remove the four 2-mm screws from the side of the camera.

    • Remove the two 3-mm screws from the other side of the camera.

    • Finally, remove the three 4-mm screws from the bottom of the camera.

  2. Nikon Coolpix S230 Lens Assembly Replacement: 2 단계, 이미지 1/3 Nikon Coolpix S230 Lens Assembly Replacement: 2 단계, 이미지 2/3 Nikon Coolpix S230 Lens Assembly Replacement: 2 단계, 이미지 3/3
    • Insert the plastic opening tool into the seam where the front and back parts of the case meet on the bottom of the camera, and slide it along the bottom. Continue along the next side to separate the back part of the case.

    • If necessary, continue along the third and fourth sides until the case separates easily.

    • Lift the back off of the case.

  3. Nikon Coolpix S230 Lens Assembly Replacement: 3 단계, 이미지 1/2 Nikon Coolpix S230 Lens Assembly Replacement: 3 단계, 이미지 2/2
    • Carefully lift the LCD screen to reveal two orange ribbons connecting the screen to the camera.

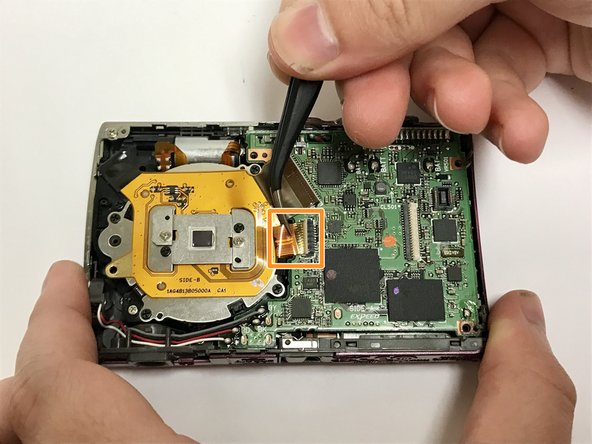
    • Use tweezers to carefully lift the blue retaining flap holding down the orange ribbon cable. (Flap can be seen open in the second photo)

    • Slowly wiggle the ribbon cable back and forth while pulling away from the zero insertion force (ZIF) connector to disconnect the cable.

  4. Nikon Coolpix S230 Lens Assembly Replacement: 4 단계, 이미지 1/2 Nikon Coolpix S230 Lens Assembly Replacement: 4 단계, 이미지 2/2
    • Using tweezers, lift the black retaining flap holding down the larger orange ribbon cable.

    • Carefully remove the ribbon cable from the ZIF connector as before.

  5. Nikon Coolpix S230 Lens Assembly Replacement: 5 단계, 이미지 1/1
    • Lift the LCD screen away from the camera.

  6. Nikon Coolpix S230 Lens Assembly Replacement, Button Circuit Board: 6 단계, 이미지 1/1
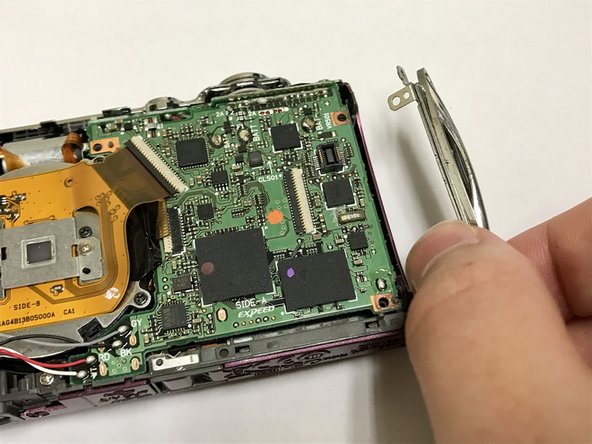
    • Lift the button circuit board by gently popping it out of its connector.

  7. Nikon Coolpix S230 Lens Assembly Replacement, Lens Assembly: 7 단계, 이미지 1/1
    • Using a Phillips #000 screwdriver, remove the four 4-mm screws from the metal place.

  8. Nikon Coolpix S230 Lens Assembly Replacement: 8 단계, 이미지 1/2 Nikon Coolpix S230 Lens Assembly Replacement: 8 단계, 이미지 2/2
    • Lift the plate from the camera to reveal the motherboard.

    • Once the plate is removed, the metal attachment for the camera strap on the side of the camera will no longer be secured to the device, and should be set aside.

  9. Nikon Coolpix S230 Lens Assembly Replacement: 9 단계, 이미지 1/2 Nikon Coolpix S230 Lens Assembly Replacement: 9 단계, 이미지 2/2
    • Use tweezers to lift the black retaining flap for the larger ribbon cable connecting the motherboard to the lens.

    • Continue using the tweezers to gently pull the ribbon cable out of the ZIF connector.

  10. Nikon Coolpix S230 Lens Assembly Replacement: 10 단계, 이미지 1/2 Nikon Coolpix S230 Lens Assembly Replacement: 10 단계, 이미지 2/2
    • Use tweezers to lift the beige retaining flap for the smaller, orange ribbon cable that attaches the motherboard to the lens.

    • Use tweezers to gently pull the orange ribbon cable from the ZIF connector.

  11. Nikon Coolpix S230 Lens Assembly Replacement: 11 단계, 이미지 1/1
    • Remove the solder using a soldering iron by following the instructions in this guide.

  12. Nikon Coolpix S230 Lens Assembly Replacement: 12 단계, 이미지 1/1
    • Lift the motherboard from the camera to reveal the lens assembly.

    • The motherboard is still attached to the camera by the wires connected to the speaker and mic.

  13. Nikon Coolpix S230 Lens Assembly Replacement: 13 단계, 이미지 1/2 Nikon Coolpix S230 Lens Assembly Replacement: 13 단계, 이미지 2/2
    • Using a Phillips #000 screwdriver, remove the two visible 5-mm screws that attach the lens to the camera.

    • Remove the third 5-mm screw by carefully lifting the large ribbon cable that is attached to the lens.

  14. Nikon Coolpix S230 Lens Assembly Replacement: 14 단계, 이미지 1/1
    • Lift the lens assembly from the camera.

결론

To reassemble your device, follow these instructions in reverse order.

Chris Helms

회원 가입일: 01/31/17

1 평판

안내서 3개 작성하였습니다

Baylor, Team 3-1, Whitney Spring 2017 Baylor, Team 3-1, Whitney Spring 2017 회원

BU-WHITNEY-S17S3G1

4 회원들

안내서 8개 작성하였습니다

댓글 0개

댓글 쓰기

조회 통계:

24 시간 전: 0

7일 전: 5

30일 전: 22

전체 시간: 639