이 버전에는 잘못된 편집 사항이 있을 수 있습니다. 최신 확인된 스냅샷으로 전환하십시오.
필요한 것
-
이 단계는 번역되지 않았습니다. 번역을 도와주십시오
-
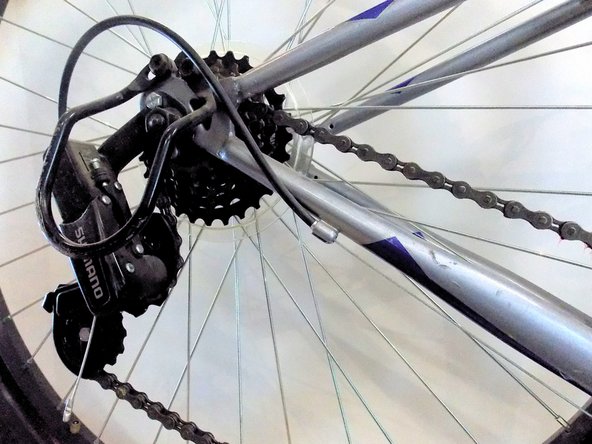
Using one hand, pull the rear derailleur forward to create slack in the chain.
-
Using your other hand, lift the chain off of the front gears, setting it down on the "inside," between the gears and the bicycle's frame.
-
-
이 단계는 번역되지 않았습니다. 번역을 도와주십시오
-
Disengage the master link by pushing the links on either side of it together.
-
After the master link is disengaged, pull the chain apart by separating the two halves of the master link.
-
Pull the two halves of the master link out of each end of the chain, and set them aside.
-
-
이 단계는 번역되지 않았습니다. 번역을 도와주십시오
-
Remove the chain from the bike by pulling it through the rear derailleur.
-
-
-
이 단계는 번역되지 않았습니다. 번역을 도와주십시오
-
Set the chain onto the same rear gear you removed the previous chain from earlier.
-
Thread the chain down and around the first derailleur gear...
-
...then between the two derailleur gears...
-
...then around the other derailleur gear.
-
Be sure to thread the chain through the chain guard, rather than over it.
-
-
이 단계는 번역되지 않았습니다. 번역을 도와주십시오
-
Slide the pin of one of the master link halves through the end of one end of the chain.
-
Attach the other half to the other end in the opposite direction. ("From the front" on one end, and "from the back" on the other end.)
-
-
이 단계는 번역되지 않았습니다. 번역을 도와주십시오
-
Slot the two halves of the master link together. One half's pin should go in the other's hole, and vice versa.
-
-
이 단계는 번역되지 않았습니다. 번역을 도와주십시오
-
Hold the chain on either side of the master link, and pull them apart. The master link will snap in place, with each pin now in its "outer" hole rather than its "inner" hole
-
-
이 단계는 번역되지 않았습니다. 번역을 도와주십시오
-
Pull the rear derailleur forward to create slack in the chain, just like in Step 1.
-
Set the chain onto the front gear.
-


다른 2명이 해당 안내서를 완성하였습니다.

팀

Northern Arizona University, Team S1-G2, Konrad Spring 2021 Northern Arizona University, Team S1-G2, Konrad Spring 2021 회원
NAU-KONRAD-S21S1G2
3 회원들
안내서 1개 작성하였습니다