주요 콘텐츠로 건너뛰기

Panasonic Lumix DMC-FH27 Main Board PCB Replacement

필요한 것

  1. Panasonic Lumix DMC-FH27 Main Board PCB Replacement, Step 1: 1 단계, 이미지 1/1
    • Remove the battery and memory card from the device.

  2. Panasonic Lumix DMC-FH27 Main Board PCB Replacement, Step 2: 2 단계, 이미지 1/1
    • Remove 2 (0.3mm) screws from the left side of the camera.

  3. Panasonic Lumix DMC-FH27 Main Board PCB Replacement, Step 3: 3 단계, 이미지 1/1
    • Remove 4 (0.3mm) screws from the right side of the camera.

  4. Panasonic Lumix DMC-FH27 Main Board PCB Replacement, Step 4: 4 단계, 이미지 1/1
    • Remove 3 (0.4mm) screws from the base of the camera.

  5. Panasonic Lumix DMC-FH27 Main Board PCB Replacement, Step 5: 5 단계, 이미지 1/1
    • Arrange your screws properly.

  6. Panasonic Lumix DMC-FH27 Main Board PCB Replacement, Step 6: 6 단계, 이미지 1/2 Panasonic Lumix DMC-FH27 Main Board PCB Replacement, Step 6: 6 단계, 이미지 2/2
    • Do not remove the Rear Casing because it is attached via cable to the Main PCB and circuit board.

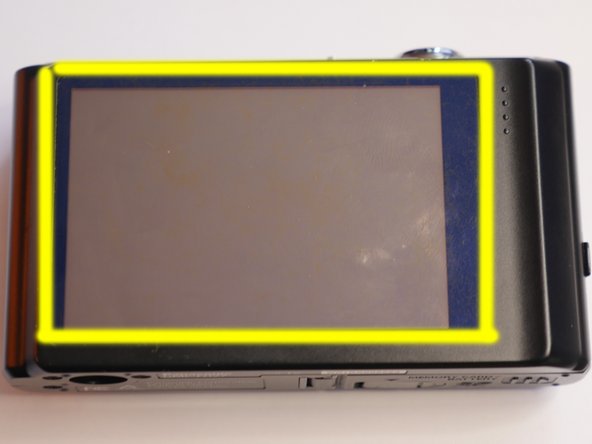
    • Pry the casing upward slightly, careful NOT to remove it. Only lift it slightly as shown in the picture.

    • The LCD is attached to the rear casing via a light coating of adhesive on the underside of the yellow highlighted area. In the next step you will apply light pressure to the LCD to release it from the case.

  7. Panasonic Lumix DMC-FH27 Main Board PCB Replacement, Step 7: 7 단계, 이미지 1/3 Panasonic Lumix DMC-FH27 Main Board PCB Replacement, Step 7: 7 단계, 이미지 2/3 Panasonic Lumix DMC-FH27 Main Board PCB Replacement, Step 7: 7 단계, 이미지 3/3
    • Do not apply heavy pressure and Do Not apply uneven pressure. If you find yourself applying too much pressure then dab some Isopropyl Alcohol 91% using a qtip along the edges to loosen the adhesive.

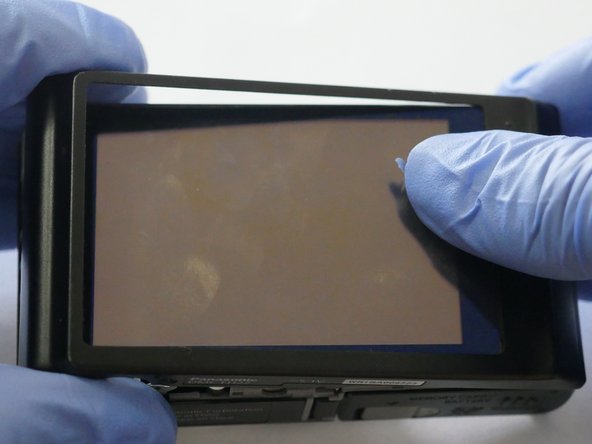
    • Using your thumbs gently apply pressure to release the LCD. Both thumbs should be applying even pressure and work your way down to the bottom.

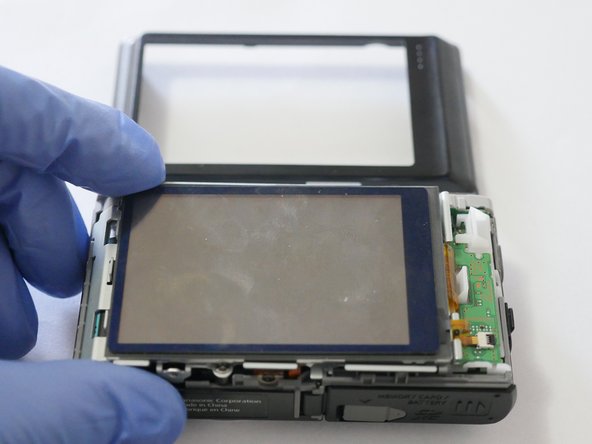
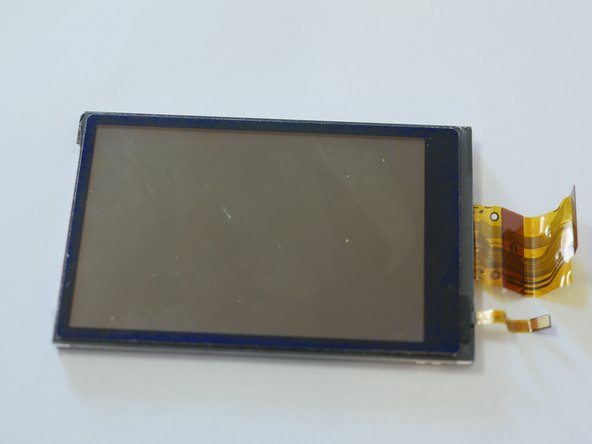
    • Once LCD is free of casing, remove Rear Case.

  8. Panasonic Lumix DMC-FH27 Main Board PCB Replacement, Step 8: 8 단계, 이미지 1/2 Panasonic Lumix DMC-FH27 Main Board PCB Replacement, Step 8: 8 단계, 이미지 2/2
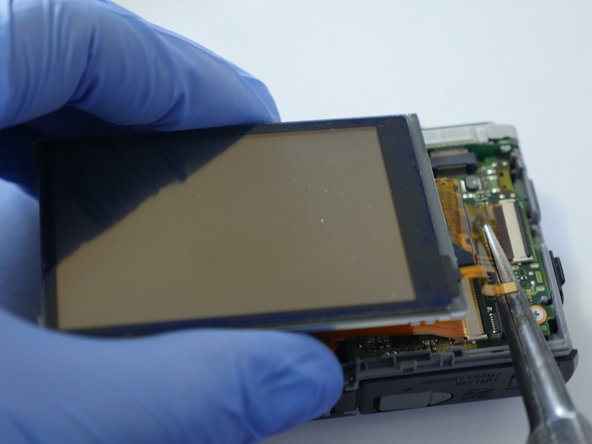
    • Flip the black clamp to the open (up) position using a spudger or other method.

    • Pull out the flex cable from the clamp using flat needle nose pliers or other method.

  9. Panasonic Lumix DMC-FH27 Main Board PCB Replacement, Step 9: 9 단계, 이미지 1/3 Panasonic Lumix DMC-FH27 Main Board PCB Replacement, Step 9: 9 단계, 이미지 2/3 Panasonic Lumix DMC-FH27 Main Board PCB Replacement, Step 9: 9 단계, 이미지 3/3
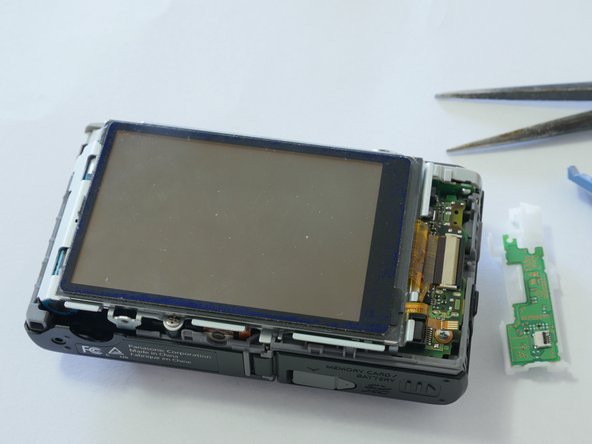
    • Use a Spudger or other tool to release the plastic hold down. Then pry the entire assembly upward releasing it from the socket. Try to keep the part as level as possible while prying up.

    • Remove the part

    • In the last picture you can see (on the reverse side of the part) the socket. This helps understand how the socket snaps down onto the Main Board.

  10. Panasonic Lumix DMC-FH27 Main Board PCB Replacement, Step 10: 10 단계, 이미지 1/3 Panasonic Lumix DMC-FH27 Main Board PCB Replacement, Step 10: 10 단계, 이미지 2/3 Panasonic Lumix DMC-FH27 Main Board PCB Replacement, Step 10: 10 단계, 이미지 3/3
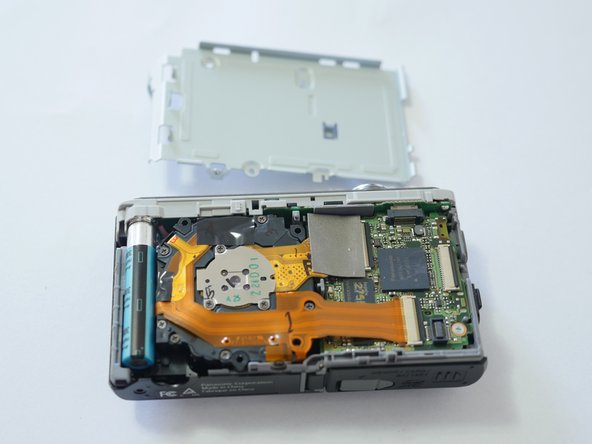
    • Remove 3 silver (0.8mm) screws from the rear metal plate.

    • Lift up and remove the metal plate

  11. Panasonic Lumix DMC-FH27 Main Board PCB Replacement, Step 11: 11 단계, 이미지 1/3 Panasonic Lumix DMC-FH27 Main Board PCB Replacement, Step 11: 11 단계, 이미지 2/3 Panasonic Lumix DMC-FH27 Main Board PCB Replacement, Step 11: 11 단계, 이미지 3/3
    • Use the spudger or other tool to flip up the LCD cable clamp.

    • Use Needle nose pliers or other tool to pull out the cable from the clamp.

    • Note: The metal protection plate has been removed so DO NOT let the LCD rest on the Rear of the camera. Do NOT touch any part of the rear camera or circuits with your bare hands. ESD can destroy your camera.

    • Remove the LCD part VYK4P64

    • When you purchase part make sure it has all three components included (backlite, touch screen and LCD display)

  12. Panasonic Lumix DMC-FH27 Main Board PCB Replacement, Step 1: 12 단계, 이미지 1/2 Panasonic Lumix DMC-FH27 Main Board PCB Replacement, Step 1: 12 단계, 이미지 2/2
    • Remove the tripod base screw

    • Remove the tape as shown in the picture

  13. Panasonic Lumix DMC-FH27 Main Board PCB Replacement, Step 2: 13 단계, 이미지 1/2 Panasonic Lumix DMC-FH27 Main Board PCB Replacement, Step 2: 13 단계, 이미지 2/2
    • Pry the front case cover from the body

    • Remove the front case cover

  14. Panasonic Lumix DMC-FH27 Main Board PCB Replacement, Step 3: 14 단계, 이미지 1/3 Panasonic Lumix DMC-FH27 Main Board PCB Replacement, Step 3: 14 단계, 이미지 2/3 Panasonic Lumix DMC-FH27 Main Board PCB Replacement, Step 3: 14 단계, 이미지 3/3
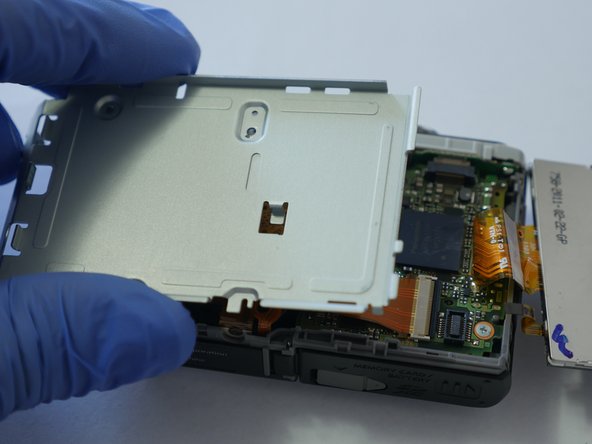
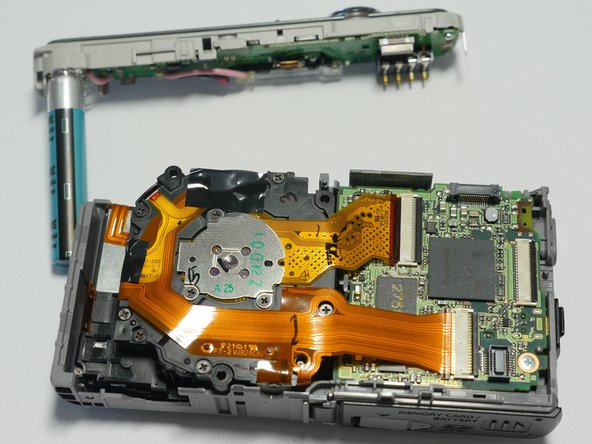
    • Pull up on the Top Panel Assembly and Remove

    • Use caution while disengaging part. The part is attached by a socket and the part should remain level with the unit while pulling up

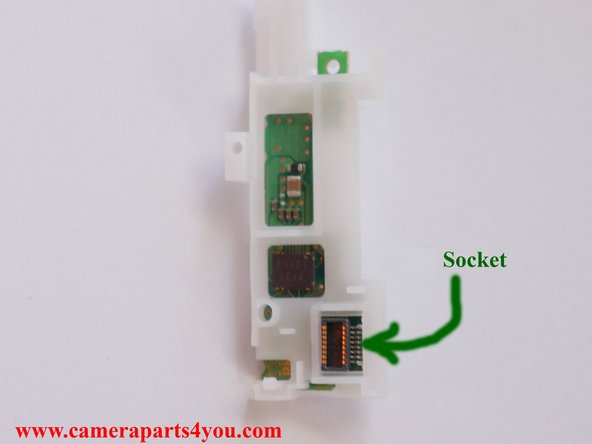
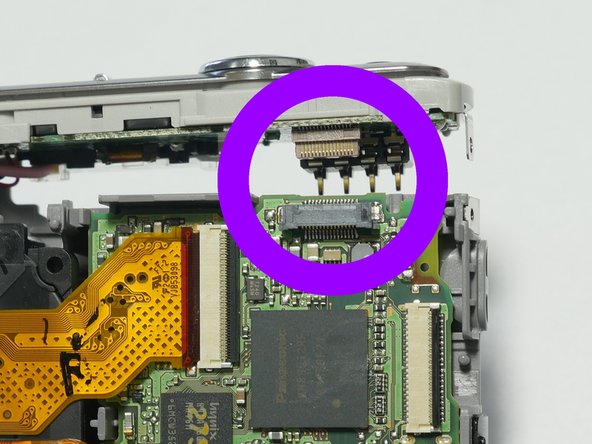
    • Note: Review the picture circled in purple so you can see how the part is attached via socket. If you bend this socket the camera will no longer function so pull the top panel out straight.

  15. Panasonic Lumix DMC-FH27 Main Board PCB Replacement, Step 4: 15 단계, 이미지 1/2 Panasonic Lumix DMC-FH27 Main Board PCB Replacement, Step 4: 15 단계, 이미지 2/2
    • Use Spudger or other tool and open both cable clamps.

  16. Panasonic Lumix DMC-FH27 Main Board PCB Replacement, Step 5: 16 단계, 이미지 1/3 Panasonic Lumix DMC-FH27 Main Board PCB Replacement, Step 5: 16 단계, 이미지 2/3 Panasonic Lumix DMC-FH27 Main Board PCB Replacement, Step 5: 16 단계, 이미지 3/3
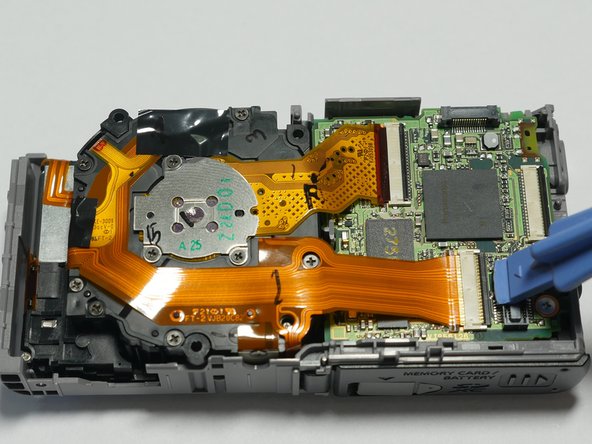
    • Use needle nose pliers or other tool to pull out the cables from the clamps

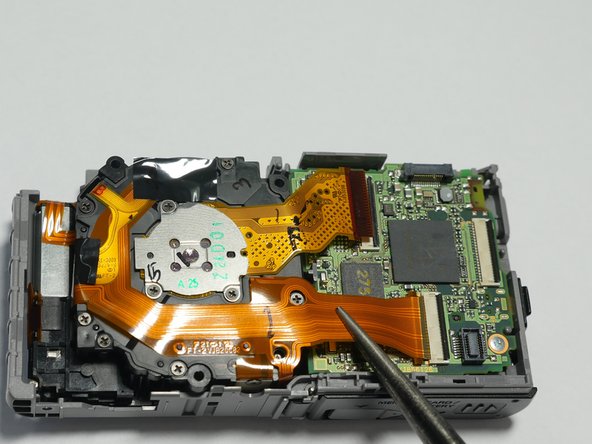
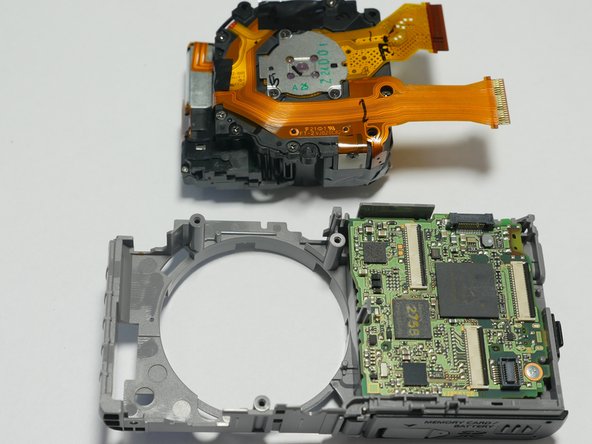
    • Remove the Lens unit from the camera body.

  17. Panasonic Lumix DMC-FH27 Main Board PCB Replacement, Step 6: 17 단계, 이미지 1/1
  18. Panasonic Lumix DMC-FH27 Main Board PCB Replacement, Main Board PCB: 18 단계, 이미지 1/1
    • Remove screw (0.3mm) from Main PCB

결론

To reassemble your device, follow these instructions in reverse order.

Sales Cameraparts4you

회원 가입일: 07/01/16

3,150 평판

안내서 20개 작성하였습니다

댓글 0개

댓글 쓰기

조회 통계:

24 시간 전: 0

7일 전: 2

30일 전: 4

전체 시간: 410