이 버전에는 잘못된 편집 사항이 있을 수 있습니다. 최신 확인된 스냅샷으로 전환하십시오.
필요한 것
-
이 단계는 번역되지 않았습니다. 번역을 도와주십시오
-
Flip the device upside down with the handle facing away from you.
-
Open the optical drive bay by sliding its latch to the right.
-
Locate optical drive release mechanism on the bottom of the laptop.
-
-
이 단계는 번역되지 않았습니다. 번역을 도와주십시오
-
Begin by turning the laptop upside down with the handle towards you.
-
Use a Phillips size 0 screwdriver to remove the 4 screws holding down the ram cover.
-
-
-
이 단계는 번역되지 않았습니다. 번역을 도와주십시오
-
Remove the panel and set it aside.
-
Use a Phillips size 0 screwdriver to remove these 8 small screws.
-
-
이 단계는 번역되지 않았습니다. 번역을 도와주십시오
-
Use a plastic opening tool to release, but NOT remove, the back cover because it is sealed with adhesive.
-
-
이 단계는 번역되지 않았습니다. 번역을 도와주십시오
-
Slowly lift the cover so that you can disconnect the red and white wires connecting the speaker to the sound card.
-
-
이 단계는 번역되지 않았습니다. 번역을 도와주십시오
-
Now the back cover should be off and you can access the inside of the casing.
-
-
이 단계는 번역되지 않았습니다. 번역을 도와주십시오
-
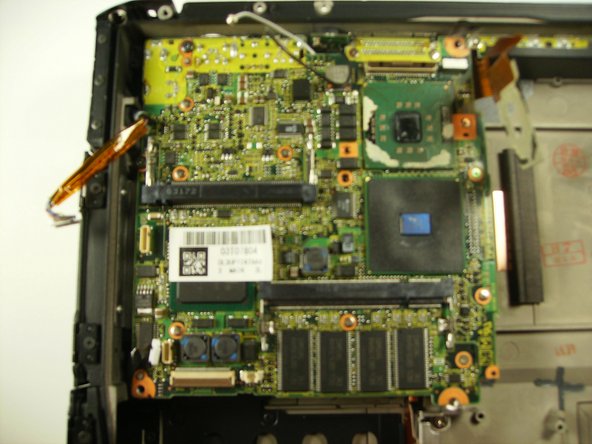
Unplug 3 cables
-
Lift up on brown tab to release cable
-
Pull cable up and out
-
-
이 단계는 번역되지 않았습니다. 번역을 도와주십시오
-
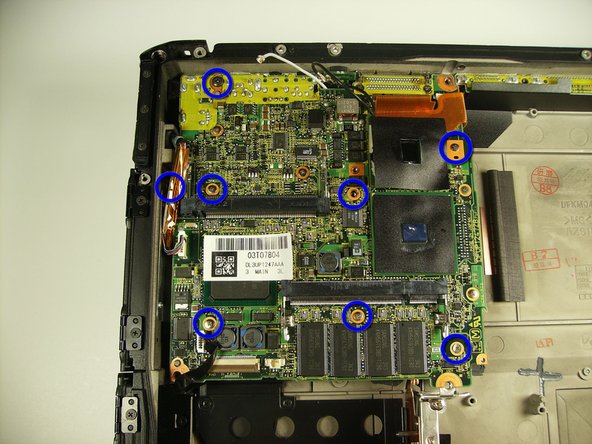
Remove 2 long screws indicated with red circles
-
Remove the remaining screws indicated in blue
-
-
이 단계는 번역되지 않았습니다. 번역을 도와주십시오
-
On the back of the unit, unscrew the three screws surrounding the serial port.
-
-
이 단계는 번역되지 않았습니다. 번역을 도와주십시오
-
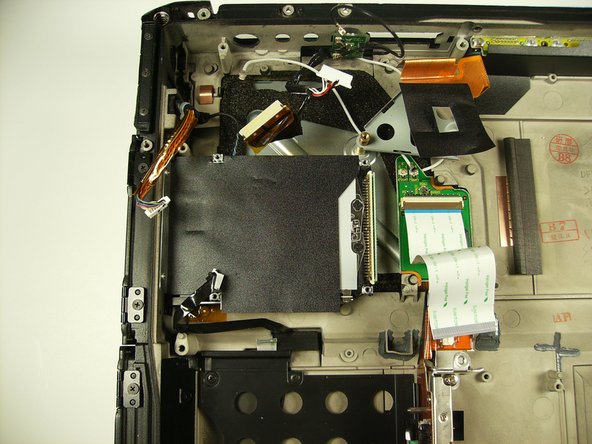
Detach the white ribbon cable, the white cluster connector, and the ribbon cable right next to the cluster
-


다른 8명이 해당 안내서를 완성하였습니다.
팀

Cal Poly, Team 27-93, Amido Spring 2010 Cal Poly, Team 27-93, Amido Spring 2010 회원
CPSU-AMIDO-S10S27G93
4 회원들
안내서 26개 작성하였습니다
댓글 4개
what about spare parts? is it possible cange MOBO and CPU? in order to upgrade the thoughbook?
Où acheter la carte mère?
MERCI
Sur Google, recherchez "DL3UP1396AAA Panasonic CF-29 System Board" (à rechercher sans les guillemets), vous aurez quelques résultats (j'ai vu au moins 2 sites qui la propose à la vente), par contre, elle est cher.
Autre recherche possible : "DL3UP1396BAA Panasonic CF-29 System Board", je ne connais pas la différence entre ces variantes
Autre recherche possible : "DL3U11213FAA Panasonic CF-29 System Board", je ne connais pas la différence entre ces variantes
Brendan -