소개
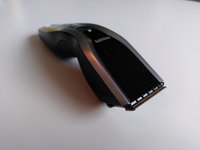
A quick disassembly of my Philips HC5450 1415 /A. I needed to revive the batteries.
필요한 것
-
-
First step is to take off the front like you normally do when cleaning.
-
-
-
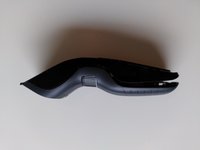
Pry off the silver bezel. This is attached pretty firmly. Start at the front, and go all the way. The front has tabs with a large hook, so it might only fully disassemble when you have pried it loose a long way and you are able to flex the bezel a little.
-
During this step, I broke the last tab of the silver bezel. Too bad, but the bezel is still firmly attached when reassembling.
-
-
-
-
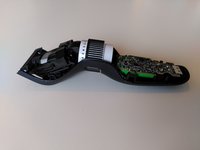
Undo the top part of the black body. I started at the back. It is retained with clips, but is not as firmly attached as the silver bezel.
-
-
-
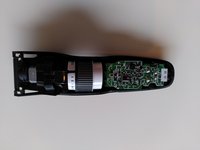
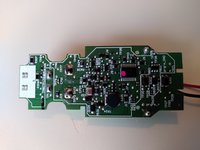
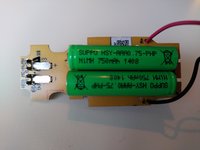
The PCB can now be taken out. The connection to the charging pins is not screwed or soldered, but a U-shaped connector that's just retained by friction.
-
-
-
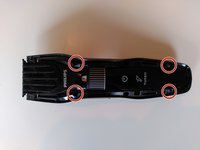
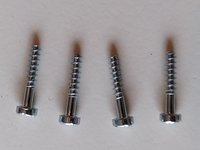
The assembly is held in place by one Torx T8 screw, identical to those from step 3.
-
The ring of the length-adjustment-assembly can slide down. A little pin-and-spring will fall out - don't loose it! It is used to make the "clicking" feedback when rotating the ring.
-
I did not disassemble this assembly any further.
-


To reassemble your device, follow these instructions in reverse order.
To reassemble your device, follow these instructions in reverse order.
다른 11명이 해당 안내서를 완성하였습니다.
댓글 8개
You helped me replace batteries in otherwise completely fine trimmer. Thanks!
Anyway I also snapped the last silver clip...
I joined ifixit just to say thank you for this. Trimmer working perfectly other than a dead battery. I just couldn't see how to get into it until I found this guide. Some advice for others:
Use the pry bar around every part of the bezel. I left the very bottom catch attached and broke it pulling on it. On the other hand, if you have to break one catch, that one is the least important.
A credit card makes a very good pry bar.
This battery seems better than the original in several ways: https://www.amazon.co.uk/dp/B0921ZJX11. It is cheaper. It is easier to install. It will likely be easier to uninstall.
Thanks for your help. All went as you described it - even the small broken pin :-)
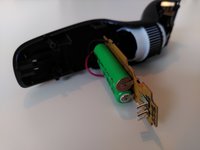
Unfortunately I couldn’t replace the batteries, because they are welded to the PCB. Phillips don’t want the lifespan of their devises to be easily extended…
Just unsolder it from the circuit board. Obviously that requires a soldering iron and a solder sucker, but those are very useful purchases if you don't already own them. If you then replace with the battery I suggest, you wont even need the solder sucker next time you need to do the job.