소개
This is a step-by-step guide on the PlayStation 2 Slimline SCPH-7500x Clock Battery Replacement, which keeps track of the time within the Playstation 2 when off.
The clock battery is a minor fix for the Playstation and will continue to work without it. It only job is to continue the use of the internal clock once the playstation is off, so when it turns on again, the time will remain accurate.
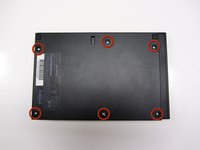
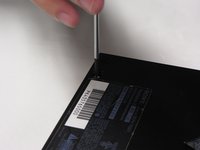
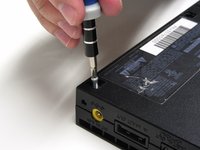
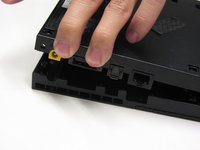
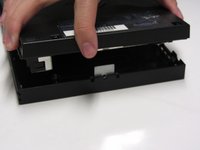
The process on replacing is a simple 2 step process that will require a Phillips screwdriver, tweezers, and a spudger and requires removing the Outer Shell before staring the guide. Make sure to power off the device and disconnect from any external power source before beginning.
필요한 것
-
-
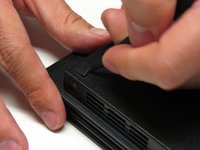
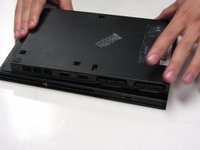
Turn off the PlayStation 2 and carefully unplug it from the power source. Also, it is important to eject the CD from the console before flipping the it upside down.
-
-
-
이 단계에 사용된 도구:Tweezers$4.99
-
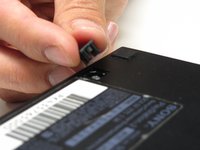
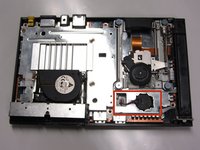
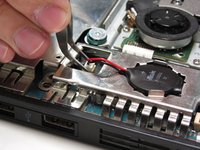
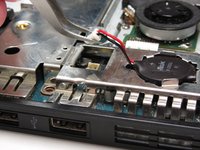
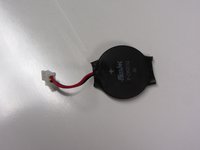
Identify the clock battery, then use tweezers to disconnect the connector from the motherboard.
-


To reassemble your device, follow these instructions in reverse order.
다른 8명이 해당 안내서를 완성하였습니다.

팀

Cal Poly, Team 17-4, Regan Spring 2013 Cal Poly, Team 17-4, Regan Spring 2013 회원
CPSU-REGAN-S13S17G4
3 회원들
안내서 28개를 작성함
1가이드 댓글
These instructions take for granted how the battery itself should be replaced. I imagine you reconnect the contact with the red wire to the positive side of the CR2032 battery and the contact for the black wire to the negative and wrap electrical tape around the entire thing BEFORE reconnecting it and then following these instructions in reverse order.