이 버전에는 잘못된 편집 사항이 있을 수 있습니다. 최신 확인된 스냅샷으로 전환하십시오.
필요한 것
-
이 단계는 번역되지 않았습니다. 번역을 도와주십시오
-
Turn the controller over and unscrew the four 10mm screws with a PH #00 screwdriver.
-
-
이 단계는 번역되지 않았습니다. 번역을 도와주십시오
-
Hold the base of the controller with one hand and with the other carefully pull up on the white spherical piece to remove it.
-
-
-
이 단계는 번역되지 않았습니다. 번역을 도와주십시오
-
Unscrew the 9mm screw behind the rumble motor slot with a PH #00 screwdriver.
-
-
이 단계는 번역되지 않았습니다. 번역을 도와주십시오
-
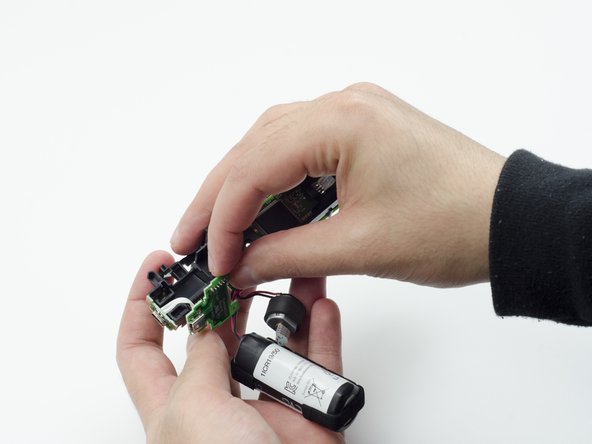
Carefully pinch the plastic sides of the battery slot and lift it (along with the circuit board) from the plastic shell of the move controller.
-
-
이 단계는 번역되지 않았습니다. 번역을 도와주십시오
-
Using your fingers, carefully pry the square green piece beneath the battery slot free.
-
-
이 단계는 번역되지 않았습니다. 번역을 도와주십시오
-
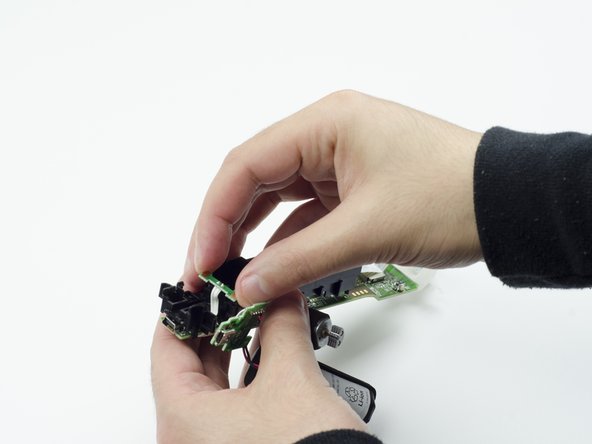
Follow the white ribbon attached to the part you just removed to a smaller, more rectangular piece.
-
Lift the rectangular piece from its slot to free it.
-
-
이 단계는 번역되지 않았습니다. 번역을 도와주십시오
-
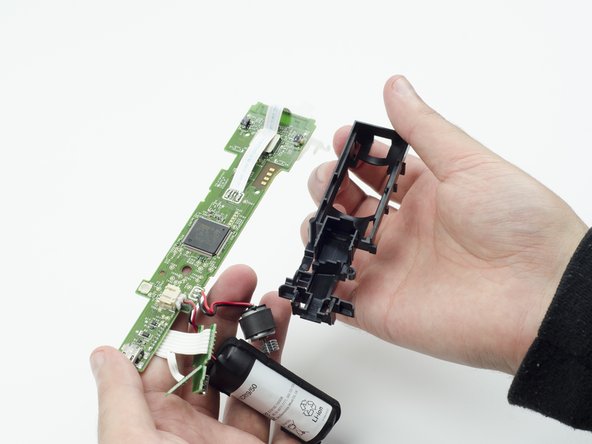
Carefully lift the entire circuit board from the black plastic encasing it.
-
-
이 단계는 번역되지 않았습니다. 번역을 도와주십시오
-
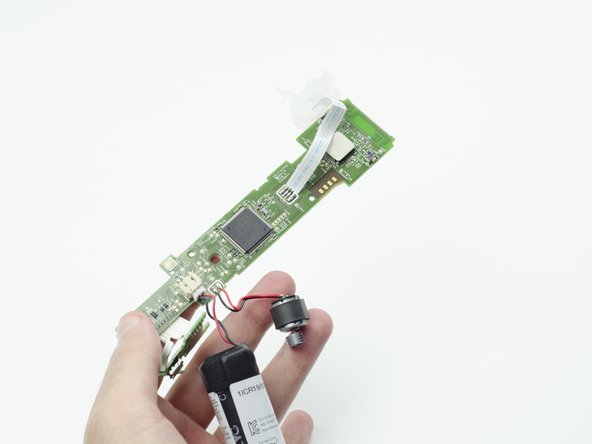
At the end of the circuit board, you should see a small silver connector port (this is the USB).
-
Using a soldering iron, carefully desolder the port from the board. For help with desoldering, please reference this guide: How To Solder and Desolder Connections
-


다른 2명이 해당 안내서를 완성하였습니다.
팀

USF Tampa, Team S3-G1, Sullivan Spring 2017 USF Tampa, Team S3-G1, Sullivan Spring 2017 회원
USFT-SULLIVAN-S17S3G1
3 회원들
안내서 13개 작성하였습니다