이 버전에는 잘못된 편집 사항이 있을 수 있습니다. 최신 확인된 스냅샷으로 전환하십시오.
필요한 것
-
이 단계는 번역되지 않았습니다. 번역을 도와주십시오
-
This is the LG 17LX1R that will no longer turn on.
-
Remove the cover from the stand by.
-
Press down on the two tabs. The cover should come off easily.
-
Remove the four screws that hold the stand assembly to the chassis.
-
-
이 단계는 번역되지 않았습니다. 번역을 도와주십시오
-
Remove the four Phillips head screws that attach the stand to the chassis.
-
Remove the eight Phillips screws that hold the back to the chassis. Once the screws are removed, the back will simply snap off.
-
Remove the metal shield. It is fastened with six Phillips screws.
-
-
-
이 단계는 번역되지 않았습니다. 번역을 도와주십시오
-
After the shield is removed, the power board and the main board are visible.
-
Power Board
-
Main Board
-
Fuse
-
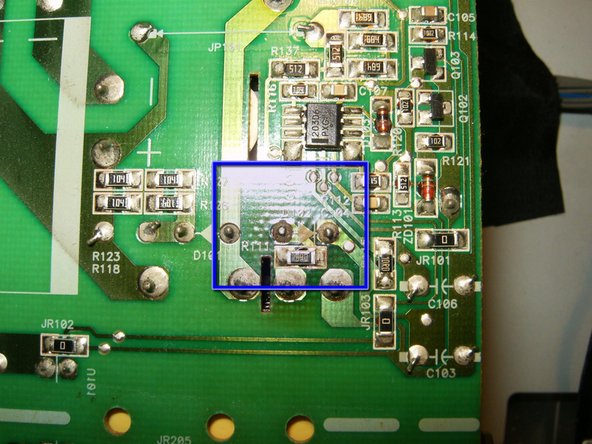
Thoroughly inspect the boards. Brown discoloration around Diode D102 is evidence of a short circuit, possibly a blown component.
-
Disconnect all connectors from the power board
-
Remove the four screws that mount the power board to the chassis.
-
-
이 단계는 번역되지 않았습니다. 번역을 도와주십시오
-
These are the chassis with the power board removed.
-
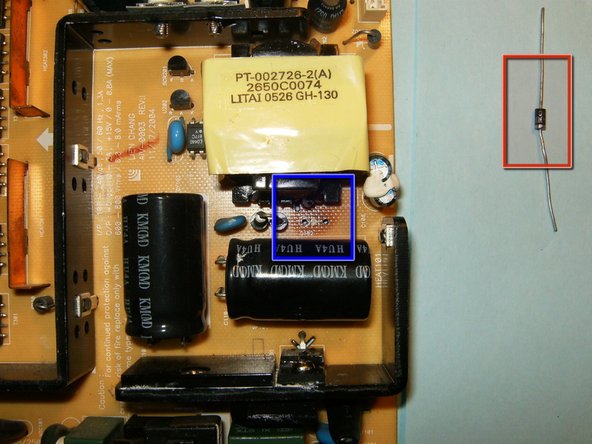
Discoloration of the back side of the power board is a sign of a faulty diode.
-
Unsolder the diode from the power board.
-
Replacement diode
-
-
이 단계는 번역되지 않았습니다. 번역을 도와주십시오
-
Here is the removed diode. Description on the diode reads LT526 IN4007.
-
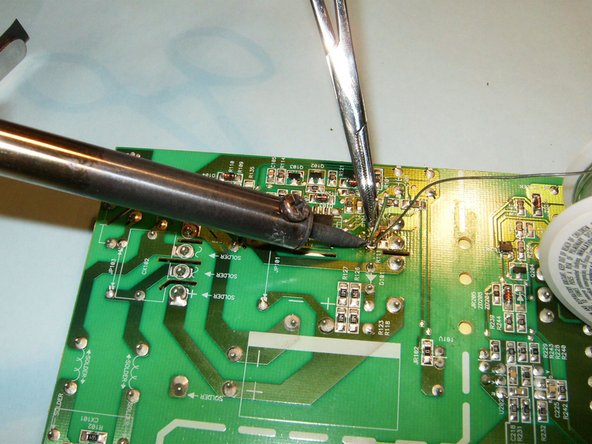
Solder the new diode onto the power board. Use a pair of tweezers or hemostat to hold the diode in place while soldering.
-
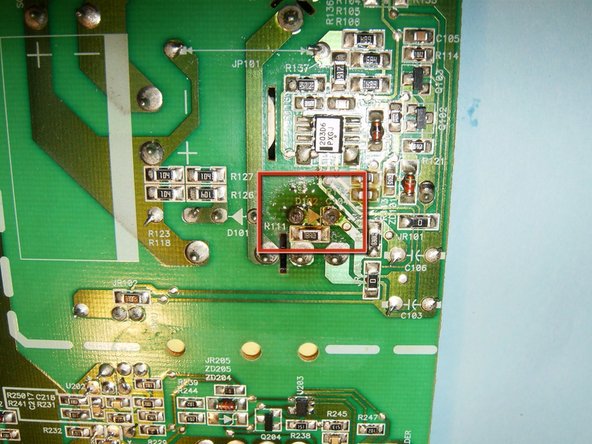
Once the diode is replaced, clean the board with isopropyl alcohol to get rid of any debris or old flux.
-


다른 37명이 해당 안내서를 완성하였습니다.

팀
