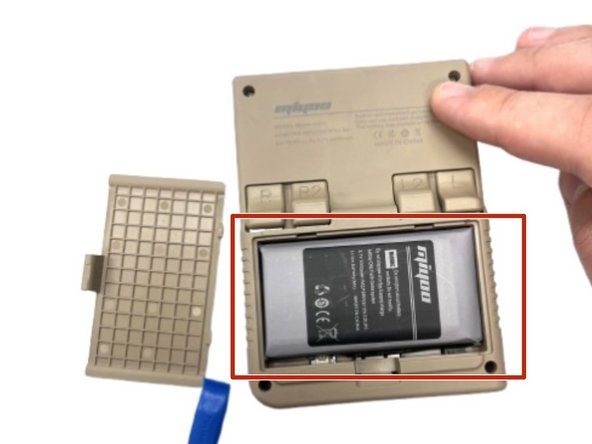
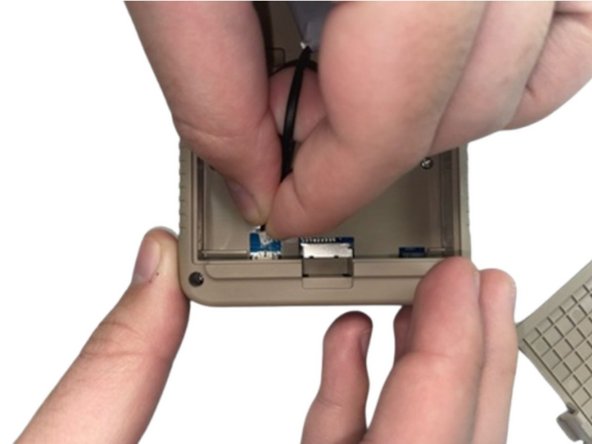
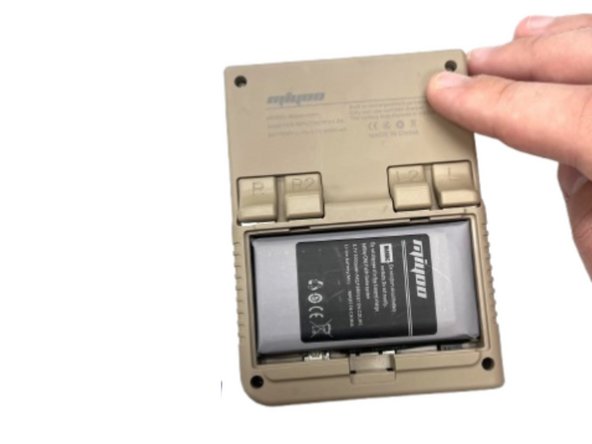
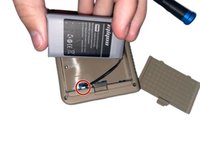
주요 콘텐츠로 건너뛰기

RetroMini Miyoo Mini Plus Battery Replacement

필요한 것

  1. RetroMini Miyoo Mini Plus Battery Replacement, Battery: 1 단계, 이미지 2개 중 1개 RetroMini Miyoo Mini Plus Battery Replacement, Battery: 1 단계, 이미지 2개 중 2개
    • Lay the device face down on a flat surface.

    • You may want to lay the device on a towel or other soft surface to avoid scratching the screen.

  2. RetroMini Miyoo Mini Plus Battery Replacement: 2 단계, 이미지 2개 중 1개 RetroMini Miyoo Mini Plus Battery Replacement: 2 단계, 이미지 2개 중 2개
    • Use your fingernail to push in the battery compartment tab.

    • Lift the cover up to expose the battery.

  3. RetroMini Miyoo Mini Plus Battery Replacement: 3 단계, 이미지 1개 중 1개
    • Use an opening tool to gently lift the the battery from its compartment.

    • Gently pull the battery out and set the battery next to the system, with care not to strain the attached wire.

  4. RetroMini Miyoo Mini Plus Battery Replacement: 4 단계, 이미지 2개 중 1개 RetroMini Miyoo Mini Plus Battery Replacement: 4 단계, 이미지 2개 중 2개
    • Pinch the white battery connector and pull it directly out of its socket.

    • Completely remove the battery.

  5. RetroMini Miyoo Mini Plus Battery Replacement: 5 단계, 이미지 2개 중 1개 RetroMini Miyoo Mini Plus Battery Replacement: 5 단계, 이미지 2개 중 2개
    • When you have the new battery, put the new battery wire into the connecter.

    • Place the battery back into the empty space with the wire at the bottom of the battery.

결론

To reassemble your device, follow the above steps in reverse order.
For optimal performance, after completing this guide, calibrate your newly installed battery.
Take your e-waste to an R2 or e-Stewards certified recycler.
Repair didn’t go as planned? Try some basic troubleshooting, or ask our Steam Deck answers community for help.

다른 한 분이 해당 안내서를 완성하였습니다.

작성자

2다른 기여자 명과 함께

Kaden

회원 가입일: 08/28/24

578 평판

안내서 4개를 작성함

0가이드 댓글

댓글 쓰기

조회 통계:

지난 24시간: 7

지난 7일: 49

지난 30일: 167

전체 시간: 704