이 버전에는 잘못된 편집 사항이 있을 수 있습니다. 최신 확인된 스냅샷으로 전환하십시오.
필요한 것
-
이 단계는 번역되지 않았습니다. 번역을 도와주십시오
-
Use the #1 Phillips head screw driver to remove each 13.75mm length screw from the rear panel.
-
-
이 단계는 번역되지 않았습니다. 번역을 도와주십시오
-
Insert the heavy duty spudger in between the monitors back panel and its frame.
-
Use the heavy duty spudger to pry open the back panel.
-
-
이 단계는 번역되지 않았습니다. 번역을 도와주십시오
-
Remove the navigation button connector by pulling while holding down its thumb tab.
-
-
이 단계는 번역되지 않았습니다. 번역을 도와주십시오
-
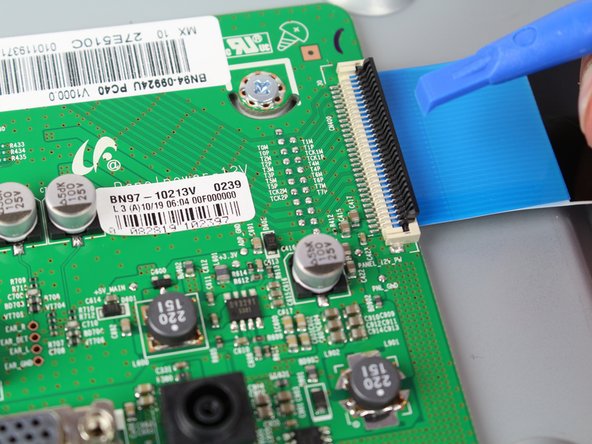
Remove the screen connector by gripping its sides and gently pulling while wiggling back and forth.
-
-
-
이 단계는 번역되지 않았습니다. 번역을 도와주십시오
-
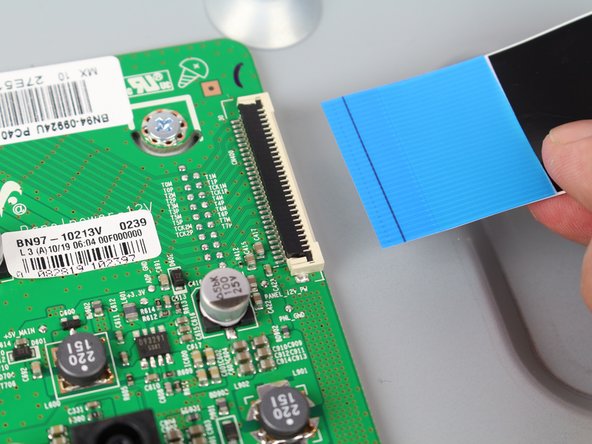
For the ribbon cable, Lift the tab from the side facing the inside of the mother board with your fingernail or a spudger.
-
Remove the cable by pulling while lifting slightly.
-
-
이 단계는 번역되지 않았습니다. 번역을 도와주십시오
-
Remove each of the 5mm length screws attaching the motherboard to the body of the monitor using a #1 Phillips head screwdriver.
-
-
이 단계는 번역되지 않았습니다. 번역을 도와주십시오
-
Using both hands, lift the board off of the monitor body by the motherboards base.
-
-
이 단계는 번역되지 않았습니다. 번역을 도와주십시오
-
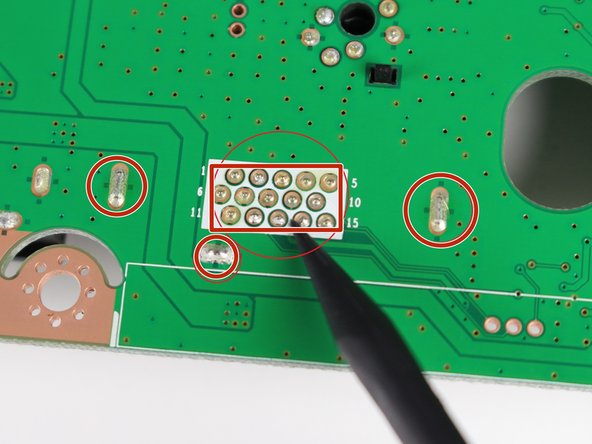
Desolder the four regions in the area indicated on the back side of the motherboard using a soldering iron and some desoldering wick.
-
-
이 단계는 번역되지 않았습니다. 번역을 도와주십시오
-
If the VGA Port does not fall off the board, try tugging on it with your hand.
-


팀

Cal Poly, Team S9-G1, Banghart Fall 2017 Cal Poly, Team S9-G1, Banghart Fall 2017 회원
CPSU-BANGHART-F17S9G1
6 회원들
안내서 14개 작성하였습니다