필요한 것
-
이 단계는 번역되지 않았습니다. 번역을 도와주십시오
-
Turn the device upside-down and slide open the back panel
-
Remove all accessories, including battery, stylus and additional MicroSD Card
-
Remove the 5 screws using a Philips #000 screwdriver
-
-
이 단계는 번역되지 않았습니다. 번역을 도와주십시오
-
Turn the device to have the screen up and slide open the keyboard
-
Gently twist the back cover at one of the keyboard corners to separate it from the keyboard top
-
The back cover is maintained by 3 or 4 invisible hooks on each side of the device
-
Following the join, squeeze gently the back cover to open it
-
-
이 단계는 번역되지 않았습니다. 번역을 도와주십시오
-
Gently pull up the 2 speaker connectors
-
Take off the 2 speakers that are soft-glued into their cavity
-
-
이 단계는 번역되지 않았습니다. 번역을 도와주십시오
-
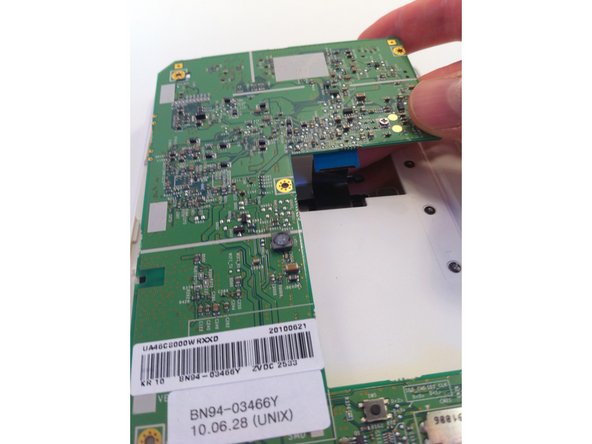
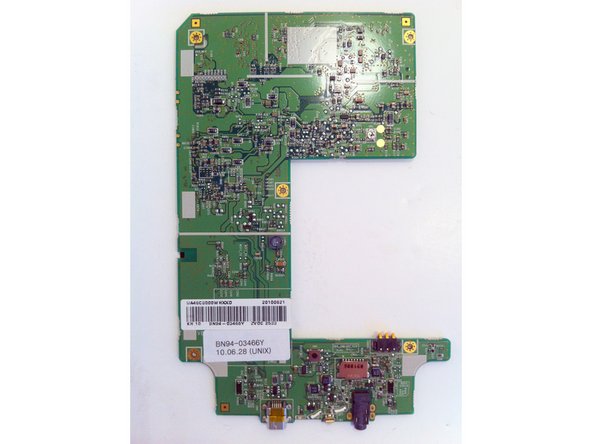
The main PCB is maintained by 2 hooks at the top and 2 at the bottom
-
Press the 2 top hooks to release the PCB
-
There may be a sticker close to the 2 bottom hooks: peel it
-
Lift the PCB up and disconnect the screen FPC cable, then remove completely the PCB from the plastic case
-
-
-
이 단계는 번역되지 않았습니다. 번역을 도와주십시오
-
Unscrew the 6 short black screws using a Philips #00 screwdriver
-
Separate the plastic keyboard top from the screen assembly
-
-
이 단계는 번역되지 않았습니다. 번역을 도와주십시오
-
Push in the 3 small metallic hooks from the back of the keyboard to release the brushed aluminium keys
-
-
이 단계는 번역되지 않았습니다. 번역을 도와주십시오
-
Remove the 3 top metallic stickers that hide 3 screws
-
Remove the 5 screws usign a Philips #000 screwdriver
-
Separate the sliding assembly from the plastic top
-
-
이 단계는 번역되지 않았습니다. 번역을 도와주십시오
-
Remove all the transparent tapes on the PCBs and connectors, keeping the top one holding the screen to the plastic case
-
Pull up the small black lever on each connector (4 of them) on the intermediate PCB to release the corresponding cable
-
-
이 단계는 번역되지 않았습니다. 번역을 도와주십시오
-
Remove the left touchscreen FPC by pushing the 2 ears on the tiny intermediate plastic part to remove it out from the touchscreen PCB connector, then pull apart the FPC cable itself
-
Remove the 2 screws that hold the "Next/Prev" key PCB in place using a Philips #000 screwdriver
-
-
이 단계는 번역되지 않았습니다. 번역을 도와주십시오
-
Turn the "Prev/Next" keys PCB up, remove the transparent tape from the connector
-
Lift up the small lever on top of the conenctor to release the "Prev/Next" FPC cable
-
Remove the transparent tape that holds the screen to the pastic top
-
-
이 단계는 번역되지 않았습니다. 번역을 도와주십시오
-
As always, we provide each device with a fitting final layout shot that it so greatly deserves.
-
We would like to thank you for joining us tonight during this monumental endeavor.
-