주요 콘텐츠로 건너뛰기

Samsung Galaxy S III Motherboard Assembly Replacement

단지 전제 조건
이 안내서는 다른 가이드의 선행 작업으로 사용하기 위한 것입니다. 그 자체로는 불완전합니다.

필요한 것

  1. Samsung Galaxy S III Motherboard Assembly Replacement, Motherboard Assembly: 1 단계, 이미지 1/1
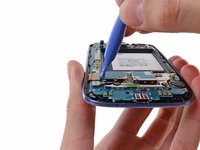
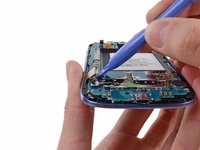
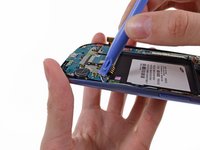
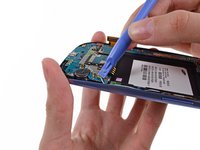
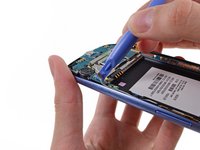
    • Use a plastic opening tool to pry the front-facing camera connector from its socket on the motherboard.

    • Do not try to remove the front-facing camera just yet. Its cable is still routed beneath the motherboard assembly to the ambient light sensor.

  2. Samsung Galaxy S III Motherboard Assembly Replacement: 2 단계, 이미지 1/2 Samsung Galaxy S III Motherboard Assembly Replacement: 2 단계, 이미지 2/2
    • Disconnect the digitizer cable by gently prying its connector up from its socket on the motherboard.

  3. Samsung Galaxy S III Motherboard Assembly Replacement: 3 단계, 이미지 1/2 Samsung Galaxy S III Motherboard Assembly Replacement: 3 단계, 이미지 2/2
    • Disconnect the display data cable from the motherboard.

  4. Samsung Galaxy S III Motherboard Assembly Replacement: 4 단계, 이미지 1/3 Samsung Galaxy S III Motherboard Assembly Replacement: 4 단계, 이미지 2/3 Samsung Galaxy S III Motherboard Assembly Replacement: 4 단계, 이미지 3/3
    • Pry the Wi-Fi antenna cable connector up from its socket on the motherboard.

    • Gently move the cable out of the way of the motherboard.

  5. Samsung Galaxy S III Motherboard Assembly Replacement: 5 단계, 이미지 1/1
    • Remove the single 3.0 mm Phillips screw securing the motherboard to the front panel assembly.

  6. Samsung Galaxy S III Motherboard Assembly Replacement: 6 단계, 이미지 1/2 Samsung Galaxy S III Motherboard Assembly Replacement: 6 단계, 이미지 2/2
    • Carefully lift the bottom of the motherboard assembly away from the front panel assembly.

    • Remove the motherboard assembly from the front panel assembly, minding any cables that may snag on it.

결론

To reassemble your device, follow these instructions in reverse order.

Walter Galan

694,692 평판

안내서 1,203개 작성하였습니다

댓글 0개

댓글 쓰기

조회 통계:

24 시간 전: 0

7일 전: 0

30일 전: 0

전체 시간: 136