주요 콘텐츠로 건너뛰기

Samsung NP305E5A-A03US Fan Replacement

필요한 것

  1. Samsung NP305E5A-A03US Fan Replacement, Battery: 1 단계, 이미지 1/1
    • Be sure to power down your laptop before replacing your battery.

    • Turn your laptop upside down so that the battery component is facing you.

  2. Samsung NP305E5A-A03US Fan Replacement: 2 단계, 이미지 1/1
    • Place your thumbs on the lock tabs.

    • Slide the tabs with your thumbs in an outward direction (in the direction of the arrows).

    • You should hear a click when you properly slide the tabs all the way.

  3. Samsung NP305E5A-A03US Fan Replacement: 3 단계, 이미지 1/2 Samsung NP305E5A-A03US Fan Replacement: 3 단계, 이미지 2/2
    • Pull the battery out of the laptop towards yourself to safely remove the battery.

    • If you are discarding the battery, please do not throw it away in the trash. Instead find a local battery recycling facility that will not damage the environment.

  4. Samsung NP305E5A-A03US Fan Replacement, Hard Drive: 4 단계, 이미지 1/1
    • Unscrew the 3.5mm screws using a Phillips J0 Screwdriver by rotating the screwdriver in the counter clockwise direction.

  5. Samsung NP305E5A-A03US Fan Replacement: 5 단계, 이미지 1/1
    • Wedge the plastic opening tool between the L-shaped back panel to slide the panel off.

    • Note this may take force. If you have difficulties using the plastic opening tool, try to use your hands to pull the panel off.

  6. Samsung NP305E5A-A03US Fan Replacement: 6 단계, 이미지 1/2 Samsung NP305E5A-A03US Fan Replacement: 6 단계, 이미지 2/2
    • Pull the panel towards you to remove the panel.

  7. Samsung NP305E5A-A03US Fan Replacement: 7 단계, 이미지 1/1
    • Unscrew the three 3.5mm screws using a Phillips J0 Screwdriver by rotating the screwdriver in the counter clockwise direction.

    • Unscrew the one 4.45mm screws using a Phillips J0 Screwdriver by rotating the screwdriver in the counter clockwise direction.

  8. Samsung NP305E5A-A03US Fan Replacement: 8 단계, 이미지 1/2 Samsung NP305E5A-A03US Fan Replacement: 8 단계, 이미지 2/2
    • Pull the cord that connects the Hard Drive to the Motherboard to disconnect it.

  9. Samsung NP305E5A-A03US Fan Replacement: 9 단계, 이미지 1/1
    • Remove the Hard Drive by lifting it towards you.

  10. Samsung NP305E5A-A03US Fan Replacement, Optical Drive: 10 단계, 이미지 1/1
    • Unscrew the fourteen 9.5mm screws using a Phillips J0 Screwdriver by rotating the screwdriver in the counter clockwise direction.

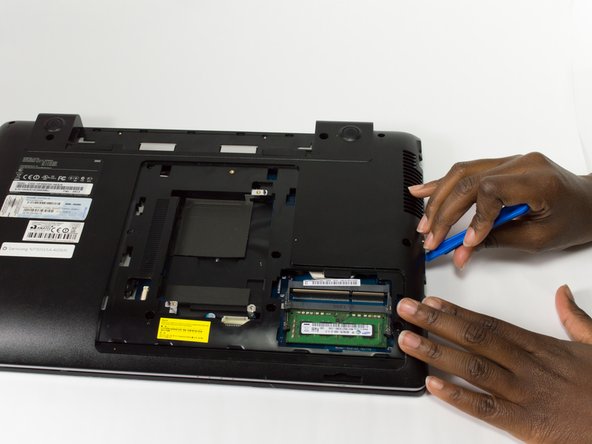
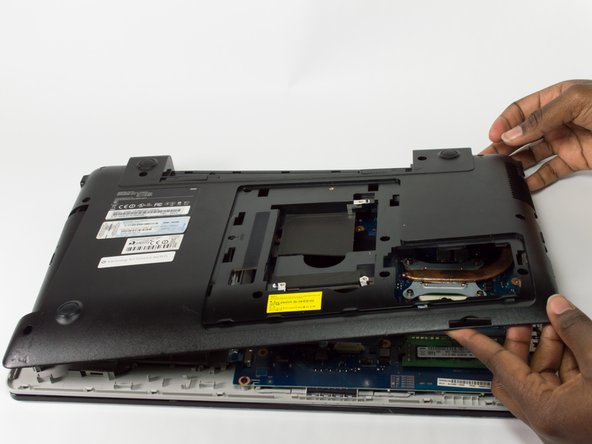
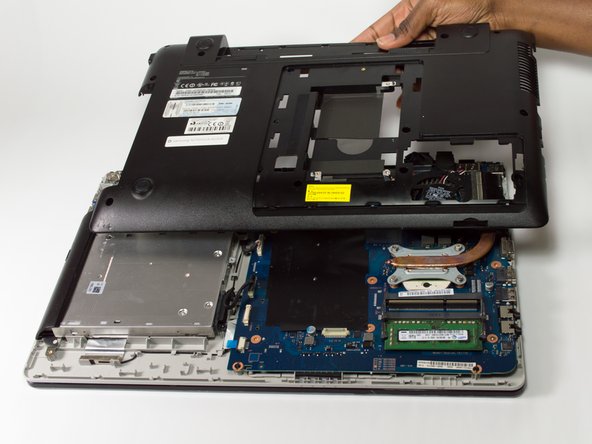
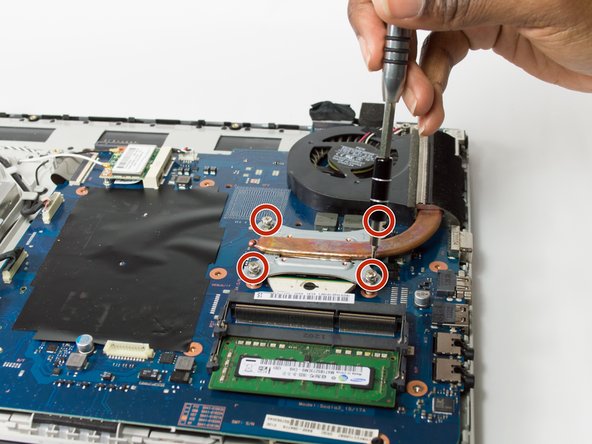
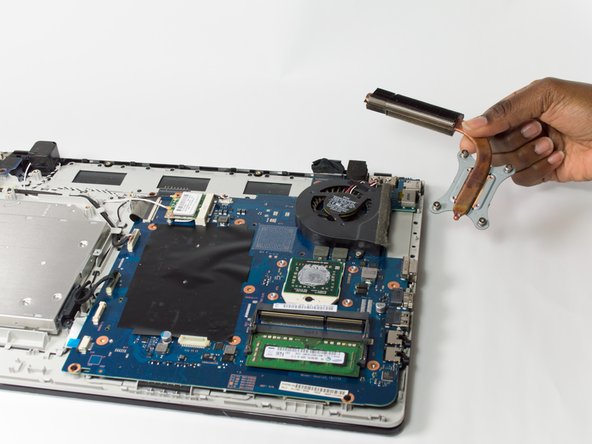
    • Unscrew the two 3.5mm screws using a Phillips J0 Screwdriver by rotating the screwdriver in the counter clockwise direction.

  11. Samsung NP305E5A-A03US Fan Replacement: 11 단계, 이미지 1/2 Samsung NP305E5A-A03US Fan Replacement: 11 단계, 이미지 2/2
    • Insert the plastic opening tool between the seam of the back panel and the laptop.

    • Slide the plastic opening tool along the seam to loosen the back panel from the laptop.

    • It may be difficult to slide the plastic opening tool along the seam, so you may have to apply some force.

  12. Samsung NP305E5A-A03US Fan Replacement: 12 단계, 이미지 1/3 Samsung NP305E5A-A03US Fan Replacement: 12 단계, 이미지 2/3 Samsung NP305E5A-A03US Fan Replacement: 12 단계, 이미지 3/3
    • Remove the Back Panel by lifting it towards you.

    • It may take some force to remove the Back Panel.

  13. Samsung NP305E5A-A03US Fan Replacement: 13 단계, 이미지 1/2 Samsung NP305E5A-A03US Fan Replacement: 13 단계, 이미지 2/2
    • Remove the Optical Drive by sliding it away from the laptop.

  14. Samsung NP305E5A-A03US Fan Replacement, Fan: 14 단계, 이미지 1/1
    • Unscrew the four 8.9mm screws using a Phillips J0 Screwdriver by rotating the screwdriver in the counter clockwise direction.

    • The screws will only loosen to the point to where you can remove the vent, so you will not be able to fully remove the screws.

  15. Samsung NP305E5A-A03US Fan Replacement: 15 단계, 이미지 1/2 Samsung NP305E5A-A03US Fan Replacement: 15 단계, 이미지 2/2
    • Remove the vent by lifting it away from the laptop.

  16. Samsung NP305E5A-A03US Fan Replacement: 16 단계, 이미지 1/1
    • Pull the cord that connects the Fan to the Motherboard to disconnect it.

  17. Samsung NP305E5A-A03US Fan Replacement: 17 단계, 이미지 1/1
    • Unscrew the two 4.45mm screws using a Phillips J0 Screwdriver by rotating the screwdriver in the counter clockwise direction.

  18. Samsung NP305E5A-A03US Fan Replacement: 18 단계, 이미지 1/1
    • Remove the Fan by lifting it towards you.

결론

To reassemble your device, follow these instructions in reverse order.

다른 4명이 해당 안내서를 완성하였습니다.

Kris Stobbe

회원 가입일: 10/30/16

585 평판

안내서 3개 작성하였습니다

Baylor, Team 5-7, Williams Fall 2016 Baylor, Team 5-7, Williams Fall 2016 회원

BU-WILLIAMS-F16S5G7

3 회원들

안내서 5개 작성하였습니다

댓글 0개

댓글 쓰기

조회 통계:

24 시간 전: 0

7일 전: 5

30일 전: 12

전체 시간: 1,793