주요 콘텐츠로 건너뛰기

Sonos Connect Fuse Replacement

필요한 것

  1. Sonos Connect Fuse Replacement, Bottom Part: 1 단계, 이미지 1/1
    • Remove the rubber pads and unscrew

  2. Sonos Connect Fuse Replacement, Continue to unscrew: 2 단계, 이미지 1/1
    • Take care not to damage the wires of the Wi-Fi antennas which are very bothersome.

  3. Sonos Connect Fuse Replacement, Unclip the top cover: 3 단계, 이미지 1/2 Sonos Connect Fuse Replacement, Unclip the top cover: 3 단계, 이미지 2/2
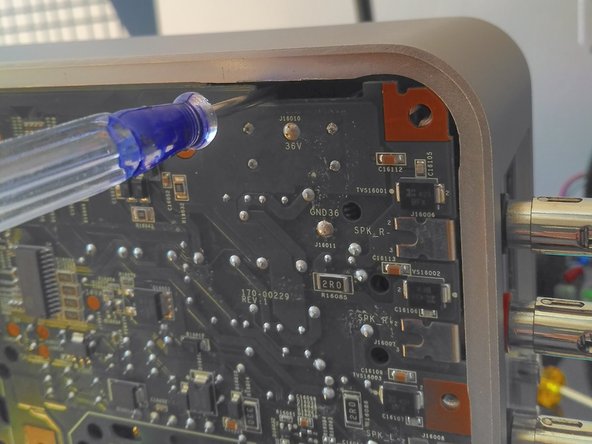
    • By using a screwdriver inserted through each of the 8 peripheral slots, you can access the clips of the top cover.

  4. Sonos Connect Fuse Replacement, Access under the top cover: 4 단계, 이미지 1/1
    • Continue unscrewing (there is a screw under the seal).

  5. Sonos Connect Fuse Replacement, Locate the fuse: 5 단계, 이미지 1/1
    • It's a soldered fuse. You will need to desolder it from the back in order to replace it.

  6. Sonos Connect Fuse Replacement, Replacement fuse: 6 단계, 이미지 1/1
    • About 1$

    • 250V 5A T fuse (time delay).

결론

To reassemble your device, follow these instructions in reverse order.

다른 한 분이 해당 안내서를 완성하였습니다.

다음 번역가들에게 특별히 감사 드립니다:

fr en

100%

이 번역자 분들은 저희가 세상을 수리하는데 동참해 주시는 분입니다! 기여하시겠습니까?
번역 시작하기 ›

YvesG

회원 가입일: 06/04/18

290 평판

안내서 2개 작성하였습니다

댓글 한 개

Bravo

Ce tuto peux rendre service a des consommateurs abusés par la sociète Sonos .

Merci

bruno vinay - 답글

댓글 쓰기

조회 통계:

24 시간 전: 5

7일 전: 15

30일 전: 60

전체 시간: 2,000