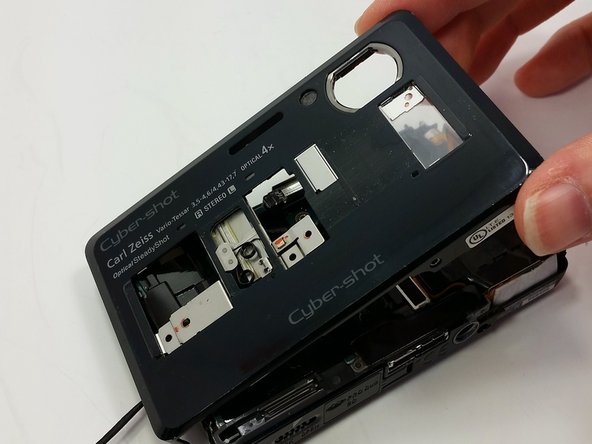
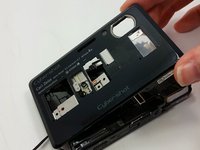
주요 콘텐츠로 건너뛰기

Sony Cyber-shot DSC-TX7 Front Sliding Lens Cover Replacement

필요한 것

  1. Sony Cyber-shot DSC-TX7 Front Sliding Lens Cover Replacement, Battery: 1 단계, 이미지 2개 중 1개 Sony Cyber-shot DSC-TX7 Front Sliding Lens Cover Replacement, Battery: 1 단계, 이미지 2개 중 2개
    • The battery compartment is located on the bottom of camera.

    • Move the slider from the 'lock' position to the 'open' position.

  2. Sony Cyber-shot DSC-TX7 Front Sliding Lens Cover Replacement: 2 단계, 이미지 3개 중 1개 Sony Cyber-shot DSC-TX7 Front Sliding Lens Cover Replacement: 2 단계, 이미지 3개 중 2개 Sony Cyber-shot DSC-TX7 Front Sliding Lens Cover Replacement: 2 단계, 이미지 3개 중 3개
    • Battery not shown.

    • Pull battery from compartment.

    • Insert newly charged battery into compartment, as shown in diagram (located in compartment).

    • Shut compartment door.

    • Move the slider back to the 'lock' position.

  3. Sony Cyber-shot DSC-TX7 Front Sliding Lens Cover Replacement, Front Cover: 3 단계, 이미지 1개 중 1개
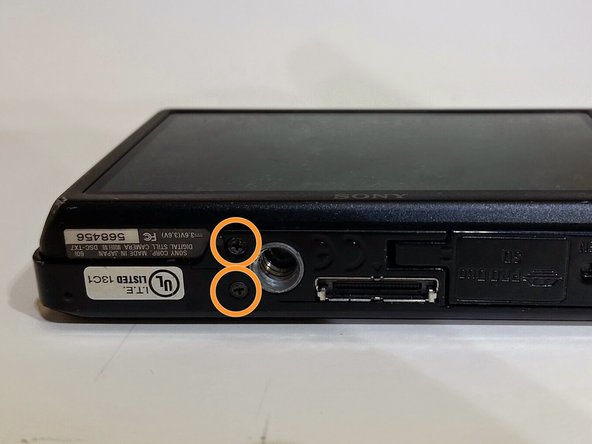
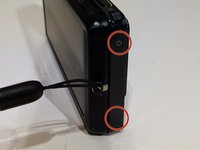
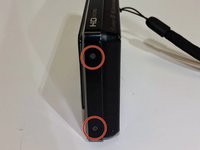
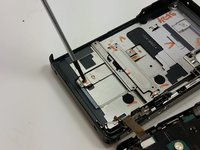
    • Use the Phillips #00 screwdriver to remove the 4mm length screws. There are 6 screws total.

  4. Sony Cyber-shot DSC-TX7 Front Sliding Lens Cover Replacement: 4 단계, 이미지 3개 중 1개 Sony Cyber-shot DSC-TX7 Front Sliding Lens Cover Replacement: 4 단계, 이미지 3개 중 2개 Sony Cyber-shot DSC-TX7 Front Sliding Lens Cover Replacement: 4 단계, 이미지 3개 중 3개
    • The 4 mm length screws are located on each side and on the bottom of the camera.

    • 2 screws on each side (4 total).

    • 2 screws on bottom.

  5. Sony Cyber-shot DSC-TX7 Front Sliding Lens Cover Replacement: 5 단계, 이미지 1개 중 1개
    • Gently pry around the front cover using the plastic opening tool.

    • Carefully separate front cover from body of camera.

  6. Sony Cyber-shot DSC-TX7 Front Sliding Lens Cover Replacement: 6 단계, 이미지 1개 중 1개
    • The front cover is now removed from the camera and the internal hardware is now visible.

    • They front cover will still be connected by a ribbon. Be careful not to break the ribbon.

  7. Sony Cyber-shot DSC-TX7 Front Sliding Lens Cover Replacement, Front Sliding Lens Cover: 7 단계, 이미지 2개 중 1개 Sony Cyber-shot DSC-TX7 Front Sliding Lens Cover Replacement, Front Sliding Lens Cover: 7 단계, 이미지 2개 중 2개
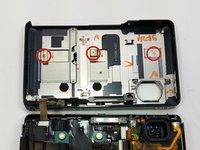
    • Remove the three 4mm length screws located on the inside of the front cover with the Phillips #00 screwdriver.

  8. Sony Cyber-shot DSC-TX7 Front Sliding Lens Cover Replacement: 8 단계, 이미지 2개 중 1개 Sony Cyber-shot DSC-TX7 Front Sliding Lens Cover Replacement: 8 단계, 이미지 2개 중 2개
    • Wiggle sliding lens cover after all screws are removed and separate from front cover.

결론

To reassemble your device, follow these instructions in reverse order.

작성자

2다른 기여자 명과 함께

Leslie Mundell

회원 가입일: 03/18/15

414 평판

안내서 4개를 작성함

Michigan Tech, Team 1-8, Lauer Spring 2015 Michigan Tech, Team 1-8, Lauer Spring 2015 회원

MTU-LAUER-S15S1G8

2 회원들

안내서 14개를 작성함

0가이드 댓글

댓글 쓰기

조회 통계:

지난 24시간: 1

지난 7일: 5

지난 30일: 12

전체 시간: 986