필요한 것
-
-
Starting with the laptop top-down, locate and remove the twelve 1mm Phillips #0 screws securing the back cover to the main body of the computer.
-
-
-
-
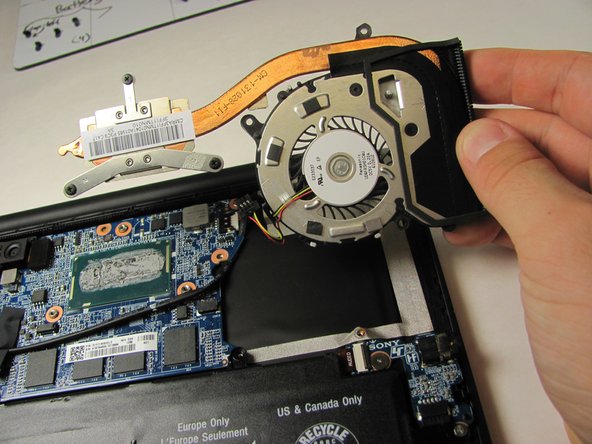
Use the Plastic Opening Tool to gently remove the heat sink and fan assembly from the computer.
-
-
-
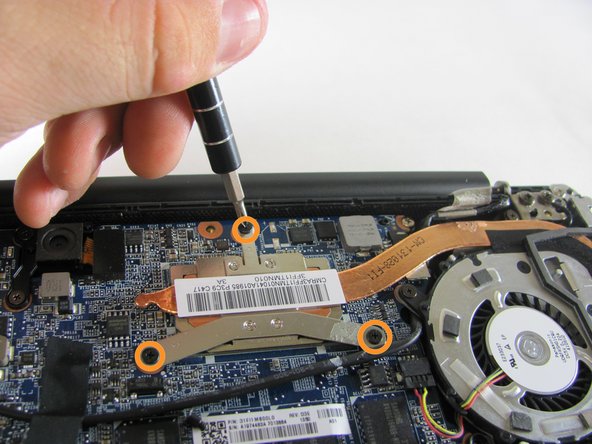
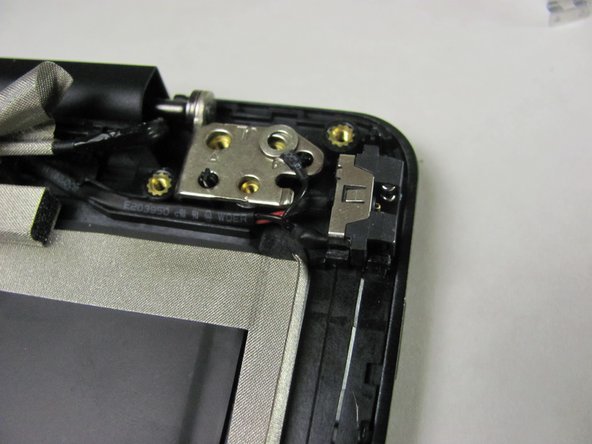
Remove 1mm screw using a Phillips Head #0 screwdriver.
-
Remove two 3mm screws using a Phillips Head #1 screwdriver.
-


To reassemble your device, follow these instructions in reverse order.
To reassemble your device, follow these instructions in reverse order.
다른 6명이 해당 안내서를 완성하였습니다.

팀

Cal Poly, Team 21-19, Maness Winter 2015 Cal Poly, Team 21-19, Maness Winter 2015 회원
CPSU-MANESS-W15S21G19
4 회원들
안내서 12개 작성하였습니다
댓글 5개
Where can I buy the charge port?
Don't even bother it will just fail again in a few weeks
I am going to try and redesign it
I already replaced mine and it just failed again
Not even a month later and it was very expensive and nearly impossible to find ,the design is faulty Sony should be sued for releasing this dangerous product
I have to hold it on the "sweet spot" the entire time I am using the computer and constantly reposition it
And it gets 🔥 HOT
Hot enough to burn my fingers
!#^& poor design and it never should have been released like this someone should have realized this this POS is a house fire waiting to happen
I misplaced the old one I took out but I plan on finding it and altering it to include a normal barrel jack instead
Or designing and 3D printing a housing for barrel jack and using the connector that plugs into the motherboard from the old one for the redesigned one
The changing the end on the charger as well ,since I already bought a couple of those before I realized it was the port ,the only solution would be to redesign it to be like normal barrel jack because it will just keep on failing