소개
The LED lights are a prominent feature of your Ollie device. There are two lights attached to the motherboard, making this replacement moderately difficult. The motherboard is the heart of Ollie, so check out the prerequisite guides and be prepared to use a Blue Opening Tool, Phillip's Head Screwdriver, and a Soldering Iron. For more detailed instructions on how to solder and desolder, please see this guide.
필요한 것
-
-
Firmly grasp Ollie in one hand.
-
Remove the blue rubber tire in a peeling motion with your opposite hand.
-
-
-
Loosen and remove the 10mm screw on each side of the device using a JIS 1 screwdriver tip.
-
Remove the plastic tire frame from the device
-
-
-
-
Loosen and remove the 10mm screws holding the blue tooth connector as well as the two 1 10 screws holding the motherboard to the case using the JIS #1 screwdriver
-
Loosen and remove the 10mm screws holding the antenna to the case.
-
Gently remove mother board from the case with an upward motion.
-
-
-
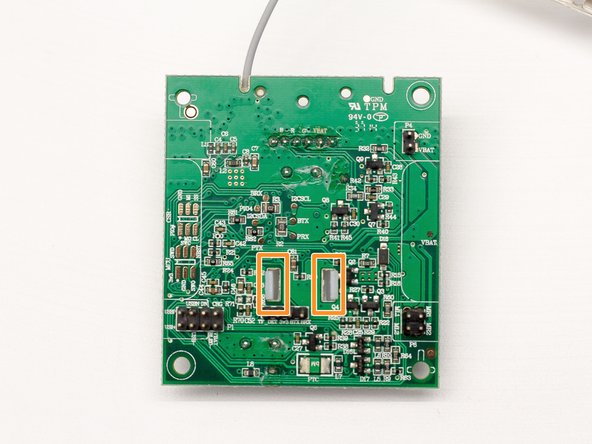
Locate the first LED light by looking for the white plastic cover on the motherboard.
-
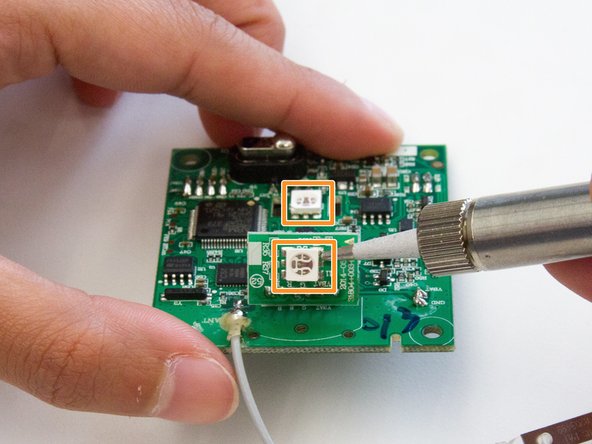
Flip the motherboard over, and locate the tabs holding on the plastic LED cover.
-
Pinch the tabs to the LED cover on the bottom side of the motherboard to remove the cover from the top side of the motherboard.
-


To reassemble your device, follow these instructions in reverse order.
To reassemble your device, follow these instructions in reverse order.
팀

UW Tacoma, Team S1-G3, Rose Fall 2017 UW Tacoma, Team S1-G3, Rose Fall 2017 회원
UWT-ROSE-F17S1G3
4 회원들
안내서 10개 작성하였습니다