소개
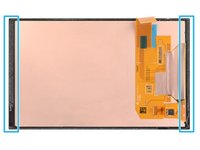
Use this guide to replace the screen (or display) on your Steam Deck OLED.
Remember to follow general electrostatic discharge (ESD) safety procedures while repairing your device.
You'll need replacement screen adhesive to complete this repair.
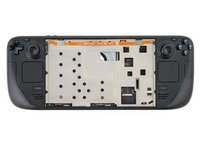
필요한 것
-
-
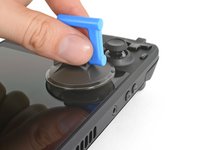
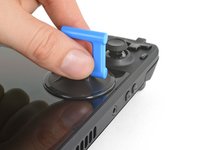
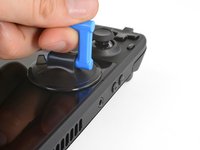
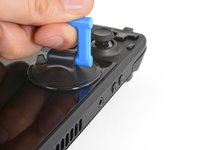
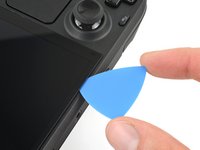
Measure 3 mm from the tip and mark the opening pick with a permanent marker.
-
-
-
Prepare an iOpener and apply it to the top edge of the screen for one minute.
-
-
-
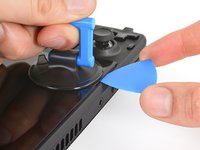
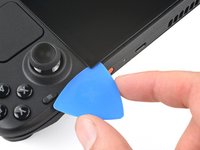
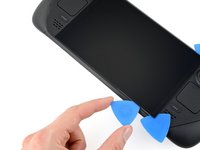
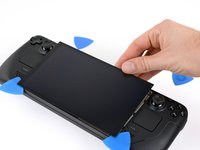
Apply a suction handle to the top left corner of the screen, as close to the top edge as possible.
-
-
-
Pull up on the suction handle with a strong, steady force to create a gap between the screen and the frame.
-
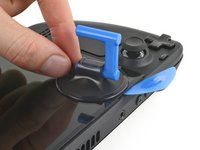
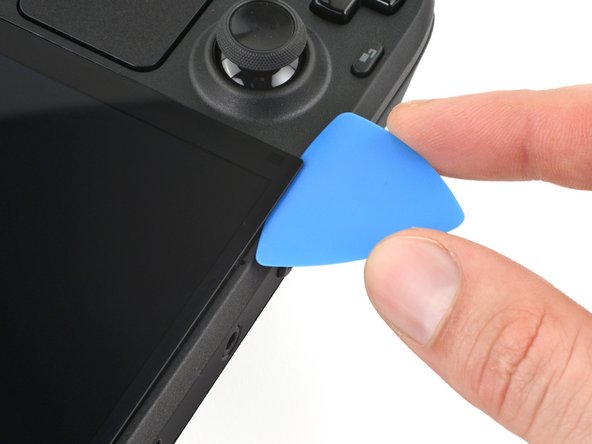
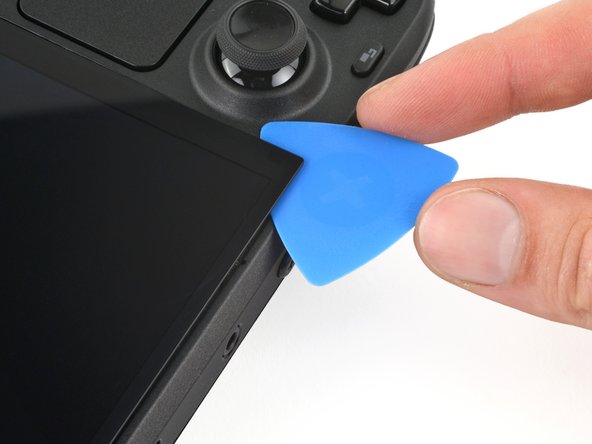
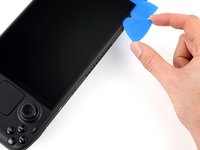
Insert the tip of an opening pick into the gap.
-
-
-
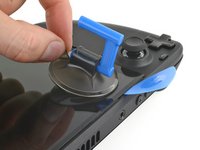
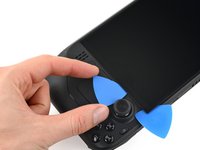
Pull up on the nub on the back of the suction handle to remove it from the screen.
-
-
-
Along the top and bottom edges, don't insert your pick deeper than 3 mm (~1/8 of an inch) to avoid damaging the sensors, sensors cable, or screen cable.
-
Along the left and right edges, don't insert your pick deeper than 5 mm (~1/5 of an inch) to avoid damaging the screen panel.
-
-
-
-
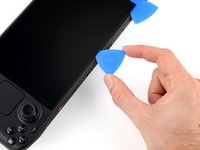
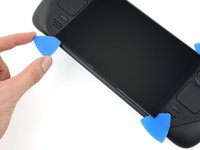
Rotate the pick so its flat edge is between the screen and frame.
-
Leave this pick inserted to prevent the adhesive from resealing.
-
-
-
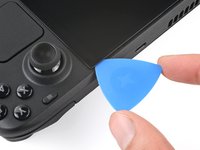
Insert another pick in the top left corner.
-
Slide the pick toward the power button to separate the adhesive securing the top edge of the screen.
-
-
-
Rotate the pick so its flat edge is between the screen and frame.
-
Leave this pick inserted to prevent the adhesive from resealing.
-
-
-
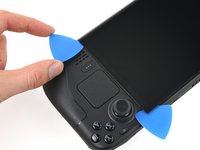
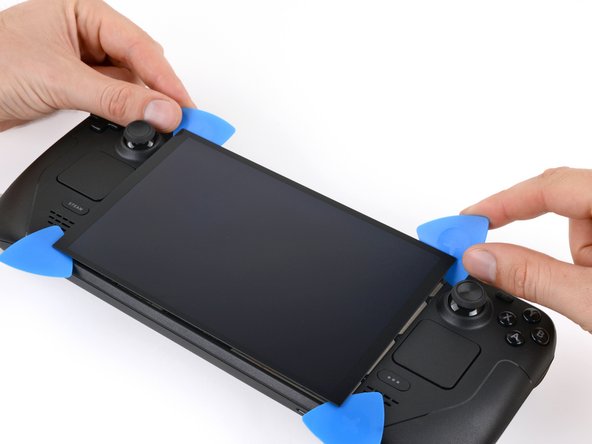
Insert another pick just below the right thumbstick.
-
Slide the pick to the bottom right corner to separate the right edge adhesive.
-
Leave the pick inserted to prevent the adhesive from resealing.
-
-
-
Insert another pick in bottom right corner along the bottom edge.
-
Slide the pick to the bottom left corner to separate the bottom edge adhesive.
-
Leave the pick inserted to prevent the adhesive from resealing.
-
-
-
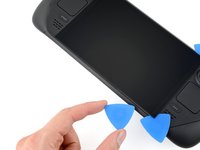
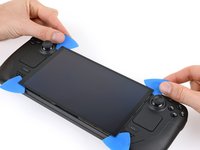
Grip the two picks along the top edge.
-
Pry up to lift the top edge of the screen away from the frame until you can grab it.
-
-
-
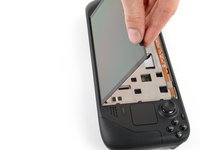
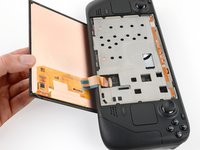
Flip the screen over the bottom edge of the frame.
-
Prop up the screen with a small box or book roughly 2.5 cm (~1 inch) thick.
-
-
-
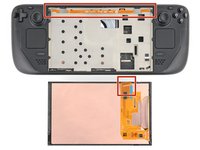
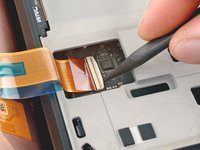
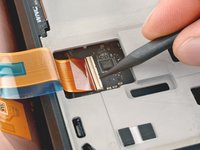
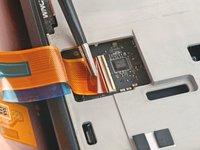
Use the point of a spudger or a clean fingernail to flip up the locking flap on the outside edge of the screen ZIF connector.
-
-
이 단계에 사용된 도구:Tweezers$4.99
-
Use tweezers or your fingers to grip the screen cable pull tab and slide the cable straight out of its socket to disconnect it.
-


To reapply adhesive and install your screen, follow this guide.
Take your e-waste to an R2 or e-Stewards certified recycler.
Repair didn’t go as planned? Try some basic troubleshooting, or ask our Steam Deck OLED answers community for help.
다른 9명이 해당 안내서를 완성하였습니다.

팀

9가이드 댓글
I successfully swapped matte/glossy OLED model screens this way. First boot after swap had a frazzled screen. Hard reset fixed the problem instantly.
Is this compatible with limited edition?
the steps are the same for both OLED models. However the LE comes stock with a matte screen, standard model with glossy screen
Is it possible to upgrade Steam Deck 512GB LCD model to better matte OLED screen?
As well as upgrade the WiFi card?
No for the screen, i do not know for wifi. i doubt it.