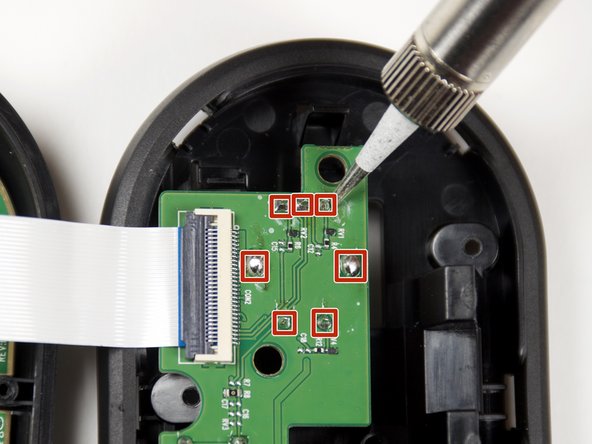
주요 콘텐츠로 건너뛰기

SteelSeries Arctis Pro Plus GameDAC Potentiometer Replacement

필요한 것

  1. SteelSeries Arctis Pro Plus GameDAC Potentiometer Replacement, GameDAC Potentiometer: 1 단계, 이미지 1/3 SteelSeries Arctis Pro Plus GameDAC Potentiometer Replacement, GameDAC Potentiometer: 1 단계, 이미지 2/3 SteelSeries Arctis Pro Plus GameDAC Potentiometer Replacement, GameDAC Potentiometer: 1 단계, 이미지 3/3
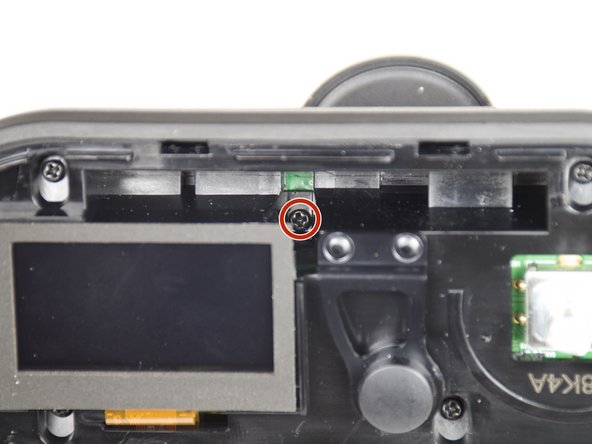
    • Remove the plastic cover using the iFixit opening tool to pry the cover open.

    • Insert opening picks to keep the cover open as you work your way around the GameDAC.
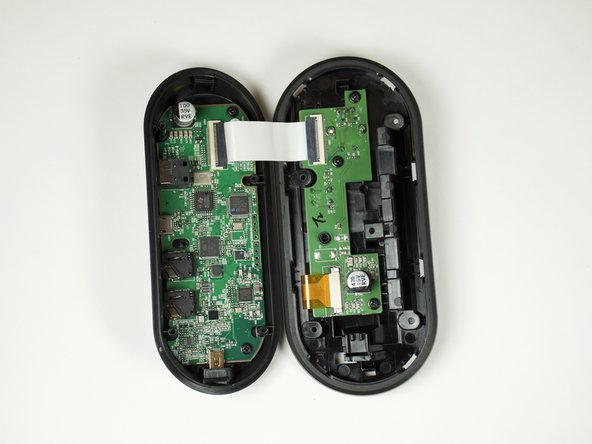
    • Pop the cover off.

  2. SteelSeries Arctis Pro Plus GameDAC Potentiometer Replacement: 2 단계, 이미지 1/2 SteelSeries Arctis Pro Plus GameDAC Potentiometer Replacement: 2 단계, 이미지 2/2
    • Remove the control wheel from the GameDAC by pulling on the knob.

  3. SteelSeries Arctis Pro Plus GameDAC Potentiometer Replacement: 3 단계, 이미지 1/2 SteelSeries Arctis Pro Plus GameDAC Potentiometer Replacement: 3 단계, 이미지 2/2
    • Remove the five 6mm screws using the Phillips #0 driver head.

    • There is one screw hidden on the upper right-hand side of the display.

  4. SteelSeries Arctis Pro Plus GameDAC Potentiometer Replacement: 4 단계, 이미지 1/2 SteelSeries Arctis Pro Plus GameDAC Potentiometer Replacement: 4 단계, 이미지 2/2
    • Hold the sides of the GameDAC and pull apart.

    • Don't pull the two sides apart quickly or forcefully to avoid tearing the wire connection between the two boards.

  5. SteelSeries Arctis Pro Plus GameDAC Potentiometer Replacement: 5 단계, 이미지 1/1
    • Remove the three 4mm screws from the circuit board using the Phillips #0 driver head.

  6. SteelSeries Arctis Pro Plus GameDAC Potentiometer Replacement: 6 단계, 이미지 1/2 SteelSeries Arctis Pro Plus GameDAC Potentiometer Replacement: 6 단계, 이미지 2/2
    • Desolder the seven potentiometer pins from the board to remove the button.

    • For help desoldering connections, follow this useful guide on How To Solder and Desolder Connections.

    • Use caution when soldering. The heated tip may cause damage to the board or burn you.

결론

To reassemble your device, follow these instructions in reverse order.

다른 5명이 해당 안내서를 완성하였습니다.

Avinash Vadlamudi

회원 가입일: 01/24/19

451 평판

안내서 1개 작성함

Cal Poly, Team S18-G1, White Winter 2019 Cal Poly, Team S18-G1, White Winter 2019 회원

CPSU-WHITE-W19S18G1

4 회원들

안내서 21개 작성하였습니다

댓글 3개

Hi there,

do you know what type of potentiometer is needed?

Greetings

Chris

Christian Humann - 답글

I would like to know too. Cause it failed for me as well!!

Antonis Lazarakis - 답글

Can I replace the Oled Screen with 2,42 inch arduino oled display that also have 24pin flex?

Muso!27 - 답글

댓글 쓰기

조회 통계:

24 시간 전: 2

7일 전: 25

30일 전: 80

전체 시간: 4,419