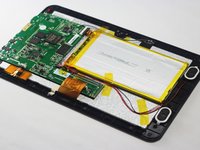
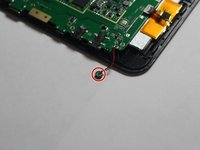
주요 콘텐츠로 건너뛰기

SuperSonic Matrix Mid SC-999 Microphone Replacement

필요한 것

  1. SuperSonic Matrix Mid SC-999 Microphone Replacement, Back Cover: 1 단계, 이미지 1/1
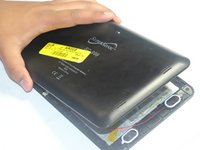
    • Wedge the plastic opening tool between the back cover of the device and the front panel.

    • You will hear a snapping sound as the cover is separated from the body of the device.

  2. SuperSonic Matrix Mid SC-999 Microphone Replacement: 2 단계, 이미지 1/1
    • Slide the opening tool along the seam between the front panel and the back cover to un-clip the remaining connections around the device.

    • Again, you will hear a snapping sound as the cover is separated from the body of the device.

  3. SuperSonic Matrix Mid SC-999 Microphone Replacement: 3 단계, 이미지 1/2 SuperSonic Matrix Mid SC-999 Microphone Replacement: 3 단계, 이미지 2/2
    • Lift the back cover from the body of the device to expose the internal components.

  4. SuperSonic Matrix Mid SC-999 Microphone Replacement, Microphone: 4 단계, 이미지 1/1
    • Remove the microphone from its compartment.

    • The microphone is located toward the bottom left corner of the device (assuming the speakers are located on the right side of you).

  5. SuperSonic Matrix Mid SC-999 Microphone Replacement: 5 단계, 이미지 1/2 SuperSonic Matrix Mid SC-999 Microphone Replacement: 5 단계, 이미지 2/2
    • Use the soldering iron to remove the wires connected to the microphone.

    • If you're unfamiliar with soldering or desoldering, check out this guide.

    • Be sure to wear protective eye wear. Also, keep in mind that the soldering iron will become extremely hot.

결론

To reassemble your device, follow these instructions in reverse order.

Harris Dagha

회원 가입일: 03/26/15

866 평판

안내서 7개 작성하였습니다

Dr Shaverz boyz Dr Shaverz boyz 회원

Community

3 회원들

안내서 14개 작성하였습니다

댓글 0개

댓글 쓰기

조회 통계:

24 시간 전: 0

7일 전: 0

30일 전: 0

전체 시간: 135