이 버전에는 잘못된 편집 사항이 있을 수 있습니다. 최신 확인된 스냅샷으로 전환하십시오.
필요한 것
-
이 단계는 번역되지 않았습니다. 번역을 도와주십시오
-
Remove the four H2 screws from the back of the phone. Do not lose the black rubber rings on the screws.
-
Remove the two H2 screws, on either side of the phone. Do not lose the red seal that are on the screws.
-
Using a prying tool work off the back of the case. Ensuring not to lose the port covers. Be careful to note the position of connector covers. Have the tabs at the end of the connectors in place before clipping the phone completely back together.
-
-
-
이 단계는 번역되지 않았습니다. 번역을 도와주십시오
-
Remove the two black Philips head screws from the battery connector cover.
-
Lift the battery cover away from the logic board
-
-
이 단계는 번역되지 않았습니다. 번역을 도와주십시오
-
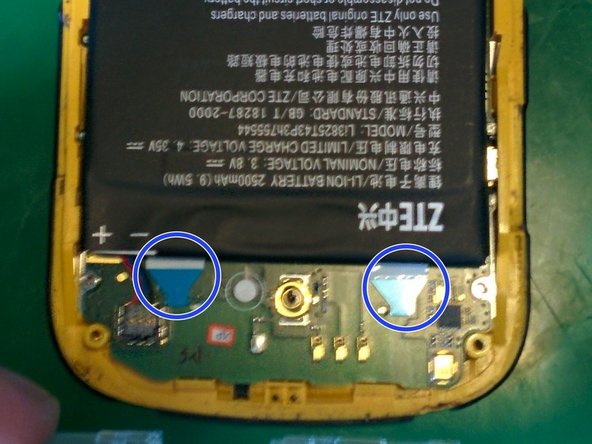
Disconnect the battery connector from the logic board. Do so by inserting a flat tool under the wires on the indicated side and wedging it up off the logic board.
-
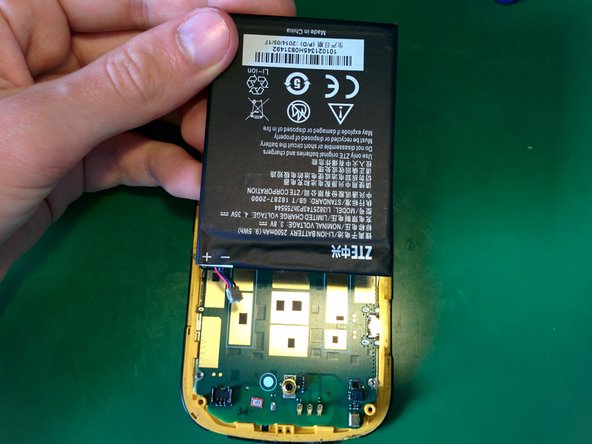
Then remove the double sided tape using the blue tabs provided. Simply grab a tab and pull until it comes out tweezers are really good for beginning the process.
-