이 버전에는 잘못된 편집 사항이 있을 수 있습니다. 최신 확인된 스냅샷으로 전환하십시오.
필요한 것
-
이 단계는 번역되지 않았습니다. 번역을 도와주십시오
-
Unscrew the two 4.0mm Phillips head screws found near the ports at the bottom of the device using a PH #00 screwdriver.
-
-
이 단계는 번역되지 않았습니다. 번역을 도와주십시오
-
Slide the plastic prying tool in between the front and back panel and pry them apart on all 4 sides.
-
It may be easiest to start on one of the sides, and work your way around the device. The bottom, with the ports, is the most difficult side and can be saved for last.
-
-
이 단계는 번역되지 않았습니다. 번역을 도와주십시오
-
With the bottom of the device facing away from you, pull the camera out of its black housing.
-
-
이 단계는 번역되지 않았습니다. 번역을 도와주십시오
-
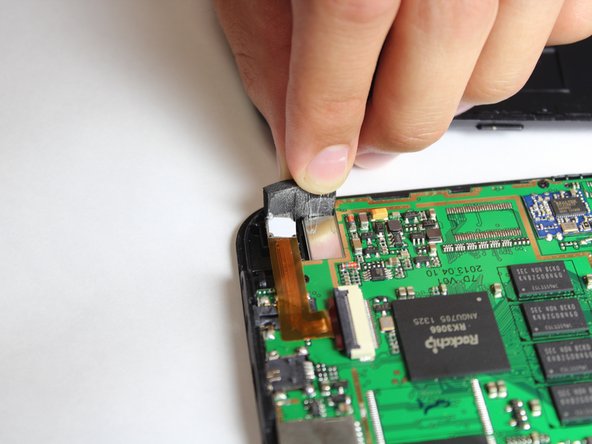
Use the tweezers to lift the grey connector, connecting the camera ribbon to the circuit board, up from the beige housing. It should rotate up, and allow you to slide the ribbon out from under the connector.
-
-
-
이 단계는 번역되지 않았습니다. 번역을 도와주십시오
-
Remove the three 4.0mm screws holding down the circuit board with the Phillips #00 screwdriver.
-
-
이 단계는 번역되지 않았습니다. 번역을 도와주십시오
-
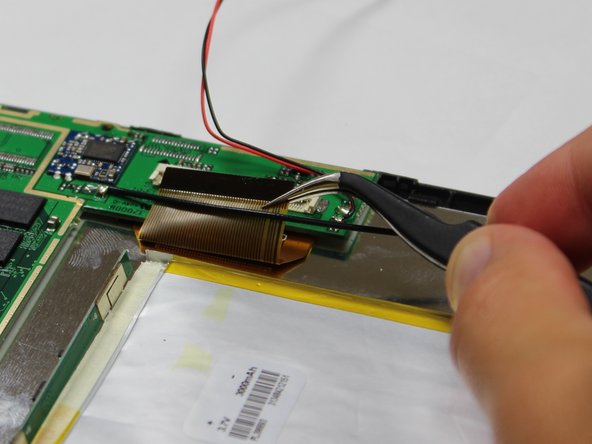
Use the tweezers to lift the grey connector, located near the battery and speaker, up from the beige housing. It should rotate up, and allow you to slide the ribbon out from under the connector.
-
-
이 단계는 번역되지 않았습니다. 번역을 도와주십시오
-
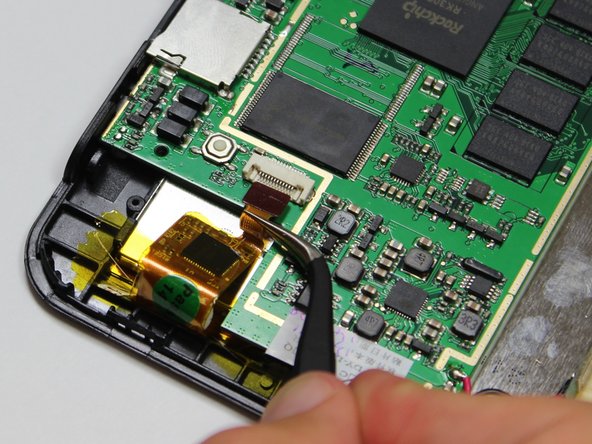
Use the tweezers to lift the grey connector, located near the reset button, up from the beige housing. It should rotate up, and allow you to slide the ribbon out from under the connector.
-
-
이 단계는 번역되지 않았습니다. 번역을 도와주십시오
-
Turn the device around, and use the large plastic opening tool to pry the battery off of the back of the silver LCD.
-
-
이 단계는 번역되지 않았습니다. 번역을 도와주십시오
-
Remove the two 3.0mm screws holding down the black tabs using the Phillips #00 screwdriver.
-
-
이 단계는 번역되지 않았습니다. 번역을 도와주십시오
-
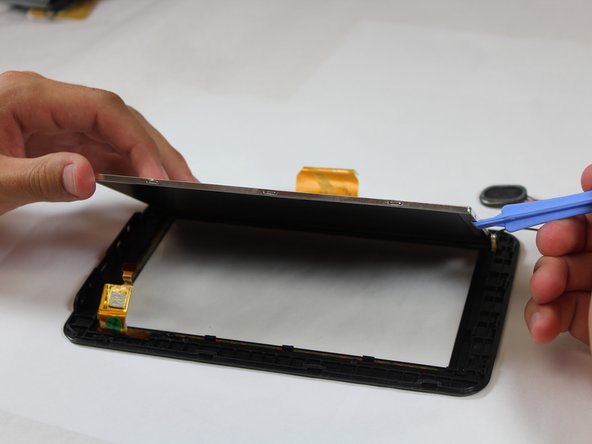
Use the Plastic Opening Tool to gently pry the black hooks away from the edges of the silver LCD. Then lift the LCD off of the front panel.
-
-
이 단계는 번역되지 않았습니다. 번역을 도와주십시오
-
Desolder the black wire from the LCD.
-
For soldering information, see our guide: How To Solder and Desolder Connections.
-


다른 한 분이 해당 안내서를 완성하였습니다.
팀

Cal Poly, Team 10-41, Amido Fall 2014 Cal Poly, Team 10-41, Amido Fall 2014 회원
CPSU-AMIDO-F14S10G41
4 회원들
안내서 12개 작성하였습니다