이 버전에는 잘못된 편집 사항이 있을 수 있습니다. 최신 확인된 스냅샷으로 전환하십시오.
필요한 것
-
이 단계는 번역되지 않았습니다. 번역을 도와주십시오
-
Unplug any cables from the USB, power, display or DVI-D ports by gripping the cord by the connector and pulling straight out of the port.
-
-
이 단계는 번역되지 않았습니다. 번역을 도와주십시오
-
Place the device screen down on a flat surface.
-
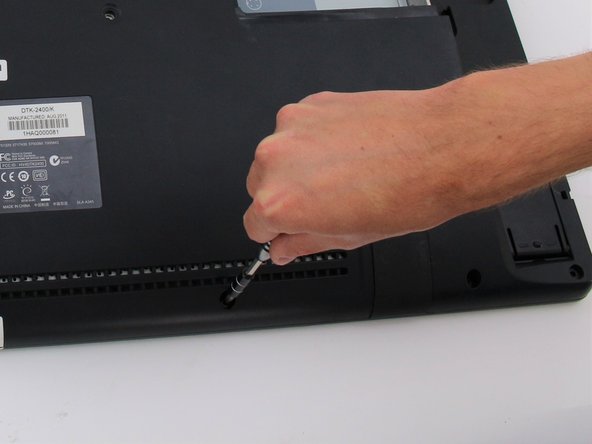
Remove eight 10mm Phillips #2 screws (four on each leg of the stand) by turning the screwdriver counterclockwise.
-
-
이 단계는 번역되지 않았습니다. 번역을 도와주십시오
-
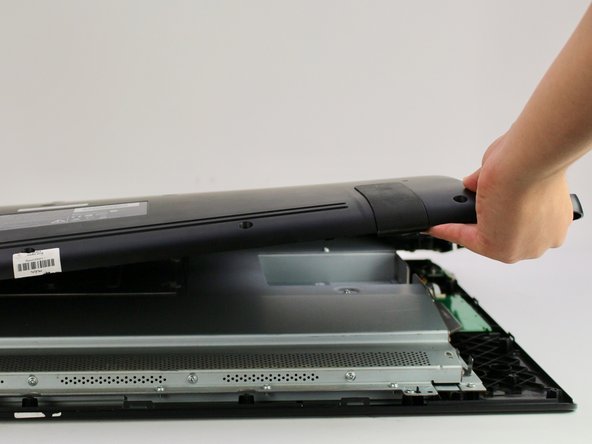
Lift the stand up and away from the rest of the device so the legs separate from the mounting plate.
-
-
이 단계는 번역되지 않았습니다. 번역을 도와주십시오
-
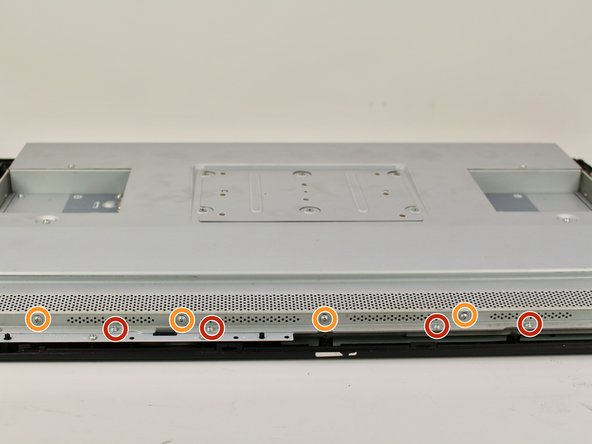
Remove eighteen 10.2mm Phillips #1 screws from the perimeter of the back panel by turning the screwdriver counterclockwise.
-
Remove one 11.9mm Phillips #1 screw from the center of the back panel.
-
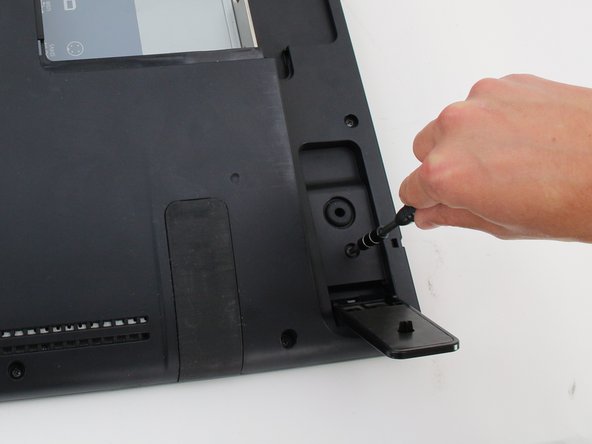
Remove two 10.2mm Phillips #1 screws from underneath hinged panels in the bottom right and left corners.
-
-
이 단계는 번역되지 않았습니다. 번역을 도와주십시오
-
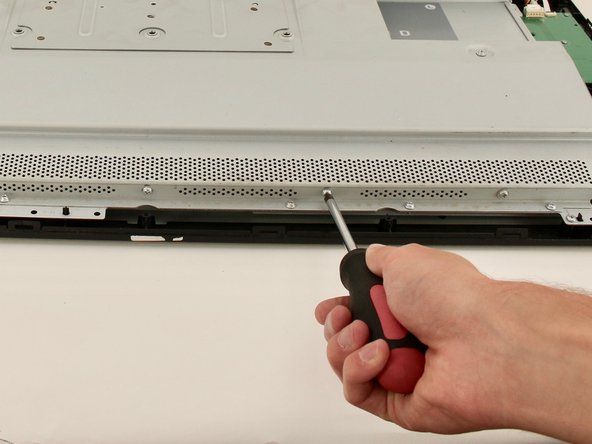
Lift the back panel up by a corner and insert a plastic opening tool in the gap.
-
Slide the tool along the gap around the perimeter of the device while lifting to unlatch the back panel.
-
Remove the panel by lifting it up and off of the device.
-
-
-
이 단계는 번역되지 않았습니다. 번역을 도와주십시오
-
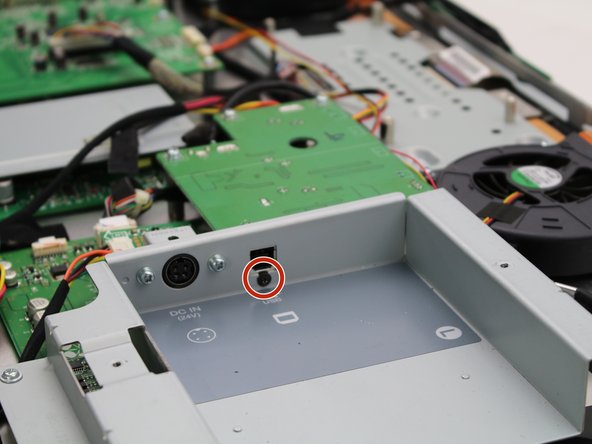
Detach the small black wire connecting the back metal plate to the USB video port by removing the one 8 mm Phillips #2 screw from the back metal plate and turning the screwdriver counterclockwise.
-
-
이 단계는 번역되지 않았습니다. 번역을 도와주십시오
-
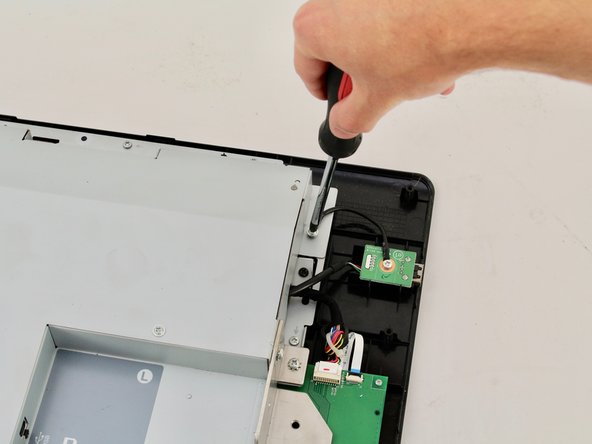
Remove the two 8 mm Phillips #2 screws from the metal button plate by rotating the screwdriver counterclockwise.
-
Remove the metal button plate from the back metal plate.
-
-
이 단계는 번역되지 않았습니다. 번역을 도와주십시오
-
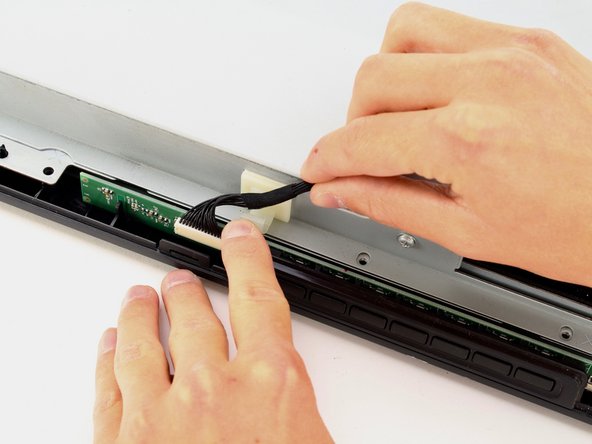
Remove the button wires from the support clip by pushing down on the clip.
-
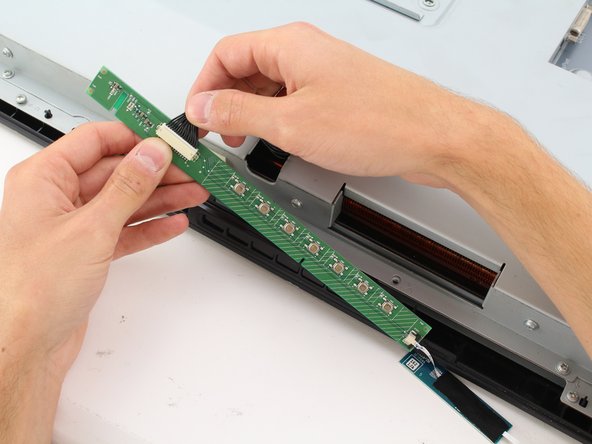
Detach the button wires from the button board by pulling the button wires away from the board.
-
Place the button board back in to the device.
-
-
이 단계는 번역되지 않았습니다. 번역을 도와주십시오
-
Remove the eight (four on each plate) 10.2mm Phillips #2 screws with locking washers from the metal mounting plates by rotating the screwdriver counterclockwise.
-
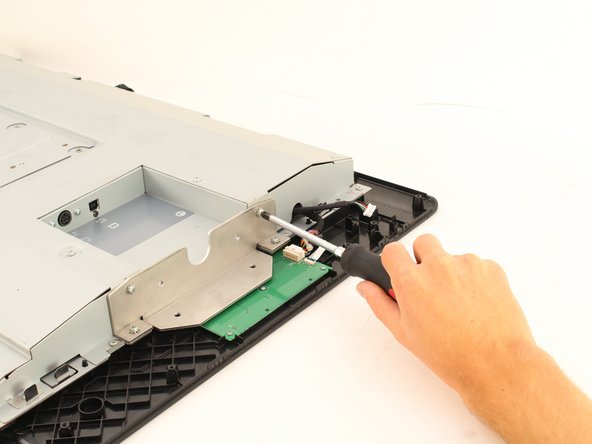
Remove the two metal mounting plates.
-
-
이 단계는 번역되지 않았습니다. 번역을 도와주십시오
-
Remove the sixteen 8 mm Phillips #2 screws with flanges from the horizontal side of the plate by turning the screwdriver counterclockwise.
-
Remove the ten 8 mm Phillips #2 screws with flanges from the vertical sides of the plate by turning the screwdriver counterclockwise.
-
-
이 단계는 번역되지 않았습니다. 번역을 도와주십시오
-
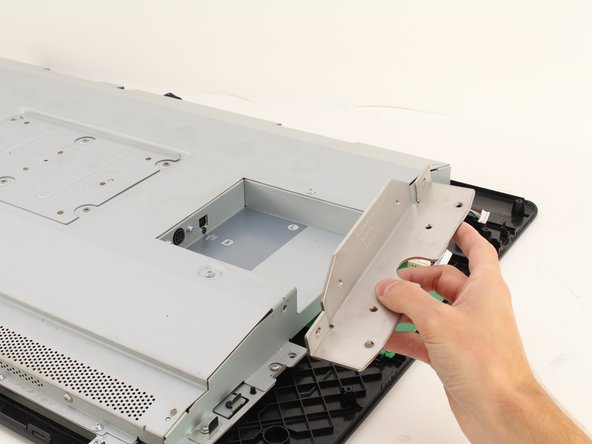
Remove the back metal plate by lifting up along one edge , then lifting the plate off and away from the device.
-
-
이 단계는 번역되지 않았습니다. 번역을 도와주십시오
-
Remove the one 6.8mm Phillips #1 screw by turning the screwdriver counterclockwise.
-
-
이 단계는 번역되지 않았습니다. 번역을 도와주십시오
-
Remove the four 8mm Phillips #1 screws with flanges by turning the screwdriver counterclockwise.
-
-
이 단계는 번역되지 않았습니다. 번역을 도와주십시오
-
Remove the five cables connected to the USB board by pinching near the connector and pulling the cables straight out.
-
-
이 단계는 번역되지 않았습니다. 번역을 도와주십시오
-
Remove USB video port by desoldering at the connection points on the board.
-


팀

Cal Poly, Team S15-G3, White Fall 2018 Cal Poly, Team S15-G3, White Fall 2018 회원
CPSU-WHITE-F18S15G3
4 회원들
안내서 18개 작성하였습니다