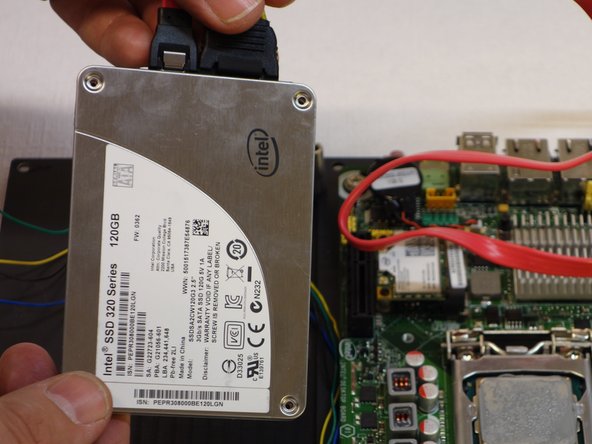
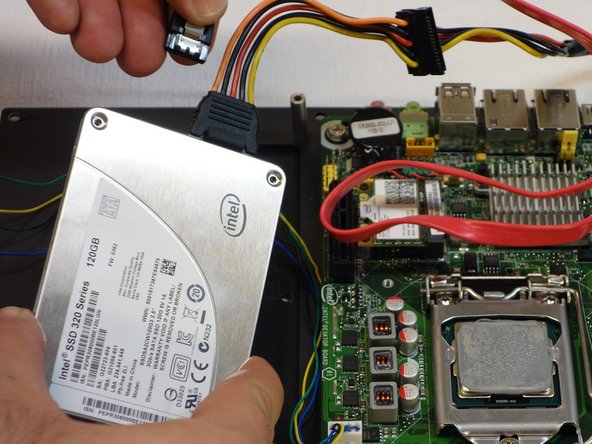
주요 콘텐츠로 건너뛰기

Why! WDi7SSD SSD Hard Drive Replacement

필요한 것

  1. Why! WDi7SSD SSD Hard Drive Replacement, why! WDi7SSD Opening procedure: 1 단계, 이미지 1/3 Why! WDi7SSD SSD Hard Drive Replacement, why! WDi7SSD Opening procedure: 1 단계, 이미지 2/3 Why! WDi7SSD SSD Hard Drive Replacement, why! WDi7SSD Opening procedure: 1 단계, 이미지 3/3
    • Make sure the computer is disconnected from the power source.

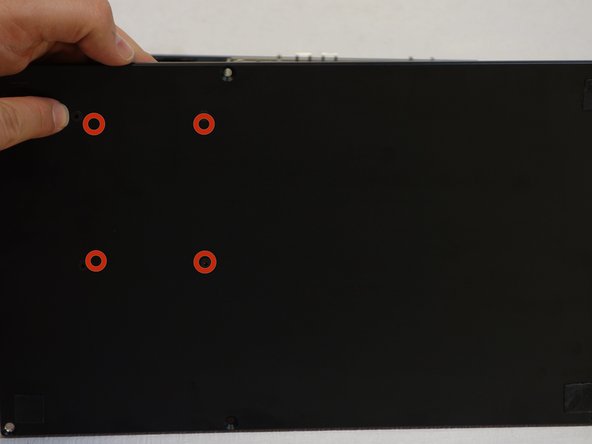
    • Flip the computer over.

    • Remove the six screws with a 2 mm Allen key.

    • Carefully remove the back panel, as well the left and right panel.

  2. Why! WDi7SSD SSD Hard Drive Replacement: 2 단계, 이미지 1/1
    • Now flip up the base panel to which all components are attached.

  3. Why! WDi7SSD SSD Hard Drive Replacement, SSD Hard Drive: 3 단계, 이미지 1/3 Why! WDi7SSD SSD Hard Drive Replacement, SSD Hard Drive: 3 단계, 이미지 2/3 Why! WDi7SSD SSD Hard Drive Replacement, SSD Hard Drive: 3 단계, 이미지 3/3
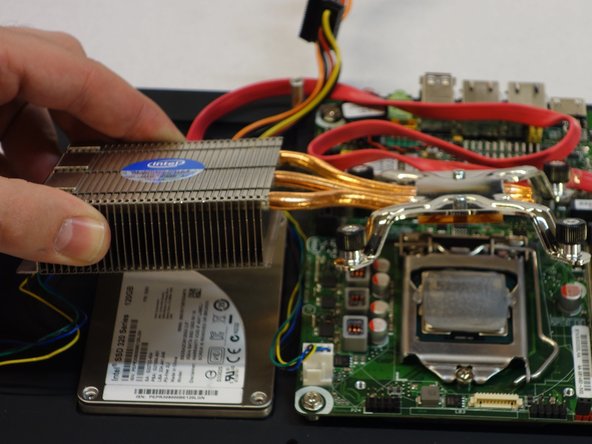
    • Using a Phillips #2 screwdriver, remove the four screws on the heatsink that cools the processor unit.

    • Remove the heatsink.

  4. Why! WDi7SSD SSD Hard Drive Replacement: 4 단계, 이미지 1/3 Why! WDi7SSD SSD Hard Drive Replacement: 4 단계, 이미지 2/3 Why! WDi7SSD SSD Hard Drive Replacement: 4 단계, 이미지 3/3
    • The SSD is now visible.

    • Now flip the computer over and use the Allen wrench to loosen the 1.5 mm screws fixing the SSD.

  5. Why! WDi7SSD SSD Hard Drive Replacement: 5 단계, 이미지 1/2 Why! WDi7SSD SSD Hard Drive Replacement: 5 단계, 이미지 2/2
    • Disconnect the first cable from the SSD. You must press the lever down to do this.

    • The cable may not loosen easily. In this case, carefully use a little force, but not too much.

    • Pay attention do the orientation when assembling. Otherwise, the SSD and cable can be damaged.

  6. Why! WDi7SSD SSD Hard Drive Replacement: 6 단계, 이미지 1/2 Why! WDi7SSD SSD Hard Drive Replacement: 6 단계, 이미지 2/2
    • Disconnect the second cable from the SSD. You must press the lever down to do this.

    • The cable may not loosen easily. In this case, carefully use a little force, but not too much.

    • Pay attention do the orientation when assembling. Otherwise, the SSD and cable can be damaged.

결론

To reassemble the device, follow the instructions in reverse order.

다음 번역가들에게 특별히 감사 드립니다:

de en

100%

이 번역자 분들은 저희가 세상을 수리하는데 동참해 주시는 분입니다! 기여하시겠습니까?
번역 시작하기 ›

Felice Suglia

회원 가입일: 06/15/13

30,884 평판

안내서 264개 작성하였습니다

댓글 0개

댓글 쓰기

조회 통계:

24 시간 전: 0

7일 전: 2

30일 전: 3

전체 시간: 125