주요 콘텐츠로 건너뛰기

X-Street STR Viper Core Motor Servos Replacement

필요한 것

  1. X-Street STR Viper Core Motor Servos Replacement, X-Street STR Viper: 1 단계, 이미지 1/1
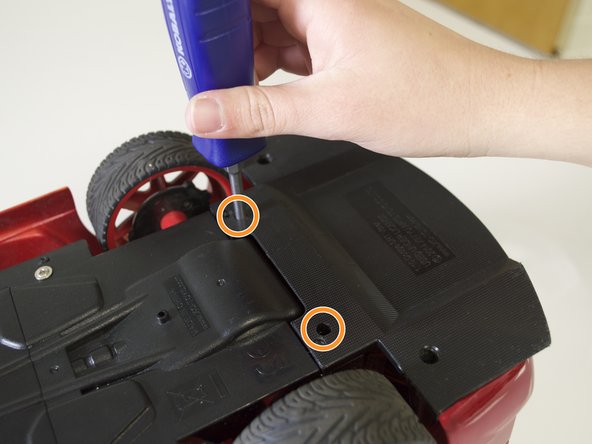
    • Remove the four 3 mm screws from the bottom panel using a 3 mm Philips #1 screwdriver.

  2. X-Street STR Viper Core Motor Servos Replacement: 2 단계, 이미지 1/1
    • Use the 3 mm Philips #1 screwdriver to remove the three 3 mm screws that connect the front panel with the main underside panel. Also remove the 6 mm front panel screw.

    • Remove the bottom panel by pulling the plastic tabs from either side of the car.

  3. X-Street STR Viper Core Motor Servos Replacement: 3 단계, 이미지 1/2 X-Street STR Viper Core Motor Servos Replacement: 3 단계, 이미지 2/2
    • Remove the two 6 mm screws and the two 3 mm screws that connect the back panel to the main underside panel.

    • Remove the two 6 mm screws that connect the rear panel to the body of the car.

  4. X-Street STR Viper Core Motor Servos Replacement: 4 단계, 이미지 1/3 X-Street STR Viper Core Motor Servos Replacement: 4 단계, 이미지 2/3 X-Street STR Viper Core Motor Servos Replacement: 4 단계, 이미지 3/3
    • Remove the two front 6 mm screws and the two middle 6 mm screws.

    • Remove the main underside panel carefully. Excessive force could damage or disconnect the fragile wires attached to this piece.

    • Remove the car shell and place it on the left side of the car.

  5. X-Street STR Viper Core Motor Servos Replacement, Core Motor Servos: 5 단계, 이미지 1/1
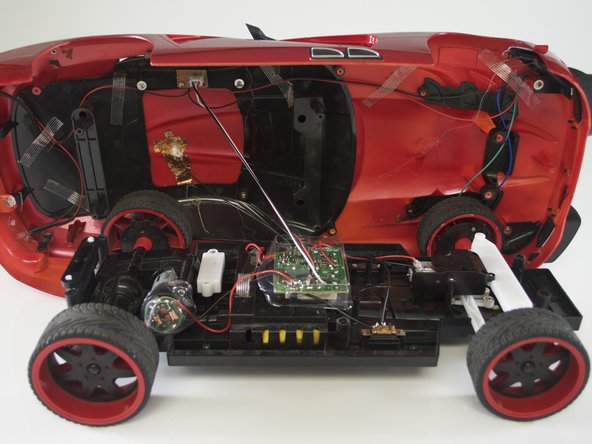
    • Begin by removing all underside panels of the car. You can do this by referring to the prerequisite up to this point.

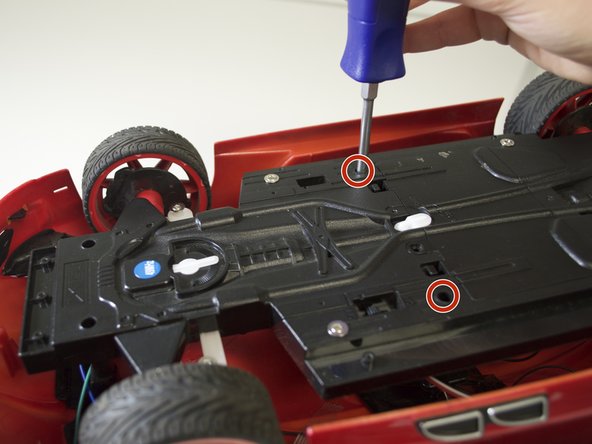
    • Remove screws. Take your #1 Phillips head screwdriver and remove the six 8mm Phillips #1 screws holding down the panel above the servos motor.

  6. X-Street STR Viper Core Motor Servos Replacement: 6 단계, 이미지 1/1
    • Remove top cover. Lift the panel off the top of the motor and place it back with the wires.

  7. X-Street STR Viper Core Motor Servos Replacement: 7 단계, 이미지 1/1
    • Remove motor. Lift the servos core motor out of the motor housing. Be careful not to pull out the plastic gears while doing so.

  8. X-Street STR Viper Core Motor Servos Replacement: 8 단계, 이미지 1/2 X-Street STR Viper Core Motor Servos Replacement: 8 단계, 이미지 2/2
    • Detach wires. Desolder or clip the back red and black wires from the motor. Use a soldering iron or wire cutters; do not use scissors as shown in the photo.

    • An orange circular wire known as a thermistor will be soldered with the two wires. Detach this part as well.

  9. X-Street STR Viper Core Motor Servos Replacement: 9 단계, 이미지 1/1
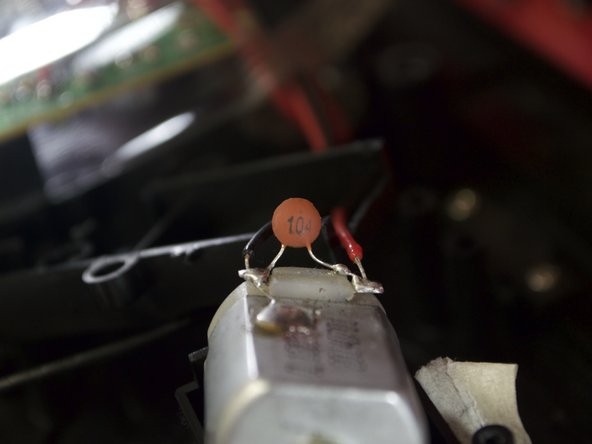
    • Solder wires back on. The last step will be to solder the red wire back on the left side of the motor and the black wire back on the right side. You can do this by referring to this how to solder/desolder page.

결론

To reassemble your device, follow these instructions in reverse order.

다른 한 분이 해당 안내서를 완성하였습니다.

Ian Johnson

회원 가입일: 04/01/15

354 평판

안내서 2개 작성하였습니다

Cal Poly, Team 12-6, Lancaster Spring 2015 Cal Poly, Team 12-6, Lancaster Spring 2015 회원

CPSU-LANCASTER-S15S12G6

4 회원들

안내서 6개 작성하였습니다

댓글 0개

댓글 쓰기

조회 통계:

24 시간 전: 0

7일 전: 1

30일 전: 4

전체 시간: 540