이 버전에는 잘못된 편집 사항이 있을 수 있습니다. 최신 확인된 스냅샷으로 전환하십시오.
필요한 것
-
이 단계는 번역되지 않았습니다. 번역을 도와주십시오
-
Insert the plastic opening tool between the charging port and the rear case.
-
Pry the end of the rear case up from the charging port.
-
-
이 단계는 번역되지 않았습니다. 번역을 도와주십시오
-
Run the plastic opening tool along the seam on the side of the phone to remove the rear casing.
-
-
이 단계는 번역되지 않았습니다. 번역을 도와주십시오
-
Locate the indentation at the bottom of the battery.
-
Place a finger in the indentation and lift up to remove the battery.
-
-
이 단계는 번역되지 않았습니다. 번역을 도와주십시오
-
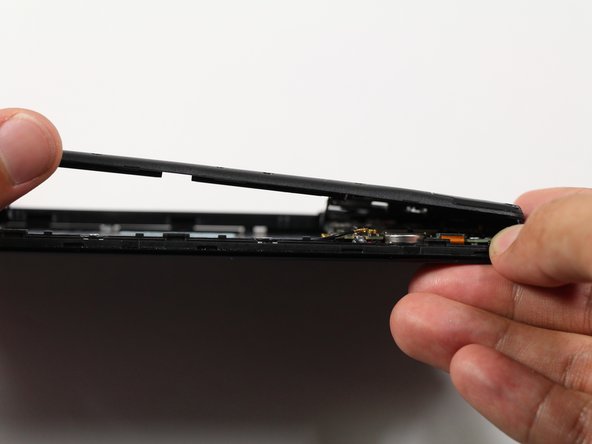
Insert a plastic opening into the seam between the midframe and the bottom frame of the phone.
-
Run the plastic opening tool along the seam.
-
Pry up the midframe with the plastic opening tool.
-
Once the midframe has been sufficiently lifted with the tool, place a hand underneath the edge to lift the entire component out of the frame.
-
-
이 단계는 번역되지 않았습니다. 번역을 도와주십시오
-
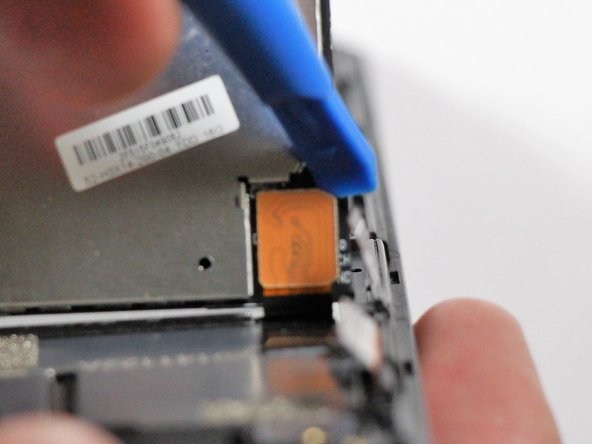
Use tweezers to lift the retaining flap of the zero insertion force (ZIF) connector to the upright position.
-
Use tweezers to pull the ribbon cable out of the ZIF connector.
-
Remove the front-facing camera from the motherboard.
-
-
-
이 단계는 번역되지 않았습니다. 번역을 도와주십시오
-
Disconnect the rear-facing camera from the motherboard by pulling out the press-fit connector to its left.
-
-
이 단계는 번역되지 않았습니다. 번역을 도와주십시오
-
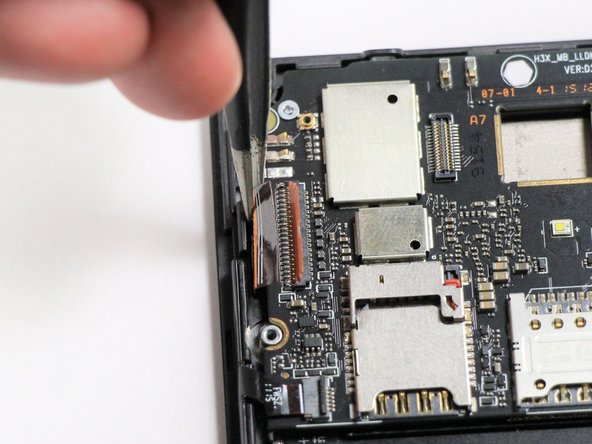
Use tweezers to lift the retaining flap on the ZIF connector to the upright position.
-
Pull the ribbon cable out of the connector by pulling to the left.
-
Repeat these steps for the other two ZIF connectors.
-
-
이 단계는 번역되지 않았습니다. 번역을 도와주십시오
-
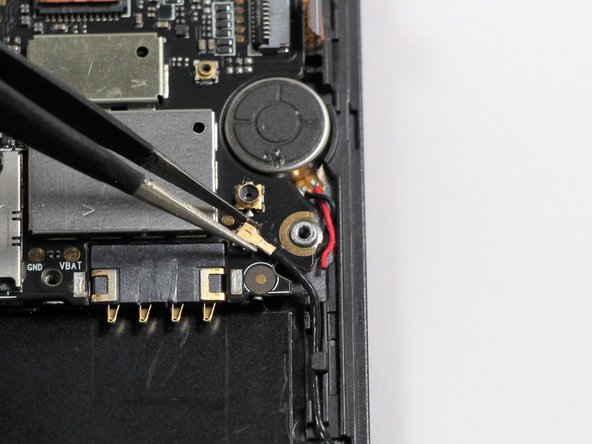
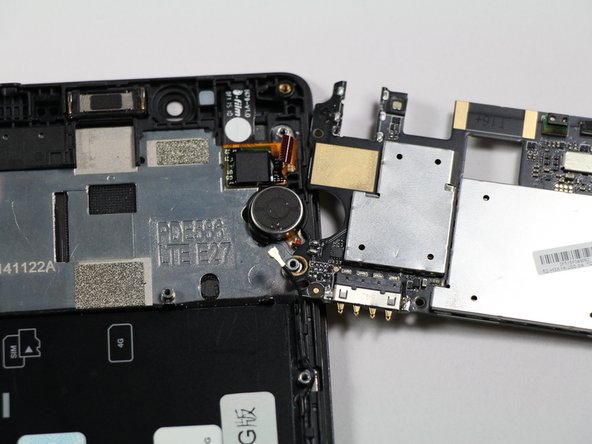
Locate the antenna cable on the bottom right of the motherboard and use tweezers to lift the cable off of the motherboard.
-
-
이 단계는 번역되지 않았습니다. 번역을 도와주십시오
-
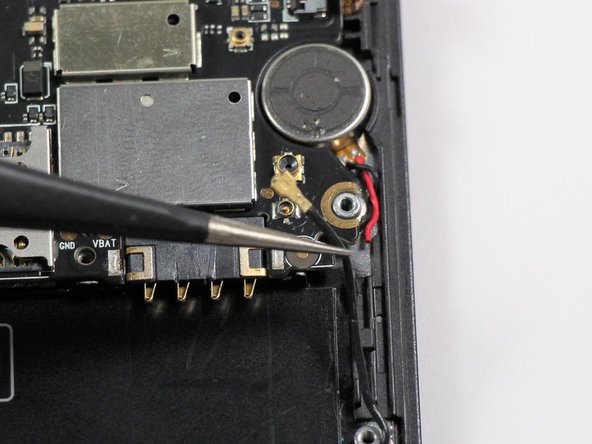
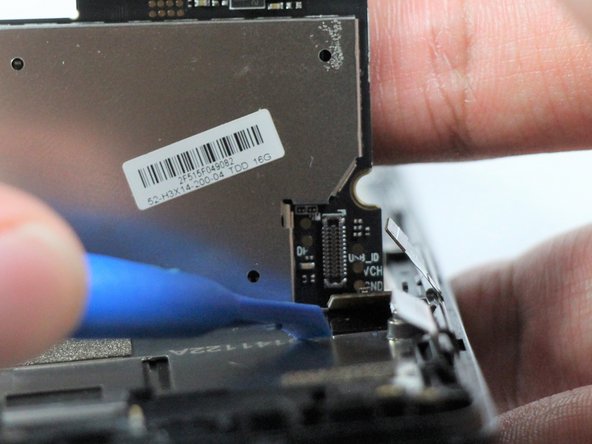
Flip over the motherboard to reveal the back.
-
Use a plastic opening tool to pry off the snap fit connector, located on the bottom right off of the motherboard.
-
-
이 단계는 번역되지 않았습니다. 번역을 도와주십시오
-
Lift up the motherboard and turn it over to place it by the side of the phone.
-
-
이 단계는 번역되지 않았습니다. 번역을 도와주십시오
-
Flip over the motherboard and locate the headphone jack at the top left corner.
-
Desolder the 6 soldered connections on the sides of the headphone jack from the motherboard.
-


다른 7명이 해당 안내서를 완성하였습니다.
팀

Cal Poly, Team S22-G4, Livingston Spring 2017 Cal Poly, Team S22-G4, Livingston Spring 2017 회원
CPSU-LIVINGSTON-S17S22G4
4 회원들
안내서 16개 작성하였습니다
댓글 6개
You have mentioned it in detailed, but can you mentioned the actual way or sequence of soldering six legs of the jack?
Can you mention the part number of redmi note headphone jack?
link where the jack will be available.
I want to buy head phone jack, where the jack will
You can visit iSparehub.com
Hey, hast du eine Ahnung, wo man eine Kopfhörerbuchse als Ersatzteil für ein Xiaomi Redmi Note 5 Global herbekommt? Das wäre klasse.
Redmi note 4 earphone jack replacement Ka price Kya hai