주요 콘텐츠로 건너뛰기

ZTE Max XL Display Replacement

필요한 것

  1. ZTE Max XL Display Replacement, Display: 1 단계, 이미지 1/2 ZTE Max XL Display Replacement, Display: 1 단계, 이미지 2/2
    • Before disassembly, assure the phone is powered off.

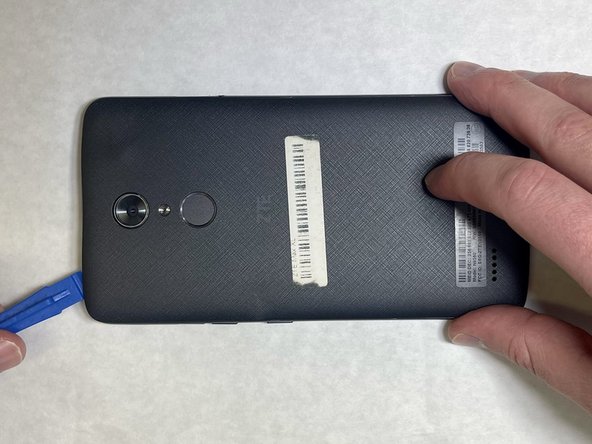
    • Use the SIM Card remover key, remove the SIM Card tray. To do this insert the key into the hole on the side of the phone near the SIM Card tray.

  2. ZTE Max XL Display Replacement: 2 단계, 이미지 1/1
    • Apply the iOpener to the back of the phone. For instructions on how to use the iOpener, use this guide

    • On our phone there was adhesive on the top and bottom of the phone backing, so we specifically heated these areas.

    • Do not heat the phone too much in one area - it may warp the plastic backing.

  3. ZTE Max XL Display Replacement: 3 단계, 이미지 1/3 ZTE Max XL Display Replacement: 3 단계, 이미지 2/3 ZTE Max XL Display Replacement: 3 단계, 이미지 3/3
    • Starting at one corner, wedge a plastic opening pick or tool underneath the plastic backing to start undoing the tabs that connect the backing to the phone.

    • There are 3 tabs on top and bottom and 6 on each side.

  4. ZTE Max XL Display Replacement: 4 단계, 이미지 1/2 ZTE Max XL Display Replacement: 4 단계, 이미지 2/2
    • Remove the two 3.4 mm JIS #00 screws that hold the cable in place—one may be under a lock sticker.

  5. ZTE Max XL Display Replacement: 5 단계, 이미지 1/1
    • Use a nylon spudger to lift the press-fit connector and free the ribbon cable from the main part of the phone.

  6. ZTE Max XL Display Replacement: 6 단계, 이미지 1/1
    • Remove all nineteen 3.4 mm JIS #00 screws from the perimeter of the back.

  7. ZTE Max XL Display Replacement: 7 단계, 이미지 1/1
    • Use an opening tool between the screen and side trim battery cover to remove the screen.

  8. ZTE Max XL Display Replacement: 8 단계, 이미지 1/2 ZTE Max XL Display Replacement: 8 단계, 이미지 2/2
    • Use a nylon spudger to carefully lift the 6 press-fit connections free from the motherboard.

  9. ZTE Max XL Display Replacement: 9 단계, 이미지 1/2 ZTE Max XL Display Replacement: 9 단계, 이미지 2/2
    이 단계에 사용된 도구:
    Plastic Cards
    $2.99
    구매
    • Using the iFixit opening tools carefully pry the edge of the battery away from the casing.

    • Do not bend or puncture the battery during this process.

    • If the battery does not lift away freely, use careful amounts of isopropyl alcohol to help soften the adhesive. Gently work a thin opening pick or plastic card along the underside of the battery, pushing the card through the adhesive while lifting the battery free.

  10. ZTE Max XL Display Replacement: 10 단계, 이미지 1/1
    • After taking off the battery and disconnecting all the metal tabs underneath, using the iOPener to break the adhesive between the display and the circuit.

    • Do not heat the phone too much in one area

  11. ZTE Max XL Display Replacement: 11 단계, 이미지 1/2 ZTE Max XL Display Replacement: 11 단계, 이미지 2/2
    • Use the plastic opening pick in the iFixit kit to wedge between the display and circuit.

    • Be sure not to damage the wire connecting the display to the circuit.

    • Replace the display and resemble the device following the reverse order

결론

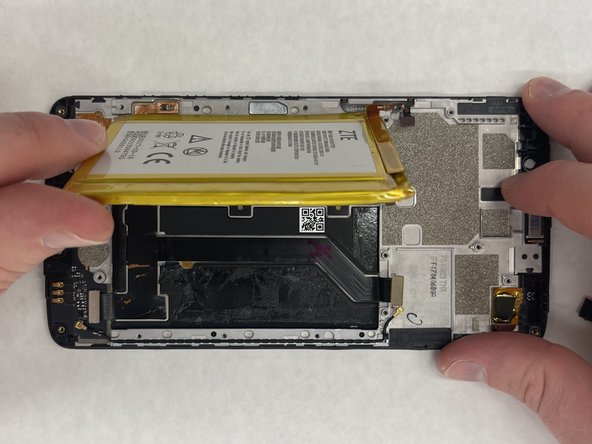
To reassemble your device, follow these instructions in reverse order.

다른 4명이 해당 안내서를 완성하였습니다.

Isaac Ssaku

회원 가입일: 04/11/22

293 평판

안내서 1개 작성함

IUPUI, Team 1-2, Harley Spring 2022 IUPUI, Team 1-2, Harley Spring 2022 회원

IUPUI-HARLEY-S22S1G2

4 회원들

안내서 3개 작성하였습니다

댓글 0개

댓글 쓰기

조회 통계:

24 시간 전: 0

7일 전: 0

30일 전: 1

전체 시간: 127