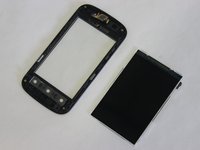
주요 콘텐츠로 건너뛰기

ZTE Whirl 2 Screen Replacement

필요한 것

  1. ZTE Whirl 2 Screen Replacement, Battery: 1 단계, 이미지 1/3 ZTE Whirl 2 Screen Replacement, Battery: 1 단계, 이미지 2/3 ZTE Whirl 2 Screen Replacement, Battery: 1 단계, 이미지 3/3
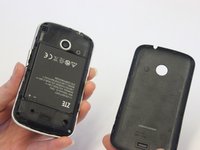
    • Power off your phone before removing the battery.

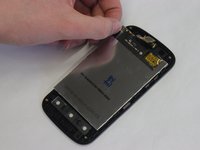
    • Pry the cover off the back of the phone using your fingers.

  2. ZTE Whirl 2 Screen Replacement: 2 단계, 이미지 1/3 ZTE Whirl 2 Screen Replacement: 2 단계, 이미지 2/3 ZTE Whirl 2 Screen Replacement: 2 단계, 이미지 3/3
    • Pry the battery from the phone using your fingers.

  3. ZTE Whirl 2 Screen Replacement, Back Panel: 3 단계, 이미지 1/3 ZTE Whirl 2 Screen Replacement, Back Panel: 3 단계, 이미지 2/3 ZTE Whirl 2 Screen Replacement, Back Panel: 3 단계, 이미지 3/3
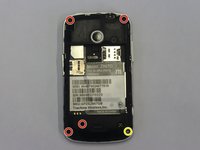
    • Remove four 4 mm screws using a Phillips #00 screwdriver.

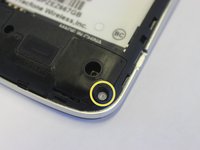
    • Use a tweezers to remove the lock sticker from the bottom right screw. Remove the 4 mm screw using a Phillips #00 screwdriver.

  4. ZTE Whirl 2 Screen Replacement: 4 단계, 이미지 1/3 ZTE Whirl 2 Screen Replacement: 4 단계, 이미지 2/3 ZTE Whirl 2 Screen Replacement: 4 단계, 이미지 3/3
    • Insert an opening pick between the midframe and the digitizer.

    • Move the pick around the midframe to detach the midframe from the digitizer.

    • The lock button and volume buttons may fall out during this process.

  5. ZTE Whirl 2 Screen Replacement: 5 단계, 이미지 1/1
    • Remove the midframe from the digitizer.

  6. ZTE Whirl 2 Screen Replacement, Screen: 6 단계, 이미지 1/2 ZTE Whirl 2 Screen Replacement, Screen: 6 단계, 이미지 2/2
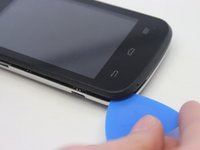
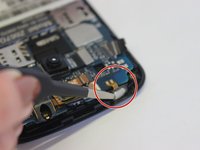
    • Use tweezers to pull the lock button and volume stickers out from the side panels.

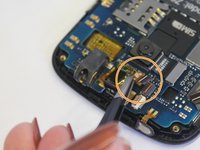
    • Use the iFixit Opening Tool to unlock the ribbon connector above the camera. Pull the ribbon from the connector.

  7. ZTE Whirl 2 Screen Replacement: 7 단계, 이미지 1/1
    • Use a spudger tool to unlock the screen ribbon cable.

    • Pull the ribbon cable from the connecter with a pair of tweezers.

  8. ZTE Whirl 2 Screen Replacement: 8 단계, 이미지 1/3 ZTE Whirl 2 Screen Replacement: 8 단계, 이미지 2/3 ZTE Whirl 2 Screen Replacement: 8 단계, 이미지 3/3
    • Remove the motherboard to access the screen. Lift the screen away from the front cover and replace.

결론

To reassemble your device, follow these instructions in reverse order.

Molli Reeder

회원 가입일: 02/04/20

97 평판

안내서 1개 작성함

UW Stout, Team S1-G1, Schneider-Bateman Spring 2020 UW Stout, Team S1-G1, Schneider-Bateman Spring 2020 회원

UWSTOUT-SCHNEIDER-BATEMAN-S20S1G1

3 회원들

안내서 10개 작성하였습니다

댓글 0개

댓글 쓰기

조회 통계:

24 시간 전: 0

7일 전: 0

30일 전: 0

전체 시간: 85