소개
Use this guide to learn how to replace the glitching or shattered LCD screen of your Zeki TBQG884B.
Electronics are a big part of our lives and when they break it can be a great inconvenience. An LCD screen can stop working for many reasons such as the device's old age, overheating, or impact damage. A screen that isn't working properly means the potential loss of important information like passwords, class notes, or childhood pictures.
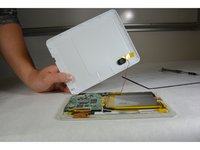
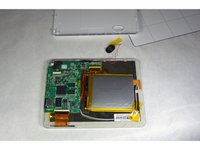
As a note of precaution, please be aware that the LCD screen is connected directly to the motherboard and assembled with the front frame. Remember to carefully follow the instructions so as to not damage your device as a whole.
This guide requires soldering, please visit the How To Solder and Desolder Connections guide for more information and advice.
Look at the teardown guide for instructions on general disassembly.
필요한 것
-
-
Remove the two screws from the end of the device where the ports are located using a Phillips #1 screwdriver.
-
-
-
-
Use an opening tool to detach the clip between the front frame, and the metal loader.
-


To reassemble your device, follow these instructions in reverse order.
다른 2명이 해당 안내서를 완성하였습니다.
팀

IUPUI, Team 1-3, Harley Fall 2015 IUPUI, Team 1-3, Harley Fall 2015 회원
IUPUI-HARLEY-F15S1G3
5 회원들
안내서 5개를 작성함