주요 콘텐츠로 건너뛰기

bObi Robotic Vacuum Power Switch Replacement

필요한 것

  1. bObi Robotic Vacuum Power Switch Replacement, Top Cover: 1 단계, 이미지 1/2 bObi Robotic Vacuum Power Switch Replacement, Top Cover: 1 단계, 이미지 2/2
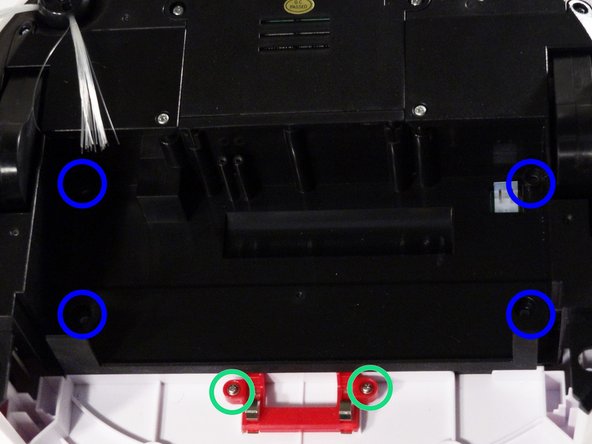
    • Remove bObi’s front wheel to access one of the screws holding bObi together.

    • Make sure the wheel is turned closer to bObi's front touch sensors. Use your screwdriver for leverage, and the wheel will pop up and out.

    • Uninstall the larger screw that sits deeper in the wheel compartment.

  2. bObi Robotic Vacuum Power Switch Replacement: 2 단계, 이미지 1/3 bObi Robotic Vacuum Power Switch Replacement: 2 단계, 이미지 2/3 bObi Robotic Vacuum Power Switch Replacement: 2 단계, 이미지 3/3
    • Remove bObi's dustbin.

    • Uninstall the 2 screws close to the bin and 2 smaller screws above her main brushes.

  3. bObi Robotic Vacuum Power Switch Replacement: 3 단계, 이미지 1/3 bObi Robotic Vacuum Power Switch Replacement: 3 단계, 이미지 2/3 bObi Robotic Vacuum Power Switch Replacement: 3 단계, 이미지 3/3
    • Lift the brush holder. To detach completely, unplug it from bObi.

    • Remove the two screws on the dustbin contact point holder inside bObi.

    • There are 4 screws beneath the main brushes. Uninstall these, and open bObi up to expose her main circuit board.

  4. bObi Robotic Vacuum Power Switch Replacement: 4 단계, 이미지 1/3 bObi Robotic Vacuum Power Switch Replacement: 4 단계, 이미지 2/3 bObi Robotic Vacuum Power Switch Replacement: 4 단계, 이미지 3/3
    • Detach the two circuit plugs connecting bObi's cover to the main board and the cover will be completely removed.

  5. bObi Robotic Vacuum Power Switch Replacement, Power Switch: 5 단계, 이미지 1/3 bObi Robotic Vacuum Power Switch Replacement, Power Switch: 5 단계, 이미지 2/3 bObi Robotic Vacuum Power Switch Replacement, Power Switch: 5 단계, 이미지 3/3
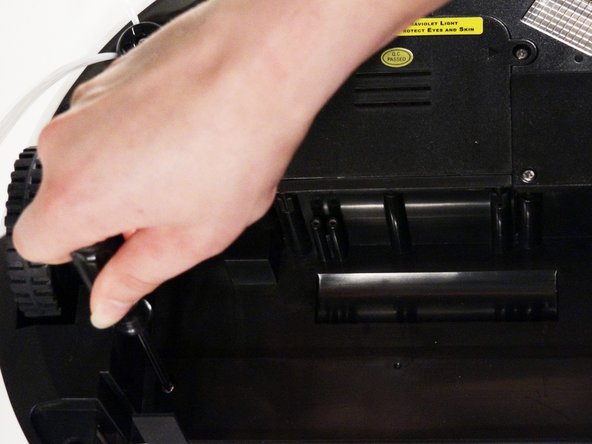
    • Slide the power switch up and out of its holder.

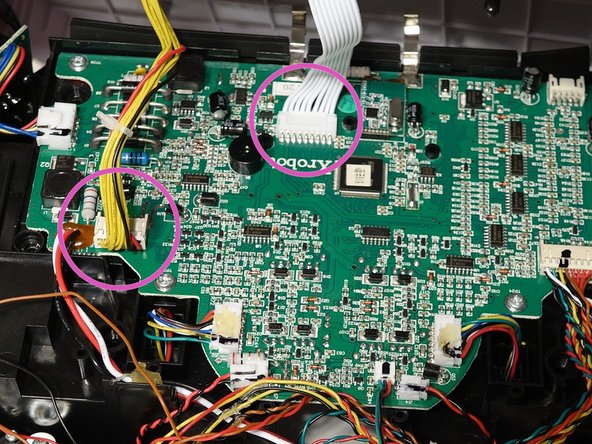
    • Unplug its wires from the main board.

  6. bObi Robotic Vacuum Power Switch Replacement: 6 단계, 이미지 1/3 bObi Robotic Vacuum Power Switch Replacement: 6 단계, 이미지 2/3 bObi Robotic Vacuum Power Switch Replacement: 6 단계, 이미지 3/3
    • Slide the new power switch into the holders on bObi.

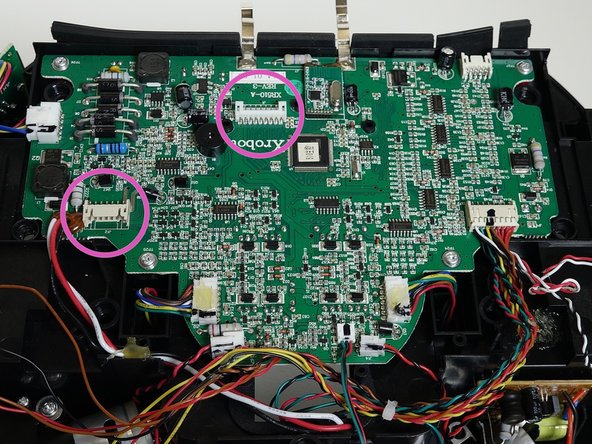
    • Plug it in to the main board and begin closing bObi up. For steps on how to close bObi, see Closing bObi's Cover Post-Repair

결론

To reassemble your device, follow the guide on closing bObi Closing bObi's Cover Post-Repair

Chelsea

회원 가입일: 09/24/14

2,278 평판

안내서 31개 작성하였습니다

댓글 0개

댓글 쓰기

조회 통계:

24 시간 전: 0

7일 전: 0

30일 전: 9

전체 시간: 291