주요 콘텐츠로 건너뛰기

Hp Pavilion dv6-2155dx Audio Jack Replacement

3 단계
Hp Pavilion dv6-2155dx Audio Jack  Replacement: 0 단계, 이미지 3개 중 1개 Hp Pavilion dv6-2155dx Audio Jack  Replacement: 0 단계, 이미지 3개 중 2개 Hp Pavilion dv6-2155dx Audio Jack  Replacement: 0 단계, 이미지 3개 중 3개
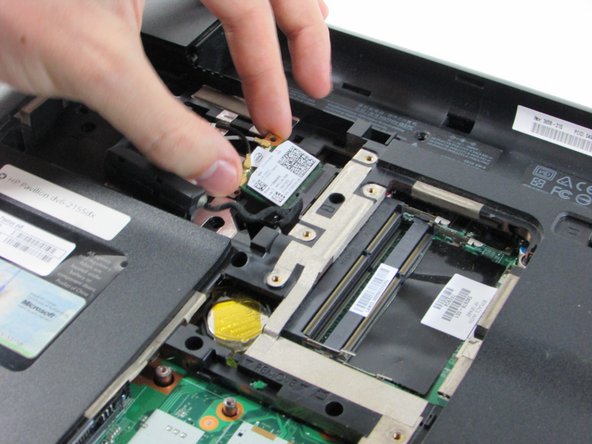
  • Locate the WLAN module located in the hard drive panel and remove the single silver screw holding the WLAN module.

  • The silver screw is 4mm long and the head is 4mm wide.

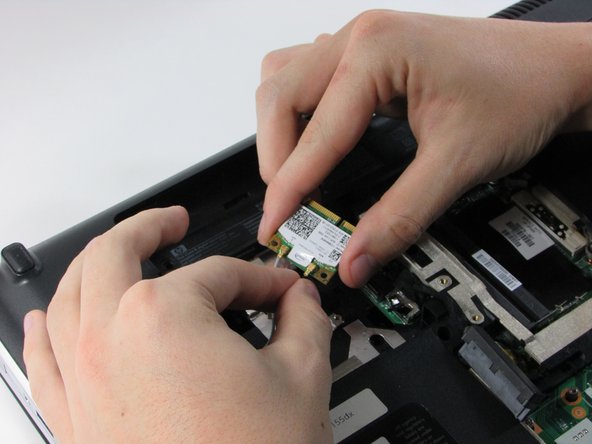
  • After screw is removed, gently disconnect the WLAN module using your thumb and index finger from the connector.

  • Disconnect the two WLAN antenna cables (white and black) attached to the WLAN module by gently lifting and holding onto the gold base.

  • The wires are numbered as "1" and "2". When reconnecting, connect the designated location notated by "J1" and "J2" on the module.

여기에 번역 삽입

여기에 번역 삽입

여기에 번역 삽입

여기에 번역 삽입

여기에 번역 삽입

귀하의 기여는 오픈 소스 Createive Commons 라이선스 하에 허가되었습니다.