주요 콘텐츠로 건너뛰기

iBook G4 14" 1.42 GHz Display Replacement

필요한 것

  1. iBook G4 14" 1.42 GHz Display Replacement, Battery: 1 단계, 이미지 1/2 iBook G4 14" 1.42 GHz Display Replacement, Battery: 1 단계, 이미지 2/2
    • Use a coin to rotate the battery locking screw 90 degrees clockwise.

    • Lift the battery out of the computer.

  2. iBook G4 14" 1.42 GHz Display Replacement, Keyboard: 2 단계, 이미지 1/1
    • Pull the keyboard release tabs (shown in yellow) toward you and lift up on the keyboard until it pops free.

    • If the keyboard does not come free, use a small flathead screwdriver to turn the keyboard locking screw (shown in orange) 180 degrees in either direction and try again.

    • Flip the keyboard over, away from the screen, and rest it face-down on the trackpad area.

  3. iBook G4 14" 1.42 GHz Display Replacement: 3 단계, 이미지 1/1
    • Loosen the four silver Phillips screws that secure the RAM shield.

    • These screws will not come out all the way. The screws are held captive to the RAM shield to prevent them from getting lost.

  4. iBook G4 14" 1.42 GHz Display Replacement: 4 단계, 이미지 1/1
    • Remove the RAM shield from the computer.

    • The four captive screws will come out with the RAM shield.

  5. iBook G4 14" 1.42 GHz Display Replacement: 5 단계, 이미지 1/1
    • Pull the keyboard cable up from the logic board, holding the cable as close to the connector as possible.

    • When reassembling your iBook, make sure that you reconnect the keyboard cable before replacing the RAM shield.

  6. iBook G4 14" 1.42 GHz Display Replacement, Lower Case: 6 단계, 이미지 1/1
    • Close the display and flip the computer over.

    • Remove the three hex screws using a T8 Torx screwdriver.

    • The shorter screw is in the center.

  7. iBook G4 14" 1.42 GHz Display Replacement: 7 단계, 이미지 1/1
    • Use a spudger or small flathead screwdriver to remove the three rubber feet from the lower case.

  8. iBook G4 14" 1.42 GHz Display Replacement: 8 단계, 이미지 1/1
    • Remove the three newly-revealed Phillips screws.

    • One screw is underneath each bumper (three total).

  9. iBook G4 14" 1.42 GHz Display Replacement: 9 단계, 이미지 1/1
    • Use a spudger or small flathead screwdriver to pry up the three metal rings that housed the rubber bumpers.

  10. iBook G4 14" 1.42 GHz Display Replacement: 10 단계, 이미지 1/1
    • Remove the two Phillips screws on either side of the battery contacts.

  11. iBook G4 14" 1.42 GHz Display Replacement: 11 단계, 이미지 1/1
    • Breathe deeply. Trying times are ahead, but we promise the lower case does come off.

    • Push in the thin rims of the lower case surrounding the battery compartment, bending them past the tabs, and then lift up to free that corner of the lower case.

  12. iBook G4 14" 1.42 GHz Display Replacement: 12 단계, 이미지 1/1
    • There is a slot on the wall of the battery compartment that locks the lower case in place. Use a small flathead screwdriver to pry out the slot's lower rim and pull up on the lower case to free the slot from the tabs holding it.

  13. iBook G4 14" 1.42 GHz Display Replacement: 13 단계, 이미지 1/1
    • Run a spudger along the seam between the lower case and upper case on the front of the computer to free the tabs locking the lower case. Pull up on the lower case and continue to use the spudger as necessary until you hear three distinct clicks.

  14. iBook G4 14" 1.42 GHz Display Replacement: 14 단계, 이미지 1/1
    • Continue to run the spudger around the front, right corner. There are two tabs on the port side of the computer, one near the front corner and one near the sound-out port.

  15. iBook G4 14" 1.42 GHz Display Replacement: 15 단계, 이미지 1/1
    • There are three tabs over the optical drive that must be released before the lower case can come off. Slide the spudger into the lower case above the optical drive and run it toward the back of the computer until you hear three distinct clicks.

  16. iBook G4 14" 1.42 GHz Display Replacement: 16 단계, 이미지 1/1
    • The front and sides of the lower case are now free.

    • Turn the computer so that the back is facing you and pull the lower case up and toward you until the back tabs pop free.

    • It may be helpful to jiggle the case up and down.

  17. iBook G4 14" 1.42 GHz Display Replacement: 17 단계, 이미지 1/1
    • Remove the small greasy springs with white plastic caps from either side of the battery contacts.

  18. iBook G4 14" 1.42 GHz Display Replacement, Bottom Shield: 18 단계, 이미지 1/1
    • Remove the following 10 screws from the bottom shield:

    • Six 3 mm Phillips

    • Three 7.5 mm Phillips

    • One 14 mm Phillips

  19. iBook G4 14" 1.42 GHz Display Replacement: 19 단계, 이미지 1/1
    • Lift the bottom shield off.

  20. iBook G4 14" 1.42 GHz Display Replacement, DC-In Board: 20 단계, 이미지 1/1
    • Remove the single Phillips screw securing the DC-In board.

  21. iBook G4 14" 1.42 GHz Display Replacement: 21 단계, 이미지 1/1
    • Angle the DC-In board out of its compartment.

    • You may need to remove tape that secures the DC-In board cable to the case.

  22. iBook G4 14" 1.42 GHz Display Replacement: 22 단계, 이미지 1/1
    • Lift the DC-In cable from the adhesive attaching it to the logic board.

  23. iBook G4 14" 1.42 GHz Display Replacement: 23 단계, 이미지 1/1
    • Disconnect the DC-In cable from the logic board.

    • Wiggling the connector parallel to the surface of the logic board while applying slight tension may aid in removal.

  24. iBook G4 14" 1.42 GHz Display Replacement, Upper Case: 24 단계, 이미지 1/1
    • Remove the following 11 screws from the bottom of the computer:

    • Three 3 mm Phillips around the battery compartment.

    • Three 4.5 mm Phillips along the optical drive bezel. (a magnetic screwdriver may help to lift these screws out)

    • One 12 mm Phillips in the lower right corner.

    • Four 14.5 mm Phillips.

  25. iBook G4 14" 1.42 GHz Display Replacement: 25 단계, 이미지 1/1
    • We recommend placing the computer on a soft cloth from this point on to prevent damaging the logic board.

    • Turn over the computer and open it.

    • Remove the 3 Phillips screws from the edges of the keyboard area.

    • The shorter screw goes in the lower left corner. The left corner is indicated by a blue "L" in the photograph and is on the right side.

  26. iBook G4 14" 1.42 GHz Display Replacement: 26 단계, 이미지 1/1
    • Be especially careful while disconnecting the cables in the forthcoming steps. Never pull directly on the cables, but use a spudger to pry up the connector directly from its socket.

    • Lift the upper case and use a spudger or your finger to disconnect the trackpad connector hidden beneath the white plastic tab.

    • Be careful while lifting the upper case, as its tabs are still hanging on the metal frame.

  27. iBook G4 14" 1.42 GHz Display Replacement: 27 단계, 이미지 1/1
    • The sockets attached to the motherboards of most iBooks are very weak and easily broken. Use extreme caution when pulling connectors out of their sockets.

    • Lift the upper case enough to disconnect the blue and white power cable from the logic board. Using your fingernails, carefully pry the connector from its socket.

    • Carefully disconnect the multicolored speaker cable from the logic board in the same fashion.

  28. iBook G4 14" 1.42 GHz Display Replacement, Top Shield: 28 단계, 이미지 1/1
    • Remove the following 16 screws:

    • Thirteen 3 mm Phillips.

    • One 3 mm Phillips.

    • Two 4 mm Phillips.

    • During reassembly, be sure to fit the screw near the left hinge through the loop in the display data cable, securing the cable to the upper case.

  29. iBook G4 14" 1.42 GHz Display Replacement: 29 단계, 이미지 1/1
    • Lift the top shield up from the right side, minding the upper left corner which may catch on the metal framework.

  30. iBook G4 14" 1.42 GHz Display Replacement, Modem: 30 단계, 이미지 1/1
    • Remove the two Phillips screws at the corners of the modem.

    • Remove the two Phillips screws at the corners of the modem.

  31. iBook G4 14" 1.42 GHz Display Replacement: 31 단계, 이미지 1/2 iBook G4 14" 1.42 GHz Display Replacement: 31 단계, 이미지 2/2
    • Use a spudger to pry the modem up from the end nearest the AirPort card to separate its connector from a socket on the logic board.

    • Be sure to pry only against the heat sink or the metal framework.

    • Use your hands to seperate the modem from the modem shield.

  32. iBook G4 14" 1.42 GHz Display Replacement: 32 단계, 이미지 1/1
    • Disconnect the RJ-11 cable from the end of the modem.

    • When replacing the modem, first make sure that both the microphone and display data cables are routed beneath where the modem lies.

  33. iBook G4 14" 1.42 GHz Display Replacement, Display: 33 단계, 이미지 1/1
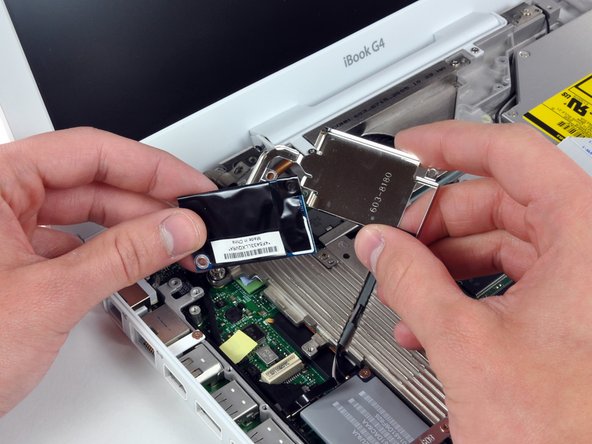
    • Remove the three 3 mm Phillips screws securing the AirPort card bracket to the framework.

    • Lift the AirPort card bracket up and out of the computer.

  34. iBook G4 14" 1.42 GHz Display Replacement: 34 단계, 이미지 1/1
    • Remove the two 3 mm Phillips screws securing the AirPort card to the logic board.

  35. iBook G4 14" 1.42 GHz Display Replacement: 35 단계, 이미지 1/1
    • Using a spudger, pry up on the AirPort card from the end nearest the hard drive to separate the connector from the logic board.

    • Be sure to pry only between the metal frame and the AirPort card.

  36. iBook G4 14" 1.42 GHz Display Replacement: 36 단계, 이미지 1/1
    • Use a spudger to disconnect the two antenna cables from the AirPort card.

    • Remove the AirPort card from the computer and set it aside.

  37. iBook G4 14" 1.42 GHz Display Replacement: 37 단계, 이미지 1/1
    • De-route the antenna wires from above the heat sink, around the RAM socket, and below the optical drive.

    • Optical drive removal is not necessary for this step.

  38. iBook G4 14" 1.42 GHz Display Replacement: 38 단계, 이미지 1/1
    • Turn the computer over.

    • Disconnect the inverter cable from the logic board and deroute it from the metal framework, removing tape as necessary.

  39. iBook G4 14" 1.42 GHz Display Replacement: 39 단계, 이미지 1/1
    • Turn the computer back over.

    • Use the black plastic loop to disconnect the display data cable from the logic board.

    • Deroute the microphone and display data cables from the metal framework, removing tape as necessary.

  40. iBook G4 14" 1.42 GHz Display Replacement: 40 단계, 이미지 1/1
    • The cable you're about to remove is very fragile - do not pull directly on the wires. Instead, try to pry up the connector directly, using a spudger or a small flathead screwdriver if necessary.

    • Disconnect the microphone cable at the front of the computer, between the left side of the hard drive and the metal framework.

    • Deroute the microphone and display data cables from the metal framework, removing tape as necessary.

  41. iBook G4 14" 1.42 GHz Display Replacement: 41 단계, 이미지 1/1
    • Support the display with one hand and remove the single Phillips screw on either side of the hinge (two screws total).

    • The screws go in the outer holes on each side (you can see the threads in the correct hole).

  42. iBook G4 14" 1.42 GHz Display Replacement: 42 단계, 이미지 1/1
    • Lift the display up and tilt it backwards, freeing it from the two metal alignment posts holding the hinges in place, and slide it away from you.

    • Be sure all cables connecting the display to the computer are free before completely removing the display.

결론

To reassemble your device, follow these instructions in reverse order.

다른 14명이 해당 안내서를 완성하였습니다.

첨부 문서

Walter Galan

693,685 평판

안내서 1,203개 작성하였습니다

댓글 2개

Smooth as silk Walter. I am changing this to try and address a Black screen problem. After a Optical Drive and HD (OWC Legacy SSD) my machine went from perfect to normal boot then 28-30 secs later, black screen while everything else worked (caps lock light, pulsing sleep light, etc.) Will let you know if this solved the prob as I have a screen harvested years ago from a working iBook of mine.

Thanks

DesertMac - 답글

Nothing yet Walter. The past couple of weeks I have dismantled my iBook 14” 1.42 and put it back together a half dozen times or so. I’ve bought parts off of ebay, harvested stuff from my spare iBook and I am certain of this... It still loads as normal as can be. Bright screen, sound, etc. but 38 secs from first desktop view and 28-30 secs after complete load it gets a black screen.

I’ve checked or replaced: RAM, Inverter cable, HD, different display, and more. I’ve tried rushing to the sys prefs and setting it to “no sleep.” I’ve quickly opened a song in Quicktime and it shuts off with the screen goes black.

Any other suggestions from anyone would be great. I really dig my iBook and it was working fine until I replaced the Optical drive (now gone) and at one point I started it up with only the aluminum shields on and it worked fine. Then, after putting the cases back together, nothing since.

DesertMac - 답글

댓글 쓰기

조회 통계:

24 시간 전: 0

7일 전: 4

30일 전: 8

전체 시간: 13,258