소개
Remove your front bezel to gain access to your iMac's internals.
필요한 것
-
-
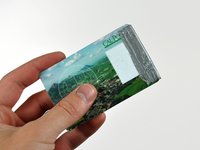
이 단계에 사용된 도구:Plastic Cards$2.99
-
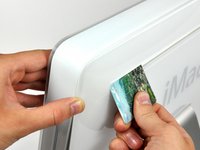
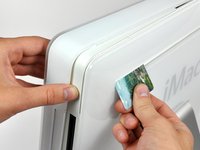
Insert a plastic card up into the corner of the air vent slot at the top of the rear case.
-
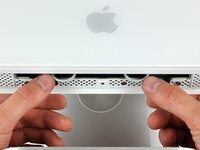
Push the card toward the top of the iMac to release the front bezel latch.
-
Pull the front bezel away from the rear case.
-
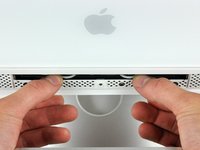
Repeat this process for the other side of the front bezel.
-


거의 끝나갑니다!
To reassemble your device, follow these instructions in reverse order.
결론
To reassemble your device, follow these instructions in reverse order.
