이 버전에는 잘못된 편집 사항이 있을 수 있습니다. 최신 확인된 스냅샷으로 전환하십시오.
필요한 것
-
이 단계는 번역되지 않았습니다. 번역을 도와주십시오
-
Remove the two 7 mm T10 Torx screws securing the optical drive clip to the logic board.
-
-
-
이 단계는 번역되지 않았습니다. 번역을 도와주십시오
-
Pull the optical drive thermal sensor cable connector away from its socket on the logic board.
-
-
이 단계는 번역되지 않았습니다. 번역을 도와주십시오
-
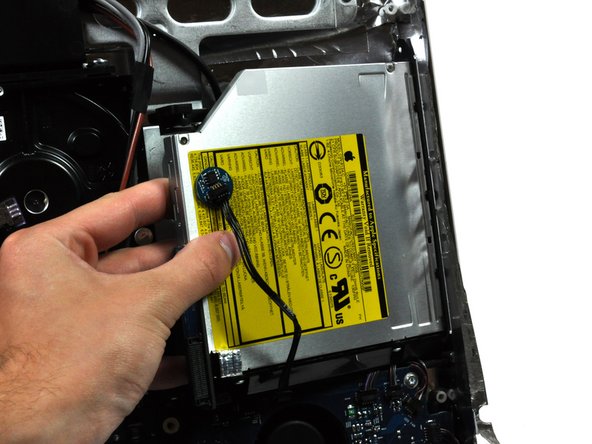
Squeeze the two optical drive bracket ears together while pulling the drive toward yourself.
-
Pull the optical drive away from the side of the rear panel and remove it from the iMac.
-


다른 한 분이 해당 안내서를 완성하였습니다.
