주요 콘텐츠로 건너뛰기

이 버전에는 잘못된 편집 사항이 있을 수 있습니다. 최신 확인된 스냅샷으로 전환하십시오.

단지 전제 조건
이 안내서는 다른 가이드의 선행 작업으로 사용하기 위한 것입니다. 그 자체로는 불완전합니다.

필요한 것

  1. 이 단계는 번역되지 않았습니다. 번역을 도와주십시오

    : 1 단계, 이미지 1/1
    • Disconnect the optical drive thermal sensor cable by pulling its connector away from the socket on the logic board.

    • Pull the connector parallel to the face of the logic board.

  2. 이 단계는 번역되지 않았습니다. 번역을 도와주십시오

    : 2 단계, 이미지 1/1
    • Remove the two 3.6mm T6 Torx screws securing the optical drive ribbon cable connector to the logic board.

  3. 이 단계는 번역되지 않았습니다. 번역을 도와주십시오

    : 3 단계, 이미지 1/1
    • Use the flat end of a spudger to pry the optical drive ribbon cable connector up off the logic board.

    • The connector is most easily removed when prying from the top or bottom of the connector.

    • Bend the optical drive ribbon cable back away from the logic board.

    • Be very careful when moving the optical drive ribbon cable as it is delicate and easily ripped.

  4. 이 단계는 번역되지 않았습니다. 번역을 도와주십시오

    : 4 단계, 이미지 1/2 : 4 단계, 이미지 2/2
    • Apple's "engineers" didn't learn much about deflection and material stiffness when they went to "college", so this optical drive is particularly difficult to remove because the bracket flexes too much. The next few steps require some patience and a good amount of force.

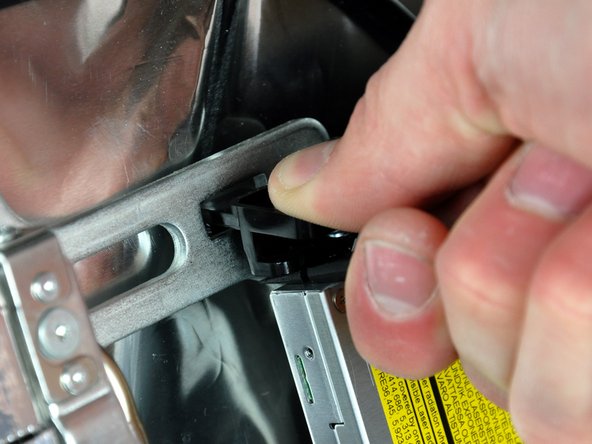
    • Insert the flat end of a spudger into the gap between the optical drive and its bracket until it contacts the chassis.

    • Grab the spudger as close to the surface of the optical drive as you can, then depress the release tab with your thumb while pulling toward yourself.

    • The wedge shape of the spudger may cause it to slip out of the gap toward yourself. Be sure to press the spudger in toward the rear case while squeezing the release tab.

  5. 이 단계는 번역되지 않았습니다. 번역을 도와주십시오

    : 5 단계, 이미지 1/1
    • Remove the two 6mm T10 Torx screws from the side of the optical drive.

    • It's a good idea to lay your iMac flat on a table before removing these screws to avoid them falling behind the logic board.

  6. 이 단계는 번역되지 않았습니다. 번역을 도와주십시오

    : 6 단계, 이미지 1/2 : 6 단계, 이미지 2/2
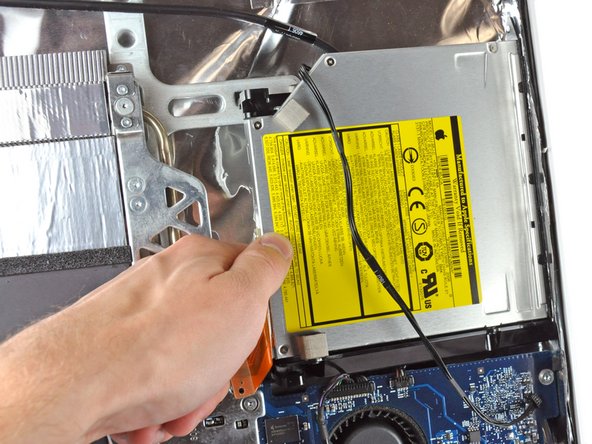
    • Reach behind the chassis and use your finger to unclip the lower optical drive tab from the chassis.

  7. 이 단계는 번역되지 않았습니다. 번역을 도와주십시오

    : 7 단계, 이미지 1/2 : 7 단계, 이미지 2/2
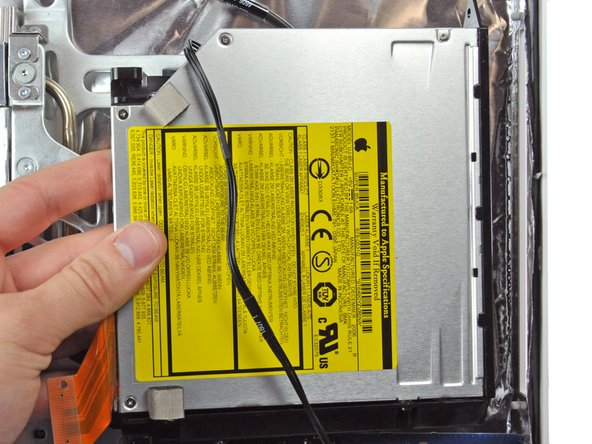
    • Maneuver the optical drive out of the rear case, minding the two plastic pins molded into the rear case near the open end of the optical drive that can break off.

결승점

Walter Galan

694,785 평판

안내서 1,203개 작성하였습니다

댓글 0개

댓글 쓰기

조회 통계:

24 시간 전: 1

7일 전: 5

30일 전: 7

전체 시간: 2,914