이 버전에는 잘못된 편집 사항이 있을 수 있습니다. 최신 확인된 스냅샷으로 전환하십시오.
필요한 것
-
이 단계는 번역되지 않았습니다. 번역을 도와주십시오
-
Remove the following five Phillips screws holding the lower support bracket in place:
-
Four 3.2 mm screws
-
One 1.7 mm screw
-
-
-
이 단계는 번역되지 않았습니다. 번역을 도와주십시오
-
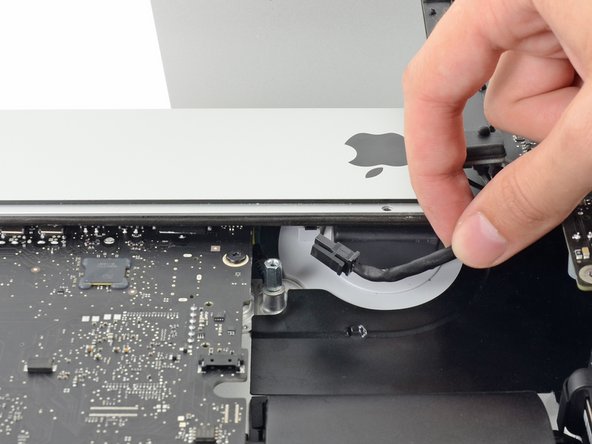
Use a spudger to loosen the right speaker cable's connector from its socket on the logic board.
-
Pull the connector downwards to remove it from its socket.
-
-
이 단계는 번역되지 않았습니다. 번역을 도와주십시오
-
Remove the two 10.0 mm T10 screws securing the right speaker to the rear enclosure.
-
-
이 단계는 번역되지 않았습니다. 번역을 도와주십시오
-
Pull the top of the right speaker away from the rear enclosure, about half an inch, to expose the antenna cable running down its right side.
-
-
이 단계는 번역되지 않았습니다. 번역을 도와주십시오
-
Insert the tip of a spudger between the right speaker and the antenna cable that is routed into the speaker's right side.
-
Run the spudger down along the right side of the speaker to pry the antenna cable from its channel in the right speaker.
-
-
이 단계는 번역되지 않았습니다. 번역을 도와주십시오
-
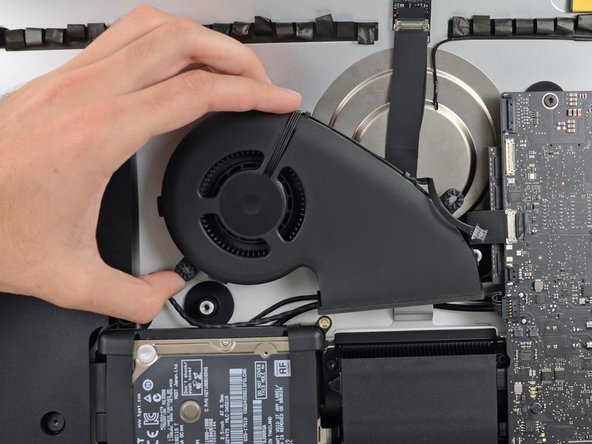
Pull the right speaker straight up about an inch, toward the top of the iMac.
-
Lift the right speaker straight up and remove it from the iMac. This may take some force, both hands and rocking the speaker right and left to get it out.
-
-
-
하드 드라이브 브래킷을 후면 엔클로저에 고정하는 다음 나사를 풀어주세요:
-
왼쪽 하드 드라이브 브래킷에서 21mm T10 Torx 나사 두 개.
-
9mm T10 Torx 나사 한 개.
-
27mm T10 Torx 나사 한 개.
-
-
이 단계는 번역되지 않았습니다. 번역을 도와주십시오
-
Use the tip of a spudger to push each side of the power button cable connector and gently "walk" it out of its socket.
-
-
이 단계는 번역되지 않았습니다. 번역을 도와주십시오
-
Gently push upward on each side of the power supply control cable connector with the tip of a spudger to gently "walk" it out of its socket.
-
-
이 단계는 번역되지 않았습니다. 번역을 도와주십시오
-
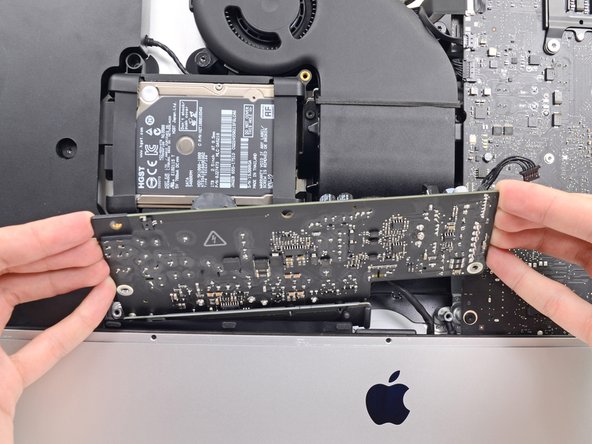
Remove the two 7.2 mm T10 screws securing the power supply to the rear enclosure.
-
-
이 단계는 번역되지 않았습니다. 번역을 도와주십시오
-
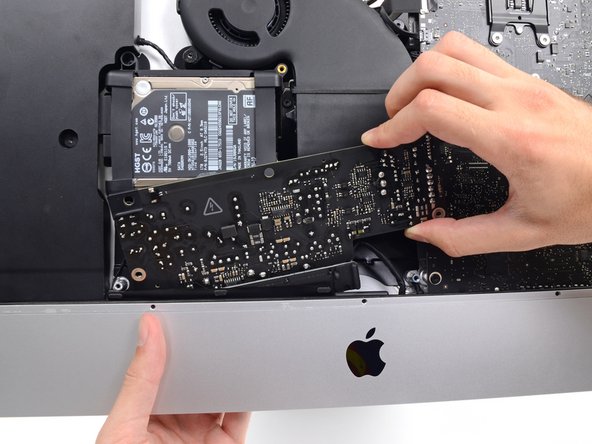
Pull the power supply slightly up and out from the rear enclosure.
-
Rotate the power supply counterclockwise, lifting the right side up about an inch higher than the left.
-
-
이 단계는 번역되지 않았습니다. 번역을 도와주십시오
-
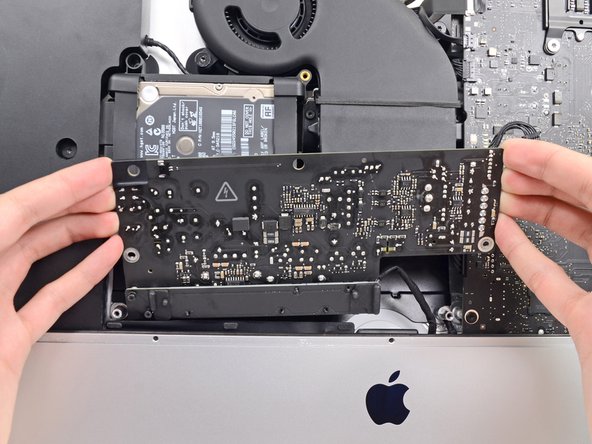
Slide the power supply to the right to clear the screw posts on the rear enclosure.
-
-
이 단계는 번역되지 않았습니다. 번역을 도와주십시오
-
Rock the power supply forward and remove it from its recess in the rear enclosure.
-
-
이 단계는 번역되지 않았습니다. 번역을 도와주십시오
-
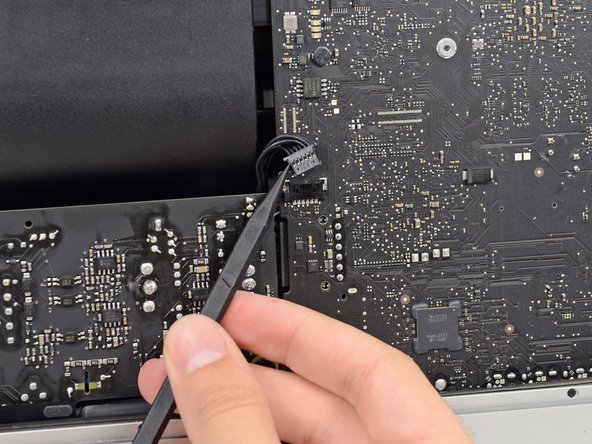
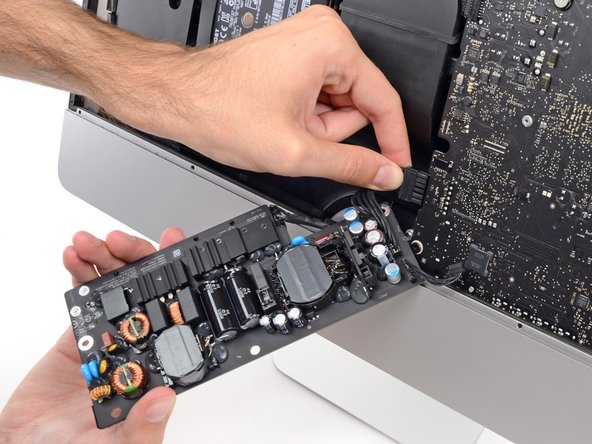
Squeeze the DC power cable connector tab and pull it straight out of its socket on the back of the logic board.
-
-
이 단계는 번역되지 않았습니다. 번역을 도와주십시오
-
Use the flat end of a spudger to push the clip on the side of the AC inlet cable connector inward.
-
While holding on the release clip with the spudger, grasp the AC inlet cable, and pull the connector straight out of its socket.
-
-
이 단계는 번역되지 않았습니다. 번역을 도와주십시오
-
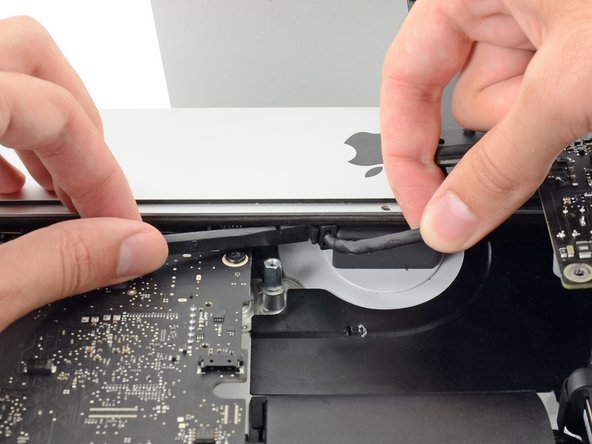
Gently pull the fan cable connector straight away from its socket on the logic board.
-
-
이 단계는 번역되지 않았습니다. 번역을 도와주십시오
-
Remove the three 12.3 mm T10 shoulder screws securing the fan to the rear enclosure.
-
-
이 단계는 번역되지 않았습니다. 번역을 도와주십시오
-
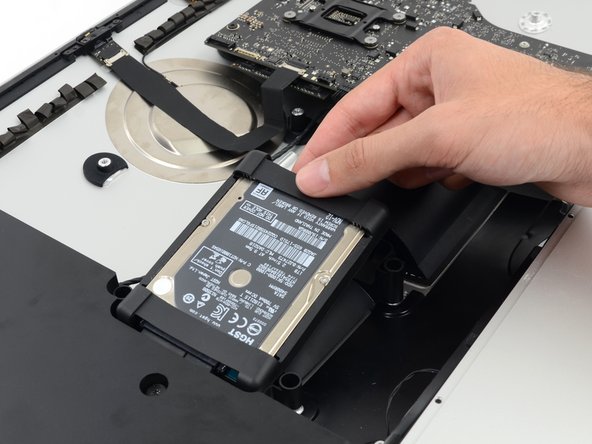
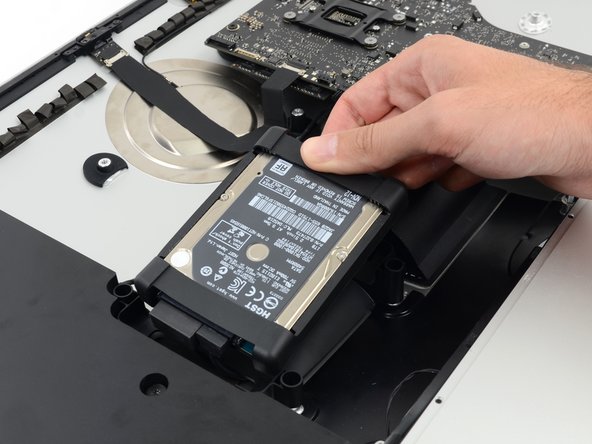
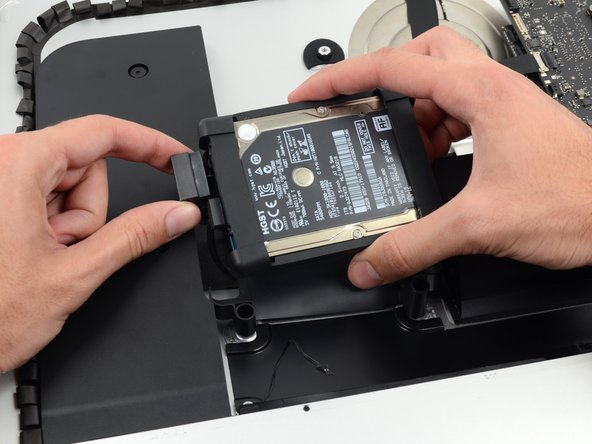
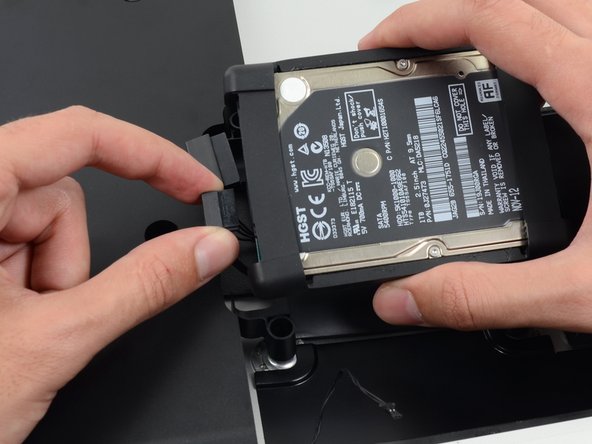
Lift the hard drive from the edge nearest the logic board and pull it slightly out of its recess.
-
-
이 단계는 번역되지 않았습니다. 번역을 도와주십시오
-
Remove the single 7.2 mm T10 screw securing the hard drive tray to the rear enclosure.
-
-
이 단계는 번역되지 않았습니다. 번역을 도와주십시오
-
Push on each side of the left speaker cable connector with the tip of a spudger and gently "walk" it out of its socket.
-
-
이 단계는 번역되지 않았습니다. 번역을 도와주십시오
-
De-route the left speaker cable by pulling it straight up out of the retaining clip in the back of the rear enclosure.
-
-
이 단계는 번역되지 않았습니다. 번역을 도와주십시오
-
In a similar fashion as the previous step, de-route the SATA data and power cables up out of the retaining clip.
-
-
이 단계는 번역되지 않았습니다. 번역을 도와주십시오
-
Use the flat edge of a spudger to flip up the metal retaining bracket on the iSight camera cable connector.
-
Pull the iSight camera cable straight out of its socket on the logic board.
-
-
이 단계는 번역되지 않았습니다. 번역을 도와주십시오
-
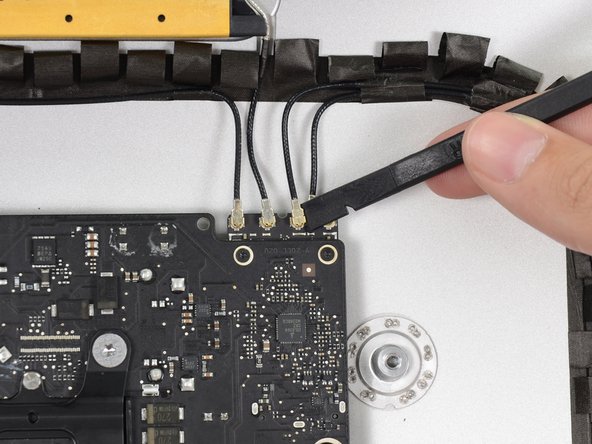
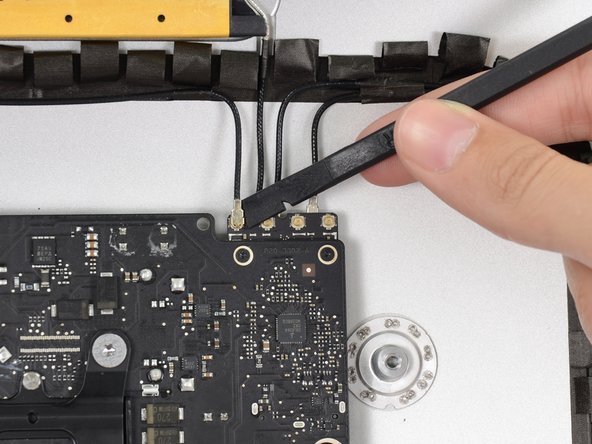
Use the flat edge of a spudger to disconnect each of the four antenna connectors from the AirPort/Bluetooth card.
-
-
이 단계는 번역되지 않았습니다. 번역을 도와주십시오
-
If brackets secure the four antenna cables, remove the two T5 Torx screws from the brackets.
-
-
이 단계는 번역되지 않았습니다. 번역을 도와주십시오
-
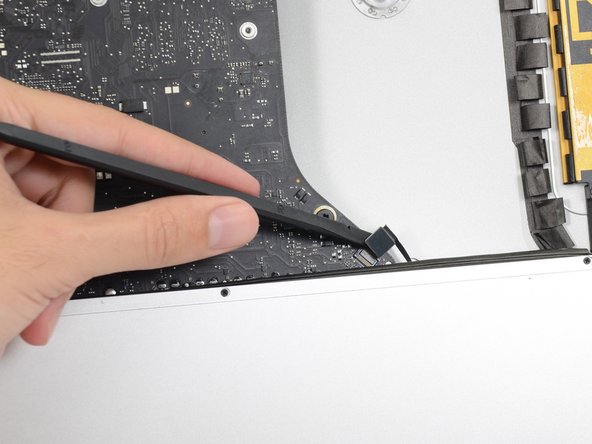
Use the flat edge of a spudger to pry the headphone jack cable connector from its socket on the logic board.
-
-
이 단계는 번역되지 않았습니다. 번역을 도와주십시오
-
Remove the following screws securing the exhaust duct to the rear enclosure:
-
Two 6.3 mm T8 screws
-
Two 4.7 mm T8 screws
-
-
이 단계는 번역되지 않았습니다. 번역을 도와주십시오
-
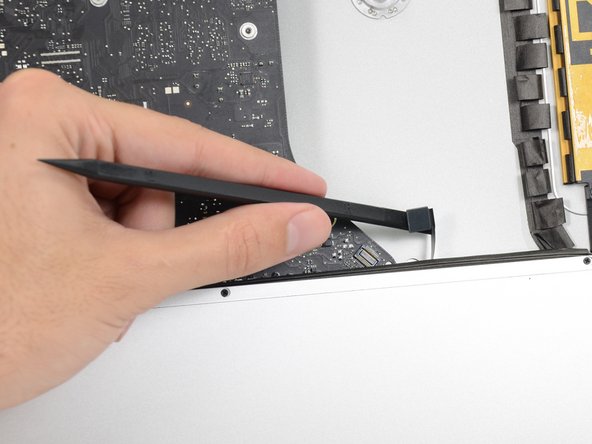
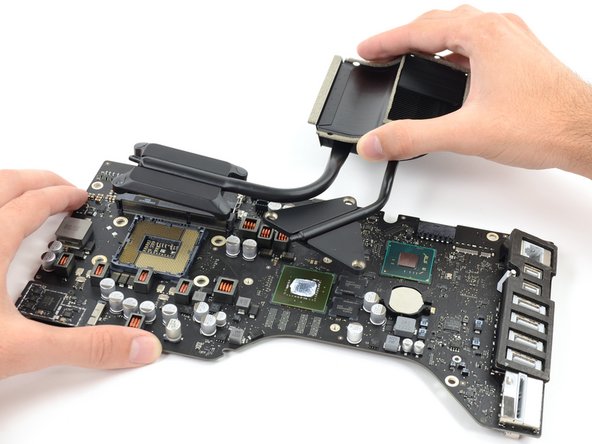
Remove the four 7.2 mm T10 screws securing the logic board to the rear enclosure.
-
-
이 단계는 번역되지 않았습니다. 번역을 도와주십시오
-
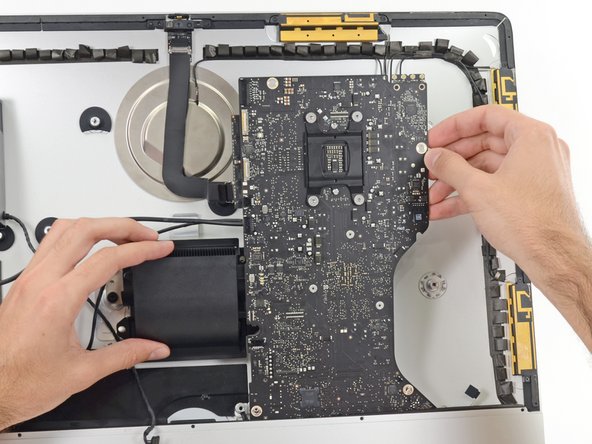
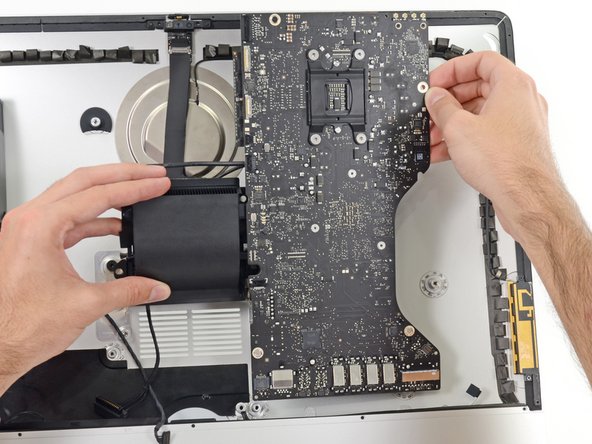
Tilt the top of the logic board away from the rear enclosure.
-
Lift the logic board straight up and out of the iMac.
-
-
이 단계는 번역되지 않았습니다. 번역을 도와주십시오
-
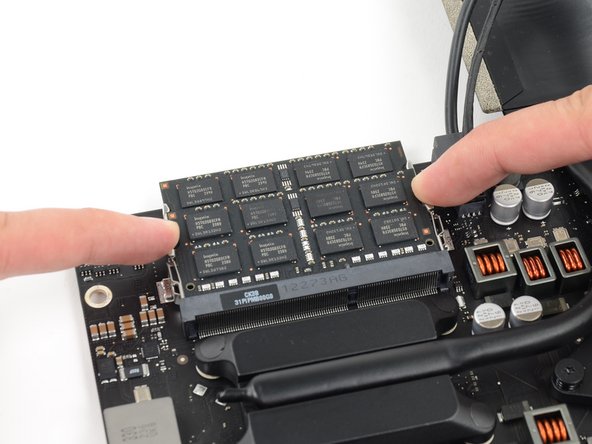
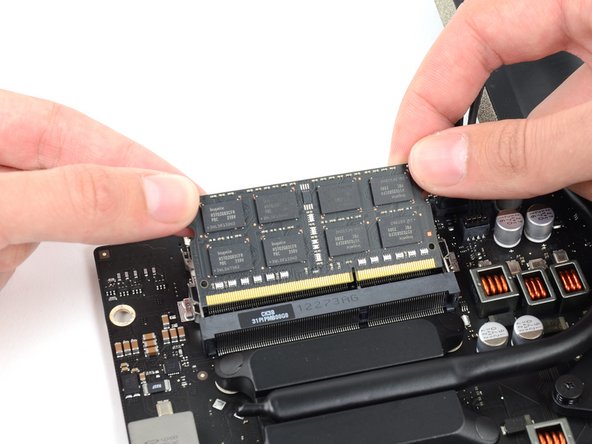
Release the tabs on each side of the RAM module by simultaneously pushing each tab away.
-
Grab the top left and right corners of the RAM module and carefully pull it straight out of its socket.
-
-
이 단계는 번역되지 않았습니다. 번역을 도와주십시오
-
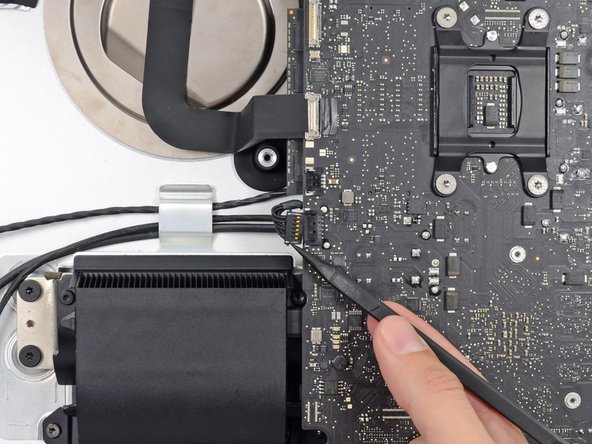
Disconnect and remove the SATA data and power cables from the logic board.
-
-
이 단계는 번역되지 않았습니다. 번역을 도와주십시오
-
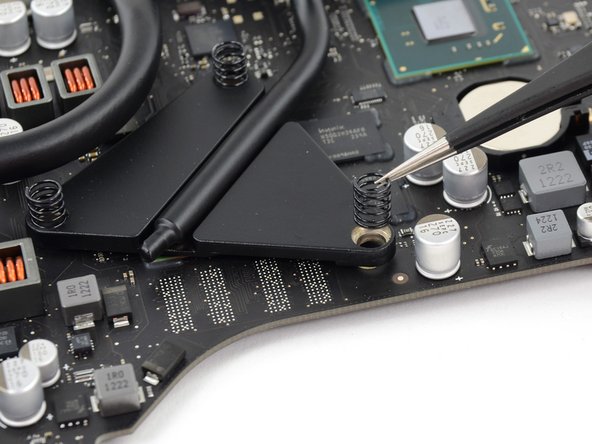
Remove the four 12 mm T10 shoulder screws from the spring plate behind the CPU.
-
-
이 단계는 번역되지 않았습니다. 번역을 도와주십시오
-
Remove the three 12 mm T8 Torx screws securing the GPU heat sink to the logic board.
-
Remove the three springs left behind.
-
-
이 단계는 번역되지 않았습니다. 번역을 도와주십시오
-
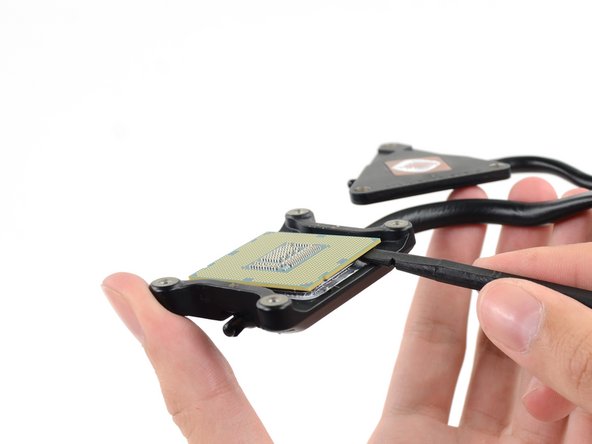
Insert the flat edge of a spudger between the CPU and heat sink.
-
Gently pry the CPU off the heat sink by slightly twisting the spudger upwards.
-
-
이 단계는 번역되지 않았습니다. 번역을 도와주십시오
-
Remove the CPU from the heat sink. Be careful not to touch the contacts.
-


다른 36명이 해당 안내서를 완성하였습니다.


댓글 10개
I just upgraded my 2544 base model iMac (2.7 i5, 8gb ram, 5400 rpm HDD) with all possible options: 3.1 i7 3770s CPU, 16gb ram and a Samsung EVO 850 SSD. The upgrades all worked perfectly, and were made possible for an amateur such as myself thanks to these amazingly detailed and well photographed instruction guides. I can't tell you how helpful they were to me, and just wanted to thank you and share my success. I am an amateur with no significant experience at all with computers, so I wanted to encourage anyone who is hesitant to get the right tools for the job and get to it! Thanks again!
Use Core i7-3770 3.4Ghz (70€ eBay ) (not 3770s) + HyperX Impact 16Gb 1833Mhz 70€ + SSD Samsung 1TB QVO (trim enable) 95€ - all good, without issue. Same TDP have i7 - 3770K iMAC 2012 now have same power as basic iMac 2019. I’m happy. https://browser.geekbench.com/v4/cpu/130...