이 버전에는 잘못된 편집 사항이 있을 수 있습니다. 최신 확인된 스냅샷으로 전환하십시오.
필요한 것
-
이 단계는 번역되지 않았습니다. 번역을 도와주십시오
-
If you are re-using your existing display, you must also remove the old adhesive from the back of the display.
-
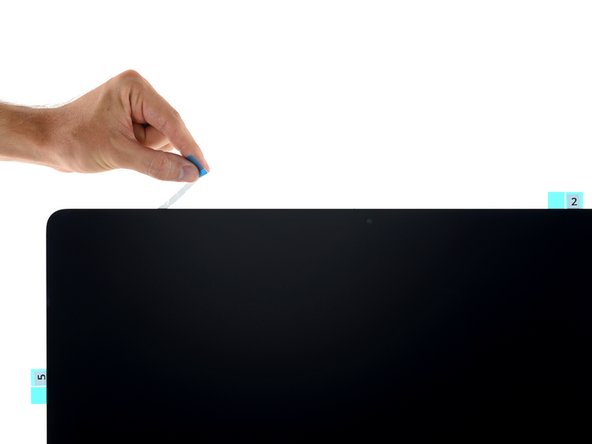
Peel off the old strips of adhesive using tweezers or your fingers. Start at the bottom and peel upward towards the top of the device.
-
After all the old adhesive is removed, carefully clean the area under the adhesive with 90% (or greater) isopropyl alcohol and a lint-free cloth. Wipe in one direction, not back and forth.
-
-
이 단계는 번역되지 않았습니다. 번역을 도와주십시오
-
Start with the strip labeled 3 (or 03), which goes on the right vertical side of the rear enclosure.
-
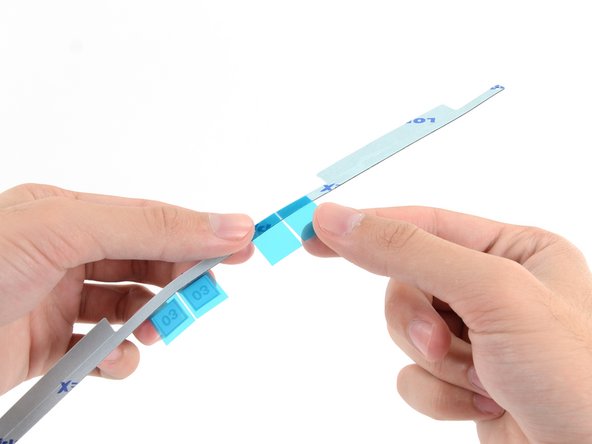
Peel the short piece of backing off the back of the strip.
-
-
이 단계는 번역되지 않았습니다. 번역을 도와주십시오
-
Insert the tip of a spudger into the hole at the end of the strip from the side that still has a backing on it.
-
-
이 단계는 번역되지 않았습니다. 번역을 도와주십시오
-
With the spudger still poking through the hole in the adhesive strip, push the spudger tip into the corresponding hole in the frame of the iMac.
-
Using the hole and spudger to anchor the position of the adhesive strip, line the strip up against the right edge, gently pulling up against the spudger to ensure the strip is taut, and stick it onto the frame.
-
-
이 단계는 번역되지 않았습니다. 번역을 도와주십시오
-
Once you've aligned the bottom half of the adhesive strip, peel the longer piece of backing out from behind the strip.
-
-
이 단계는 번역되지 않았습니다. 번역을 도와주십시오
-
Align the upper half of the strip with the right edge of the rear enclosure, and stick it down.
-
-
이 단계는 번역되지 않았습니다. 번역을 도와주십시오
-
Use your finger to smooth Strip 3 along the right edge. Make sure it is neatly aligned with the right side of the frame and that it sits flat.
-
-
-
이 단계는 번역되지 않았습니다. 번역을 도와주십시오
-
Work your way counter-clockwise around the perimeter of the iMac, adding three more adhesive strips in the same manner:
-
Strip 2 on the top right
-
Strip 1 on the top left
-
Strip 5 on the left vertical
-
-
이 단계는 번역되지 않았습니다. 번역을 도와주십시오
-
Grasp the red film pull tab on the 4R adhesive strip and pull to remove the backing from the strip.
-
Align the strip on the bottom edge of the rear enclosure, directly to the right of the middle screw on that edge.
-
Run your finger along the length of the adhesive strip to ensure it is straight and unwrinkled, pressing down as you go to adhere the strip to the iMac.
-
-
이 단계는 번역되지 않았습니다. 번역을 도와주십시오
-
Repeat the previous step for the 4L adhesive strip, placing it along the left half of the bottom edge of the iMac.
-
-
이 단계는 번역되지 않았습니다. 번역을 도와주십시오
-
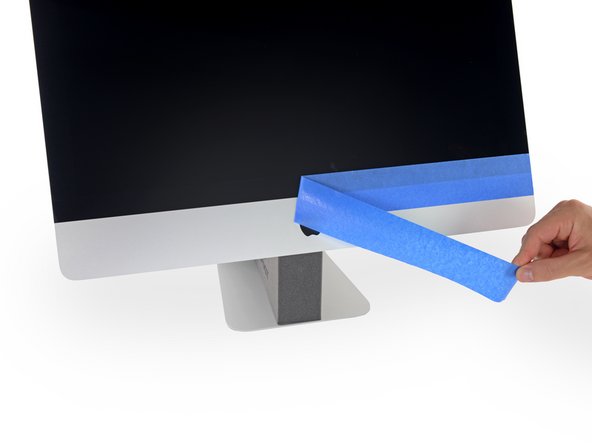
Use painter's tape or masking tape to temporarily secure the bottom edge of the display to the iMac's enclosure.
-
-
이 단계는 번역되지 않았습니다. 번역을 도와주십시오
-
If you've already verified that your iMac is working correctly and are ready to seal it up, skip to Step 17.
-
Insert the display power cable into its socket on the logic board.
-
-
이 단계는 번역되지 않았습니다. 번역을 도와주십시오
-
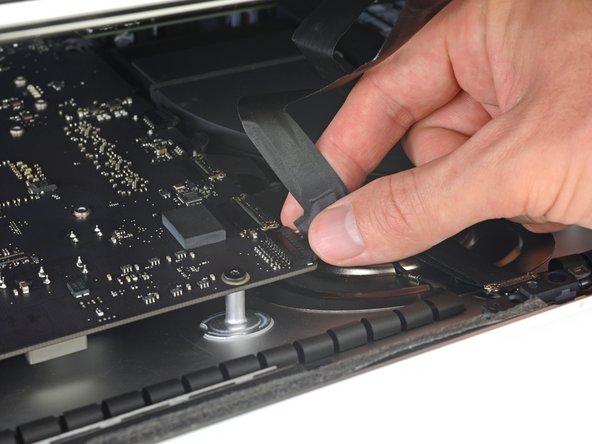
Use a pair of tweezers or your other hand to gently insert the display data cable connector into its socket on the logic board.
-
Secure the metal retaining bracket on the display data cable downwards towards the logic board.
-
-
이 단계는 번역되지 않았습니다. 번역을 도와주십시오
-
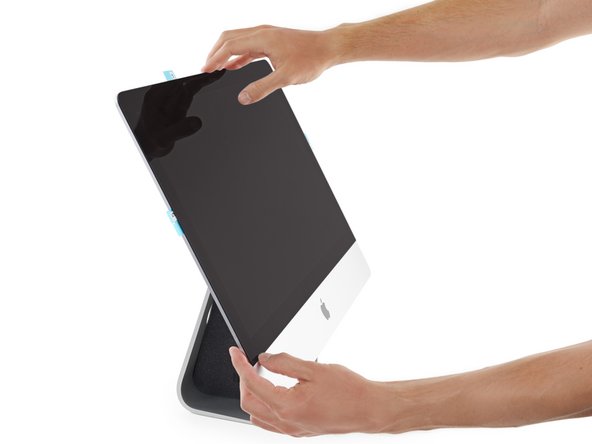
After confirming that your iMac functions properly, disconnect the display cables and carefully lean the display forward.
-
Remove the film from the 4R strip by reaching in from above and pulling the tab straight up from the bottom edge of the display.
-
-
이 단계는 번역되지 않았습니다. 번역을 도와주십시오
-
Steady the display with one hand as you remove the adhesive liners in the following steps, or rest it lightly against the iMac's enclosure.
-
-
이 단계는 번역되지 않았습니다. 번역을 도와주십시오
-
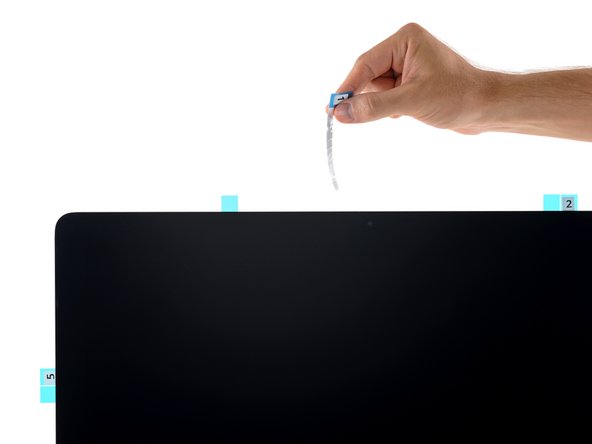
Remove the protective film from Strip 1 by pulling its tab straight up.
-
-
이 단계는 번역되지 않았습니다. 번역을 도와주십시오
-
Likewise, remove the protective film from the strip that was paired with Strip 1.
-
-
이 단계는 번역되지 않았습니다. 번역을 도와주십시오
-
Repeat the previous two steps to remove the protective film from all the remaining adhesive strip pairs (labeled 2, 3, and 5).
-
-
이 단계는 번역되지 않았습니다. 번역을 도와주십시오
-
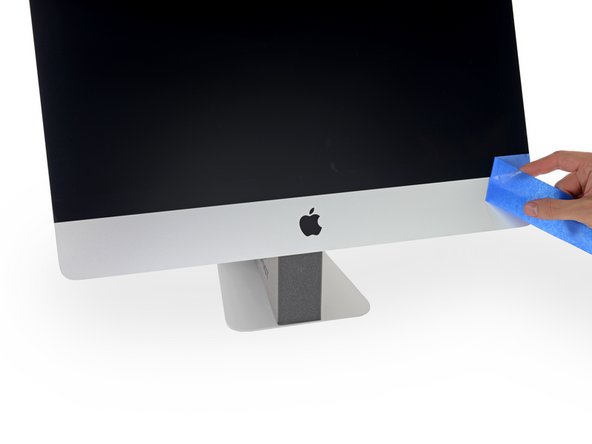
Remove the tape securing the display to the rear enclosure.
-
To ensure a strong bond, carefully tip the iMac flat on its back (with the screen facing straight up) and press carefully but firmly around all four edges of the display.
-


다른 38명이 해당 안내서를 완성하였습니다.


댓글 5개
When I received the adhesive strip kit and pizza cutting tool, my initial thought was that it was overpriced. This turned out not to be the case, as the adhesive strips are cut perfectly and install with great predictability. The guide is an excellent step by step tutorial which, along with the pre-cut strips, enables a handyman to complete his first time repair with a professional outcome.
I did complete this process and turned out fine in the end but when I initially removed the blue tape there was about a 16th of an inch gap between the glass and bottom lip of the iMac case. When I had tilted the glass up using the tape like a hinge I guess the monitor either stretched the tape or something and when it had come down it landed in the wrong spot so be careful with the tape you use. I had not firmly pressed down the glass yet and I was able to separate the pieces and reattach the monitor in the right place. I did it without the tape and it wasn't very difficult although it did require a second person to hold a book along one side of the iMac so I was able to snug the glass against 2 sides (the book and the bottom lip of the iMac case) to get proper alignment. The guide and adhesive kit was indispensable. Thanks a ton.
Great kit and made a fine job of the repair. You would never know the case had been opened.
be careful not to stretch the stickers as you place them down, it’s easy to do if your not careful.
Same probem then jhweb522, : i strongly pressed to the screen to down before the last step in order to minimize this little gap, and the final result is quite good, but not perfect.
Joan Giral - 답글