주요 콘텐츠로 건너뛰기

이 안내서에는 최근 변경 사항이 더 있습니다. 최신 비검증 버전으로 전환하십시오.

iPad 3 4G Logic Board Replacement

필요한 것

  1. iPad 3 4G Logic Board Replacement, iOpener Heating: 1 단계, 이미지 1/2 iPad 3 4G Logic Board Replacement, iOpener Heating: 1 단계, 이미지 2/2
    • We recommend that you clean your microwave before proceeding, as any nasty gunk on the bottom may end up stuck to the iOpener.

    • Place the iOpener in the center of the microwave.

    • For carousel microwaves: Make sure the plate spins freely. If your iOpener gets stuck, it may overheat and burn.

  2. iPad 3 4G Logic Board Replacement: 2 단계, 이미지 1/1
    • Heat the iOpener for thirty seconds.

    • Throughout the repair procedure, as the iOpener cools, reheat it in the microwave for an additional thirty seconds at a time.

    • Be careful not to overheat the iOpener during the repair. Overheating may cause the iOpener to burst. Do not attempt to heat over 100˚C (212˚F).

    • Never touch the iOpener if it appears swollen.

    • If the iOpener is still too hot in the middle to touch, continue using it while waiting for it to cool down some more before reheating. A properly heated iOpener should stay warm for up to 10 minutes.

  3. iPad 3 4G Logic Board Replacement: 3 단계, 이미지 1/1
    • Remove the iOpener from the microwave, holding it by one of the two flat ends to avoid the hot center.

    • The iOpener will be very hot, so be careful when handling it. Use an oven mitt if necessary.

  4. iPad 3 4G Logic Board Replacement, Alternate iOpener heating method: 4 단계, 이미지 1/2 iPad 3 4G Logic Board Replacement, Alternate iOpener heating method: 4 단계, 이미지 2/2
    • If you don't have a microwave, follow this step to heat your iOpener in boiling water.

    • Fill a pot or pan with enough water to fully submerge an iOpener.

    • Heat the water to a boil. Turn off the heat.

    • Place an iOpener into the hot water for 2-3 minutes. Make sure the iOpener is fully submerged in the water.

    • Use tongs to extract the heated iOpener from the hot water.

    • Thoroughly dry the iOpener with a towel.

    • The iOpener will be very hot, so be careful to hold it only by the end tabs.

    • Your iOpener is ready for use! If you need to reheat the iOpener, heat the water to a boil, turn off the heat, and place the iOpener in the water for 2-3 minutes.

  5. iPad 3 4G Logic Board Replacement, Front Panel: 5 단계, 이미지 1/3 iPad 3 4G Logic Board Replacement, Front Panel: 5 단계, 이미지 2/3 iPad 3 4G Logic Board Replacement, Front Panel: 5 단계, 이미지 3/3
    • If your display glass is cracked, keep further breakage contained and prevent bodily harm during your repair by taping the glass.

    • Lay overlapping strips of clear packing tape over the iPad's display until the whole face is covered.

    • This will keep glass shards contained and provide structural integrity when prying and lifting the display.

    • Do your best to follow the rest of the guide as described. However, once the glass is broken, it will likely continue to crack as you work, and you may need to use a metal prying tool to scoop the glass out.

    • Wear safety glasses to protect your eyes, and be careful not to damage the LCD screen.

  6. iPad 3 4G Logic Board Replacement: 6 단계, 이미지 1/1
    이 단계에 사용된 도구:
    Safety Glasses
    $3.19
    구매
    • Again, as you may find yourself working with broken glass during this procedure, we strongly recommend wearing safety glasses for protection from flying shards.

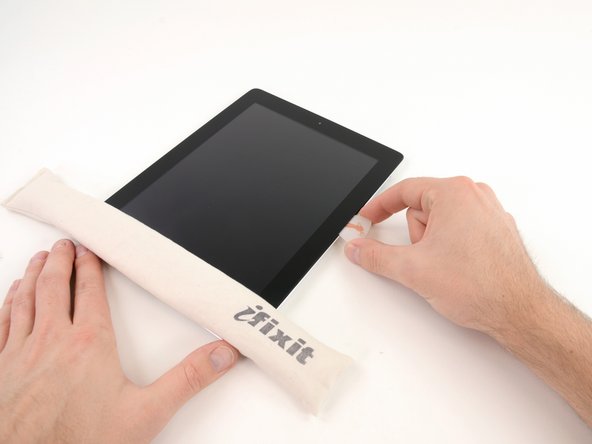
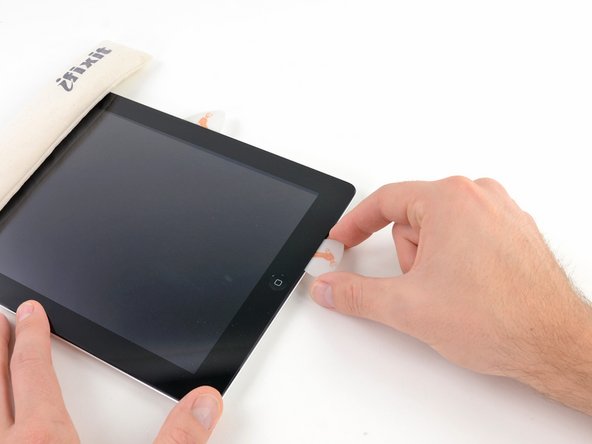
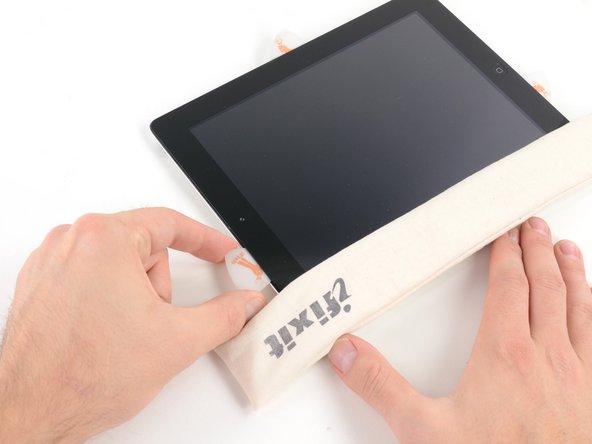
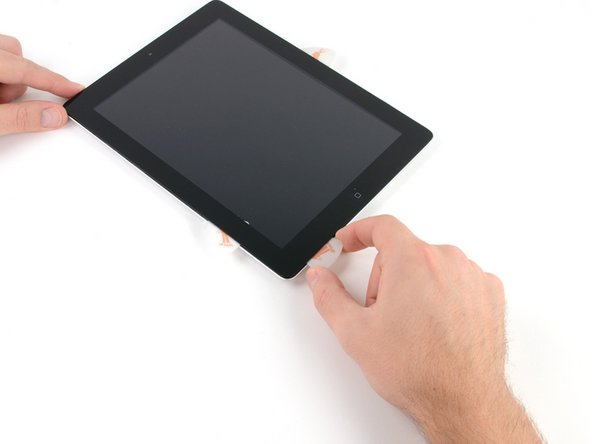
    • Lay the iOpener flat on the right edge of the iPad, smoothing it out so that there is good contact between the surface of the iPad and the iOpener.

    • Let the bag sit on the iPad for approximately 90 seconds before attempting to open the front panel.

  7. iPad 3 4G Logic Board Replacement: 7 단계, 이미지 1/3 iPad 3 4G Logic Board Replacement: 7 단계, 이미지 2/3 iPad 3 4G Logic Board Replacement: 7 단계, 이미지 3/3
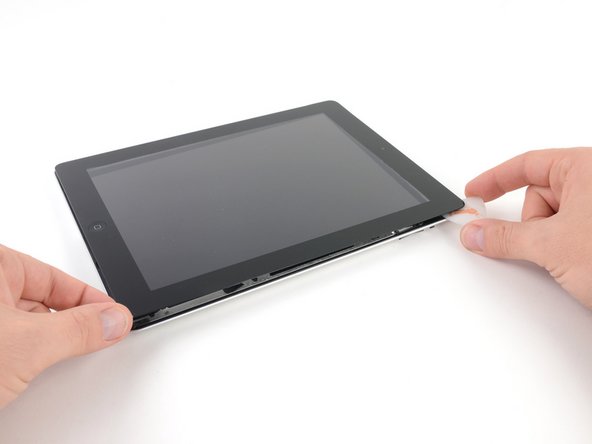
    • There is a small gap in the iPad's adhesive ring in the upper right corner of the iPad, approximately 2.0 inches (~5 cm) from the top of the iPad. You are going to exploit this weakness.

    • Align the tool with the mute button. Insert the tip of a plastic opening tool into the gap between the front glass and the plastic bezel. Just insert the very tip of the opening tool, just enough to widen the crack.

    • It may require some force to get the wedged tip of the opening tool between the glass and plastic. Work patiently and carefully, wiggling the plastic opening tool back and forth as necessary.

  8. iPad 3 4G Logic Board Replacement: 8 단계, 이미지 1/1
    • Make sure you place the tool in the proper spot—between the plastic display bezel and the front panel glass.

  9. iPad 3 4G Logic Board Replacement: 9 단계, 이미지 1/2 iPad 3 4G Logic Board Replacement: 9 단계, 이미지 2/2
    • Keeping the tip of the plastic opening tool wedged between the front glass and plastic bezel, slide a plastic opening pick in the gap, right next to the plastic opening tool.

  10. iPad 3 4G Logic Board Replacement: 10 단계, 이미지 1/2 iPad 3 4G Logic Board Replacement: 10 단계, 이미지 2/2
    • Remove the plastic opening tool from the iPad, and push the opening pick further underneath the front glass to a depth of ~0.5 inches.

  11. iPad 3 4G Logic Board Replacement: 11 단계, 이미지 1/1
    • While you work on releasing the adhesive on the right side of the iPad, reheat the iOpener, and replace it on the bottom edge of the iPad.

  12. iPad 3 4G Logic Board Replacement: 12 단계, 이미지 1/3 iPad 3 4G Logic Board Replacement: 12 단계, 이미지 2/3 iPad 3 4G Logic Board Replacement: 12 단계, 이미지 3/3
    • While the bottom edge is being heated by the iOpener, begin releasing the adhesive from the right edge of the iPad.

    • Slide the opening pick down along the edge of the iPad, releasing the adhesive as you go.

    • The adhesive is very strong, and some serious force may be required. Work carefully.

    • If you can see the tip of the opening pick underneath the front glass, pull the pick out just a little bit. While using the opening pick this deep won't damage anything, it may get adhesive residue all over the LCD.

  13. iPad 3 4G Logic Board Replacement: 13 단계, 이미지 1/3 iPad 3 4G Logic Board Replacement: 13 단계, 이미지 2/3 iPad 3 4G Logic Board Replacement: 13 단계, 이미지 3/3
    • It may be necessary to move the heated iOpener back onto the right edge of the iPad as you release the adhesive. This depends on how long the iPad has been able to cool while you were working on it.

    • If the opening pick gets stuck in the adhesive, "roll" the pick along the side of the iPad, continuing to release the adhesive.

  14. iPad 3 4G Logic Board Replacement: 14 단계, 이미지 1/2 iPad 3 4G Logic Board Replacement: 14 단계, 이미지 2/2
    • Before removing the first opening pick from the bottom corner of the iPad, insert a second pick under the right edge of the front glass to keep the adhesive from re-adhering.

    • Re-heat the iOpener, and move it to the top edge of the iPad.

  15. iPad 3 4G Logic Board Replacement: 15 단계, 이미지 1/1
    • The next few steps require extreme caution.

    • The Wi-Fi antenna is attached to the bottom right edge of the rear case of the iPad via screws and a cable. Because of the orientation of the Wi-Fi antenna, it is imperative to proceed with caution otherwise irreversible damage to the Wi-Fi antenna may result.

    • You will have to release the adhesive securing the antenna to the front panel without damaging the delicate parts attaching the antenna to the bottom of the iPad. Follow the next steps carefully.

  16. iPad 3 4G Logic Board Replacement: 16 단계, 이미지 1/2 iPad 3 4G Logic Board Replacement: 16 단계, 이미지 2/2
    • Slide the opening pick around the bottom right corner of the iPad, releasing the adhesive there.

    • Do not slide the pick further than the bottom right corner. You may damage the Wi-Fi antenna by doing so.

  17. iPad 3 4G Logic Board Replacement: 17 단계, 이미지 1/2 iPad 3 4G Logic Board Replacement: 17 단계, 이미지 2/2
    • This step requires you to move the opening pick along the bottom right edge of the front panel. The Wi-Fi antenna is very close to the corner and is easily severed if the adhesive is released improperly.

    • Do not completely remove the pick from under the front glass, but pull it out just a little bit so that ~1/8" (3 mm) of the tip is still under the front glass.

    • Slide the tip of the opening pick along the bottom edge of the iPad, releasing the adhesive over the Wi-Fi antenna.

  18. iPad 3 4G Logic Board Replacement: 18 단계, 이미지 1/2 iPad 3 4G Logic Board Replacement: 18 단계, 이미지 2/2
    • Once you have moved past the Wi-FI antenna (approximately 3" (75 mm) from the right edge, or right next to the home button) re-insert the opening pick to its full depth.

    • Slide the pick to the right, releasing the adhesive securing the Wi-Fi antenna to the front glass.

    • The antenna is attached to the bottom of the iPad via screws and a cable. This step detaches the antenna from the front panel, ensuring that when you remove the panel, the antenna will not be damaged.

  19. iPad 3 4G Logic Board Replacement: 19 단계, 이미지 1/3 iPad 3 4G Logic Board Replacement: 19 단계, 이미지 2/3 iPad 3 4G Logic Board Replacement: 19 단계, 이미지 3/3
    • Continue releasing the adhesive along the bottom of the iPad, pulling the opening pick out far enough to go around the home button, and re-inserting it to a depth of 1/2 inch (10 mm) once the pick is past the home button.

    • If the adhesive has cooled too much along the bottom edge, reheat the iOpener to warm the adhesive where you are working.

    • Do not heat the iOpener more than a minute at a time, and always allow at least two minutes before reheating it.

  20. iPad 3 4G Logic Board Replacement: 20 단계, 이미지 1/2 iPad 3 4G Logic Board Replacement: 20 단계, 이미지 2/2
    • Continue releasing the adhesive all the way along the bottom edge of the iPad.

    • On iPad 4 models, insert the pick to a maximum depth of 1/2 inch (10 mm) in this area, to avoid damaging the home button ribbon cable.

    • Leave the opening pick wedged underneath the front glass near the home button.

  21. iPad 3 4G Logic Board Replacement: 21 단계, 이미지 1/1
    • Reheat the iOpener in the microwave and set it on the left edge of the iPad to start warming the adhesive in that section.

  22. iPad 3 4G Logic Board Replacement: 22 단계, 이미지 1/3 iPad 3 4G Logic Board Replacement: 22 단계, 이미지 2/3 iPad 3 4G Logic Board Replacement: 22 단계, 이미지 3/3
    • Slide the opening pick along the top edge of the iPad, pulling it out slightly to go around the front-facing camera bracket.

    • The adhesive along this section is very thick, and a fair amount of force may be required. Work carefully and slowly, making sure to not slip and damage yourself or your iPad.

    • If the adhesive has cooled too much, replace the iOpener along the top edge and continue working. If the iOpener has cooled too much, reheat it.

    • If the opening pick is getting stuck in the adhesive, "roll" the pick as shown in step 9.

  23. iPad 3 4G Logic Board Replacement: 23 단계, 이미지 1/2 iPad 3 4G Logic Board Replacement: 23 단계, 이미지 2/2
    • Continue releasing the adhesive along the top edge of the iPad, and slide the opening pick around the top left corner.

    • If the adhesive is warm enough, remove the iOpener from the iPad for convenience. However, if the adhesive is still quite sticky, re-heat the iOpener and lay it on the left edge while you work.

  24. iPad 3 4G Logic Board Replacement: 24 단계, 이미지 1/3 iPad 3 4G Logic Board Replacement: 24 단계, 이미지 2/3 iPad 3 4G Logic Board Replacement: 24 단계, 이미지 3/3
    • Slide the opening pick along the left edge of the iPad, releasing the adhesive as you go. The adhesive is thin here due to the digitizer along the whole left side. Make sure the pick is not too deep (max 1/2 inch) 10 mm to prevent damaging the digitizer.

    • The digitizer cable is located approximately 2" (50 mm) from the bottom of the iPad. Stop sliding the pick when you get ~2.25" (60 mm) from the bottom of the iPad.

  25. iPad 3 4G Logic Board Replacement: 25 단계, 이미지 1/2 iPad 3 4G Logic Board Replacement: 25 단계, 이미지 2/2
    • Using the opening pick that is still underneath the bottom edge of the iPad, release the adhesive along the bottom left corner.

    • The bottom of the digitizer cable is only ~1" (25 mm) from the bottom of the iPad. Work carefully and slowly, making sure to not sever this cable.

  26. iPad 3 4G Logic Board Replacement: 26 단계, 이미지 1/2 iPad 3 4G Logic Board Replacement: 26 단계, 이미지 2/2
    • Using one of the opening picks, pry up the bottom right corner of the iPad and grab it with your fingers.

    • Some of the adhesive along the perimeter of the iPad may have stuck back down again. If this is the case, slide a pick underneath the edge of the iPad where the front glass is still stuck and "cut" the adhesive.

  27. iPad 3 4G Logic Board Replacement: 27 단계, 이미지 1/2 iPad 3 4G Logic Board Replacement: 27 단계, 이미지 2/2
    이 단계에 사용된 도구:
    Microfiber Cleaning Cloths
    $3.99
    구매
    • Holding the iPad by the top and bottom right corners, rotate the front glass away from the iPad.

    • Be careful of any adhesive that may still be attached, and use an opening pick to cut any adhesive that may still be holding the front panel down.

    • During reassembly use a microfiber cloth and compressed air to clean any dust or fingerprints off the LCD before reinstalling the glass.

  28. iPad 3 4G Logic Board Replacement, Front Panel Assembly: 28 단계, 이미지 1/1
    • Remove the four 2 mm Phillips #00 screws securing the LCD to the aluminum frame.

  29. iPad 3 4G Logic Board Replacement: 29 단계, 이미지 1/3 iPad 3 4G Logic Board Replacement: 29 단계, 이미지 2/3 iPad 3 4G Logic Board Replacement: 29 단계, 이미지 3/3
    • Using a plastic opening tool or a spudger, lift the right edge of the LCD out of the iPad.

    • Rotate the LCD along its left edge and lay it down on top of the front panel.

    • Be careful as you move the LCD. The ribbon cable is fragile and may break if it is flexed too much.

  30. iPad 3 4G Logic Board Replacement, LCD: 30 단계, 이미지 1/1
    • Using the tip of a spudger, peel back the piece of tape covering the LCD ribbon cable connector.

    You can actually skip this and go directly to step 37.

    ilconte - 답글

  31. iPad 3 4G Logic Board Replacement: 31 단계, 이미지 1/3 iPad 3 4G Logic Board Replacement: 31 단계, 이미지 2/3 iPad 3 4G Logic Board Replacement: 31 단계, 이미지 3/3
    이 단계에 사용된 도구:
    Tweezers
    $4.99
    구매
    • Flip up the retaining flap on the LCD ribbon cable ZIF connector.

    • Using your fingers or a pair of tweezers, pull the LCD ribbon cable from its socket on the logic board.

    • You may have to force restart the iPad by holding down the power button and home button for at least ten seconds until you see the Apple logo if the LCD screen doesn't power on after connecting the ZIF connector for the LCD screen when putting everything back together.

    I killed my iPad permanently on this step. The black flap snapped off. The ribbon will not seat in there apparently because now my display is just black. I can hold the Home button down and hear a beep/tone, but there's nothing at all on the display. It's a brick now.

    jimdelrio - 답글

    x2

    My retainer flap broke before it would move, tried to tape the cable back in place, LCD is totally dead now (wasn't before) even though I heard sounds...

    mikemiller73 - 답글

    I ran into similar problem and was able to fix it.

    I used a thin mylar piece, cut to the size of the ribbon cable and push it in, on top of the ribbon cable to thicken it.

    Digitizer(Touch screen), Not responding after Tear down.

    Instead of the mylar tape, I re-used the screen protector from an old Nintendo DS and cut it to size. I did not think it would work but it did for me after 4,5 tries. Good luck.

    Th Th - 답글

    The pictures here are very misleading. The ZIF lock tab is towards the back of the connector - opposite to where the cable comes in. you flip it up and over. The picture here does NOT show the lock tab released! when replacing make sure the white lines go right into the connector - you should almost not see them anymore.

    Mark Smith - 답글

    As Mark Smith noted the lock on the ZIF connector is at the BACK of the connector, the side FARTHEST from the cable. Put your spudger or opener at the back of the connector and gently pull up while pushing toward the connector. The black bar at the back of the connector will pop up and release pressure on the cable.

    Awfki - 답글

    The ZIF connector lock is almost impossible to see in the pictures, and even tough to see when you're looking at it. It is a really thin black bar with a hinge on the long edge. As Mark Smith and Awfki stated, pull up gently on the long edge that is opposite the ribbon cable. When inserting the new ribbon cable be sure to get the cable lined up, then push in straight and evenly.

    robertmhussey - 답글

    It IS possible to replace these connectors through a combination of hot air, microsoldering, experience, and talent (full disclosure:I sell replacements on eBay) but quite frankly, it’s a…it’s very difficult. Hiring a technician experienced enough to do it confidently and well will (should) cost you almost as much as the device is worth.

    So try the methods (like tape) that thicken the cable slightly at the point of insertion, so its contacts will make strong downward contact with the connector’s. Then tape the cable down well to keep it from pulling out.

    These solutions rely on recognizing the latch and breaking only it, so the above comments noting the latch’s location are essential.

    Bonnie Baxter - 답글

    FWIW, the second picture does show the connector’s latch in the “open” position. If what you see at the edge of the connector farthest from where the cable inserts is black, (first picture), the latch is still closed. If instead you can begin to see the metal pins (second picture), it is open. When open it is not even straight up—it is at perhaps 75 degrees from the closed position. Don’t open it too far or with too much force, or the latch will break off.

    Bonnie Baxter - 답글

    The same happened to me. While unplugging the cable I have broken the lock. I realized it only when putting everything back in place. After several attempts I noticed that if I pressed with a finger where the lock was the LCD worked.

    So, I inserted the cable and taped it so that it doesn’t slip out. In the iOpener kit you get some transparent plastic cards (not sure what are they meant for). I cut 2 small pieces the size of the connection and taped them down firmly.

    put everything back in and it worked.

    The lock is there just to make pressure on the connection.

    ronald radioni - 답글

    Have a look at the iPad 3 WIFI Battery Replacement Video Overview before you try this step. Actually seeing how to flip up the lock before attempting it myself was very helpful.

    Andrew Lusted - 답글

  32. iPad 3 4G Logic Board Replacement: 32 단계, 이미지 1/1
    • Without touching the front of the LCD, lift the LCD off the front panel.

  33. iPad 3 4G Logic Board Replacement, Front Panel Assembly: 33 단계, 이미지 1/1
    • Using the tip of a spudger, peel back the piece of tape that secures the touchscreen ribbon cable to the logic board.

  34. iPad 3 4G Logic Board Replacement: 34 단계, 이미지 1/3 iPad 3 4G Logic Board Replacement: 34 단계, 이미지 2/3 iPad 3 4G Logic Board Replacement: 34 단계, 이미지 3/3
    • Flip up the retaining flap on both of the touchscreen ribbon cable ZIF connectors.

  35. iPad 3 4G Logic Board Replacement: 35 단계, 이미지 1/2 iPad 3 4G Logic Board Replacement: 35 단계, 이미지 2/2
    • Use the flat end of a spudger to loosen the adhesive underneath the digitizer ribbon cable.

    • Pull the digitizer ribbon cable straight out of its sockets on the logic board.

  36. iPad 3 4G Logic Board Replacement: 36 단계, 이미지 1/2 iPad 3 4G Logic Board Replacement: 36 단계, 이미지 2/2
    • Peel back the touchscreen ribbon cable and use the flat end of a spudger to release the adhesive securing the cable to the rear aluminum case.

  37. iPad 3 4G Logic Board Replacement: 37 단계, 이미지 1/1
    • Using your fingers, pull the touchscreen ribbon cable out of its recess in the aluminum frame.

    • Remove the front panel from the iPad.

    Cheers for the guide.

    After replacing components, when reassembling dose the glue need some heating to bond properly or will a firm squeeze do the trick? Noticed none of the guides have any reassembly tips.

    I had to open mine up again as I had left a protective film on the inside of the new digitiser panel.

    Paul - 답글

  38. iPad 3 4G Logic Board Replacement, Electrical Tape: 38 단계, 이미지 1/2 iPad 3 4G Logic Board Replacement, Electrical Tape: 38 단계, 이미지 2/2
    • If present, remove the pieces of electrical tape covering the Wi-Fi antenna, speaker cable, and dock connector cable.

    No, you just need to remove the other piece of electrical tape - the L-shaped to the right of the thumb.

    ilconte - 답글

  39. iPad 3 4G Logic Board Replacement, Headphone Jack Cable: 39 단계, 이미지 1/3 iPad 3 4G Logic Board Replacement, Headphone Jack Cable: 39 단계, 이미지 2/3 iPad 3 4G Logic Board Replacement, Headphone Jack Cable: 39 단계, 이미지 3/3
    • Peel back and remove the piece of electrical tape covering the headphone jack assembly cable connector.

    • Using the tip of a spudger, flip up the retaining flap on both of the ZIF connectors securing the headphone jack cable to the logic board.

  40. iPad 3 4G Logic Board Replacement: 40 단계, 이미지 1/3 iPad 3 4G Logic Board Replacement: 40 단계, 이미지 2/3 iPad 3 4G Logic Board Replacement: 40 단계, 이미지 3/3
    • Slide the flat end of a spudger underneath the headphone jack assembly cable, releasing the adhesive securing it to the rear aluminum frame.

    • Pull the headphone jack assembly cable straight out of its socket on the logic board.

  41. iPad 3 4G Logic Board Replacement, SIM Board Ribbon Cable: 41 단계, 이미지 1/3 iPad 3 4G Logic Board Replacement, SIM Board Ribbon Cable: 41 단계, 이미지 2/3 iPad 3 4G Logic Board Replacement, SIM Board Ribbon Cable: 41 단계, 이미지 3/3
    • Peel back and remove the piece of tape covering the SIM board cable ZIF connector.

    • Flip up the retaining flap on the SIM board cable ZIF connector.

    • Using the tip of a spudger, pull the SIM board cable straight out of its socket on the logic board.

  42. iPad 3 4G Logic Board Replacement, Logic Board Connectors: 42 단계, 이미지 1/1
    • Disconnect the following connectors from their respective sockets on the logic board:

    • Wi-Fi antenna cable

    • Speaker connector cable.

    • Dock connector cable.

    • Make sure to pry underneath the connector and not the socket itself. Prying on the socket itself may cause severe damage.

  43. iPad 3 4G Logic Board Replacement, Logic Board: 43 단계, 이미지 1/1
    • Remove the following seven screws securing the logic board to the rear aluminum panel.

    • Six 2.1mm Phillips #00

    • One of these screws, at the top of the logic board, is tucked beneath the headphone jack assembly cable. Take care to hold the cable out of the way while removing and replacing this screw.

    • One 2.5mm Phillips #00

    Be sure you follow step 37 and free the headphone jack ribbon cable. I missed that step and found myself puzzling how to get the rightmost screw on the logicboard.

    Haig Keshishian - 답글

  44. iPad 3 4G Logic Board Replacement: 44 단계, 이미지 1/2 iPad 3 4G Logic Board Replacement: 44 단계, 이미지 2/2
    • Holding the logic board by the side nearest the dock connector, carefully pull the logic board toward the bottom of the iPad.

  45. iPad 3 4G Logic Board Replacement: 45 단계, 이미지 1/2 iPad 3 4G Logic Board Replacement: 45 단계, 이미지 2/2
    • Flip the logic board over, minding any cables that may get caught.

    • Using the tip of a spudger, remove the three antenna connectors from their sockets on the logic board.

    Follow these steps for both a speaker replacement, and then a touch screen replacement later on. However when I had to replace the battery, the cable between the main part of the logic board, and the LTE cellular component got ripped. Now the ipad will only stay booted for 1m30s before it reboots itself in a continuous loop. Has anyone seen this problem before?

    bihnx99 - 답글

    I followed all the steps and I was able to replace a battery and a the screen on my daughter ipad3 but when plugged back in, the ipad goes in a resetting loop. turns on for 7-8 sec turns off for 7-8 sec. I tryed to do a hard reset but the ipad will not stay on to be able to move it fro the wall to the computer.

    I did not shattered or destroyed any cable (as far as I know) and I opened and checked the connections 3 times now and nothing changed. The old battery got destryed in the process so I cant try it on to see id the same things happening. Please somebody help me!

    laura - 답글

    This same thing happened to me. I ended up holding the power button and home button down until the iPad rebooted. When it powered back up, it was working correctly.

    boboswell -

    If new battery was criticality low in charge, it will boot loop. Put iPad in freezer for 30m and immediately plug to charger when you remove it. Reason: too low % on battery after repairs won't allow to boot so loop occurs and you can't charge a device in a boot loop. Freezer forces an emergency shutdown and will stay off till temperature is normal by then you should have enough charge to boot. Hopefully this helps!

    Danny Hartley -

    The 3 wire connections to the underside of the system board are identical, so you might want to color code them before removal ... get them back in the right place, I think they are for the left and right GSM antennas and maybe the front camera?

    Peter Dearnley - 답글

    I did not have to remove any of the three antenna connectors while removing the battery just take your time and you can leave the connectors connected.

    Rich1981 - 답글

    I wish I did what you did.

    Harvey H -

    Dear Peter, does it really matter which socket the 3 wire connections were connected to? I did not mark/color them with any sign!

    Alexandre Bernier - 답글

    Well…. i am at this stage now, i have lifted the 3 x wire connectors…and have not colored them… I am noticing that the cables leading to the connectors are of different lenghts : the shortest can obviously only fit on the connector which is the closest to the edge of the small board… and the longest should be for the connector which is the furthest away from the edge….

    ptouboul - 답글

    When reconnecting, getting them to stay in place is a pain. Any suggestions?

    Harvey H - 답글

결론

To reassemble your device, follow these instructions in reverse order.

다른 24명이 해당 안내서를 완성하였습니다.

Brett Hartt

회원 가입일: 04/12/10

127,941 평판

안내서 143개 작성하였습니다

iFixit iFixit 회원

Staff

136 회원들

안내서 17,299개 작성하였습니다

댓글 2개

Where can I purchase a logic board for an ipad 3 4g?

Ryan Fairchild - 답글

can be reused the right part of the logic board (the one connected on the sim ) in a new motherboard only wifi ?

Simone - 답글

댓글 쓰기

조회 통계:

24 시간 전: 1

7일 전: 4

30일 전: 44

전체 시간: 25,468