소개
수리를 마친 다음 이 안내서를 사용하여 iPhone 디스플레이 아래의 교체용 접착제를 올바르게 부착하세요. 접착제를 교체하면 iPhone의 방수 기능이 보수 유지됩니다. 미리 잘라져 있는 접착 스트립은 매우 연약하며 올바르게 부착하지 않을 경우 쉽게 손상되므로 이 안내서를 처음 사용하는 경우 예비 부품을 준비하는 것이 좋습니다.
휴대폰의 원래 모습을 유지하려면 디스플레이와 같은 색상의 접착제를 구입하세요.
이 절차는 모든 iPhone 6s 및 이후*** 모델에 적용됩니다 (이전 모델들은 접착제를 사용하지 않습니다).
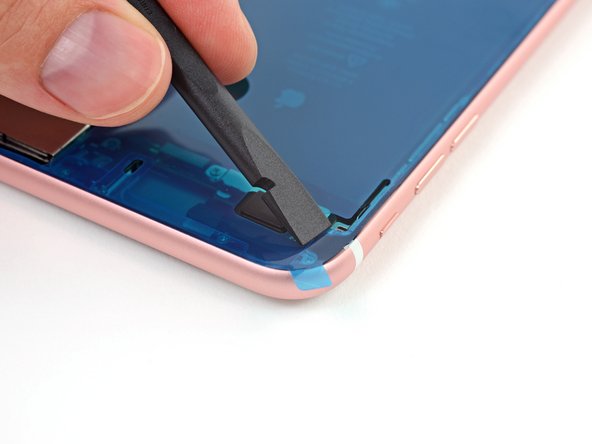
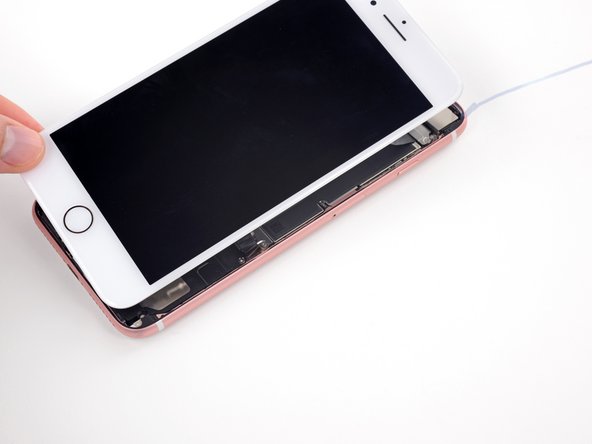
시작하기 전에 iPhone 디스플레이 어셈블리를 미리 분리하여 한 쪽에 잘 보관하세요. 그렇지 않은 경우 특정 iPhone 수리 안내서로 돌아가서 디스플레이 어셈블리를 다시 설치할 준비가 될 때까지 해당 안내서의 절차를 따르세요.
필요한 것
동영상 개요
-
-
-
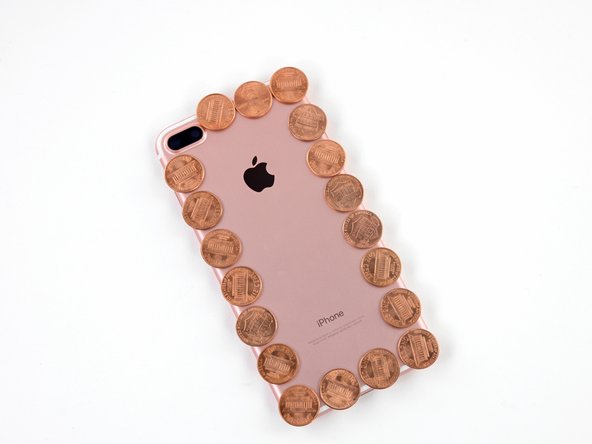
카메라의 튀어나온 부분보다 두꺼운 모든 단위의 동전을 사용할 수 있습니다.
-
iPhone의 각 모서리에 동전을 놓고 카메라의 튀어나온 부분 양쪽에 동전 두 개를 놓으세요.
-
iPhone 전체 둘레에 동전을 추가로 놓으세요.
-
헤어 드라이어나 히트 건을 사용하여 iPhone 둘레 측면 가장자리를 만지기에 약간 뜨거워질 때까지 골고루 가열하세요. 열은 접착제가 완전히 접착하도록 도움을 줍니다. iPhone을 과열하지 마세요 아니면 배터리에 불이 나거나 디스플레이처럼 열에 민감한 다른 부품이 손상될 수 있습니다.
-


다른 1015명이 해당 안내서를 완성하였습니다.
다음 번역가들에게 특별히 감사 드립니다:
100%


이 번역자 분들은 저희가 세상을 수리하는데 동참해 주시는 분입니다! 기여하시겠습니까?
번역 시작하기 ›


댓글 46개
I just bought few iPhone 7 adhesives from my supplier, and I noticed that the adhesive is not really fitting on the frame.
The iFixit shop pictures show us the iPhone 7 Plus adhesive for black color and the iPhone 7 adhesive for white color.
The iPhone 7 Plus seems to be more precise and correct than the iPhone 7 one : the iPhone 7 Plus one respect the screw hole at upper left corner for example, but the iPhone 7 one doesn’t, it has extra curves (same as iPhone 6s lower left corner) and it doesn’t take up the full width of the frame edge.
Can anyone show us the shape of an original adhesive from a brand new iPhone 7 to compare ?
This was the trickiest part of my screen replacement. Slim double sided adhesives always intimidate me because you only get one chance to line it up. I succeeded on my first attempt by following this guide and taking my time to line up the first edge as best as I could. The sides are the hardest part as they are very thin and I almost failed getting them lined up. Luckily I hadn’t pressed them down and was able to correct my alignment. Good preperation of the phone by removing the old adhesive completely and cleaning the area is my number one recommendation.
Adhesive makes everything harder. I chose to replace the adheasive on my 6s plus during a battery replacement, and it was easily the hardest part. No fault of Ifixit or this guide… the instructions above are spot on. But the cleaning of the adheasive takes forever, easily tripled my total repair time. And its really, really nerve racking to place the new adheasive. I do stuff like that all the time, but this was nuts. The strips are so tiny and delicate! Be really, really careful and take your time. This earns its “moderate” difficulty and then some.
wow that was hard to get in place. clean the edges well and use isopropyl alcohol. also practice a lot before removing the cover protection.
ericrose62 - 답글
am working on this now