주요 콘텐츠로 건너뛰기

iPhone 7 camera lens replacement

필요한 것

  1. iPhone 7 camera lens replacement, Pentalobe Screws: 1 단계, 이미지 1/1
    • Before you begin, discharge your iPhone battery below 25%. A charged lithium-ion battery can catch fire and/or explode if accidentally punctured.

    • Power off your iPhone before beginning disassembly.

    • Remove the two 3.4 mm pentalobe screws on the bottom edge of the iPhone.

    • Opening the iPhone's display will compromise its waterproof seals. Have replacement seals ready before you proceed past this step, or take care to avoid liquid exposure if you reassemble your iPhone without replacing the seals.

  2. iPhone 7 camera lens replacement, Display Assembly: 2 단계, 이미지 1/3 iPhone 7 camera lens replacement, Display Assembly: 2 단계, 이미지 2/3 iPhone 7 camera lens replacement, Display Assembly: 2 단계, 이미지 3/3
    • Make sure the battery is disconnected before you disconnect or reconnect the cables in this step.

    • Use a spudger or a fingernail to disconnect the two lower display connectors by prying them straight up from their sockets on the logic board.

    • To reconnect these cables, press down on one end until it clicks into place, then repeat on the opposite end. Do not press down on the middle. If the connector is even slightly misaligned, the connector can bend, causing permanent damage.

    • If you have a blank screen, white lines on the display, or partial or complete lack of touch response after reassembling your phone, try disconnecting and carefully reconnecting both of these cables and make sure they are fully seated.

  3. iPhone 7 camera lens replacement: 3 단계, 이미지 1/3 iPhone 7 camera lens replacement: 3 단계, 이미지 2/3 iPhone 7 camera lens replacement: 3 단계, 이미지 3/3
    • Remove the two 1.3 mm Phillips #000 screws securing the bracket over the front panel sensor assembly connector.

    • Some phones could be Y000. Apple started using Y000 for these at some point in the middle of the product's lifecycle.

  4. iPhone 7 camera lens replacement: 4 단계, 이미지 1/2 iPhone 7 camera lens replacement: 4 단계, 이미지 2/2
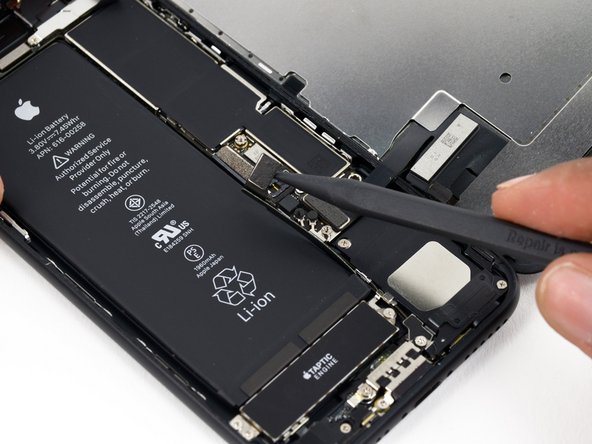
    • Disconnect the front panel sensor assembly connector from its socket on the logic board.

    • This press connector should also be reconnected one end at a time to minimize the risk of bending.

  5. iPhone 7 camera lens replacement: 5 단계, 이미지 1/1
  6. iPhone 7 camera lens replacement, Rear Camera: 6 단계, 이미지 1/2 iPhone 7 camera lens replacement, Rear Camera: 6 단계, 이미지 2/2
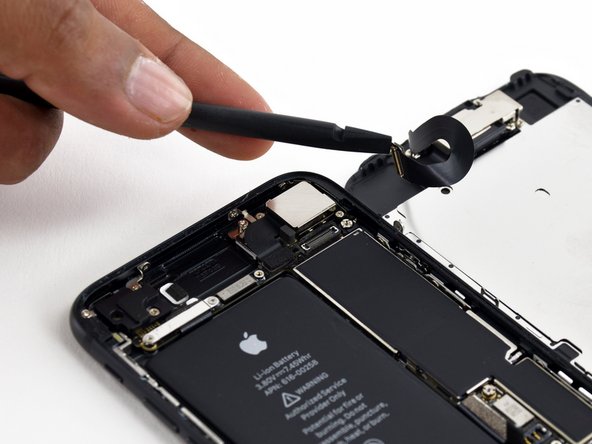
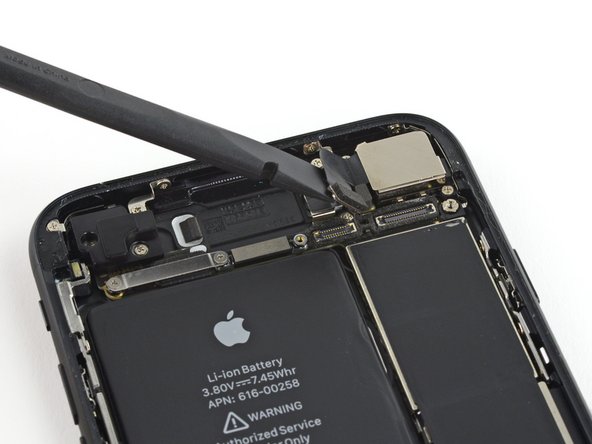
    • Use the flat end of a spudger to disconnect the rear-facing camera's press connector from its socket on the logic board.

  7. iPhone 7 camera lens replacement: 7 단계, 이미지 1/1
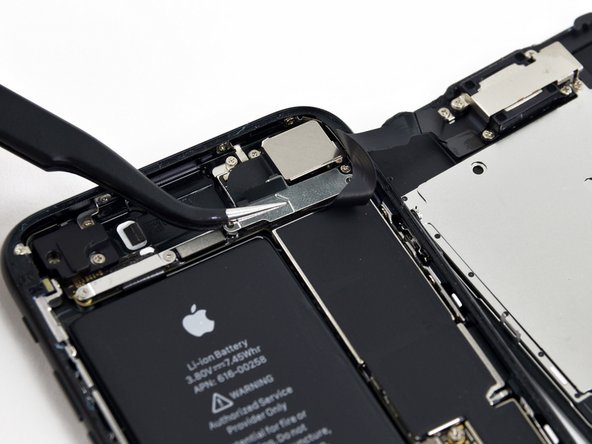
    • Remove the following Phillips screws securing the rear camera bracket over the camera module:

    • One 1.3 mm screw

    • One 2.5 mm screw

  8. iPhone 7 camera lens replacement: 8 단계, 이미지 1/2 iPhone 7 camera lens replacement: 8 단계, 이미지 2/2
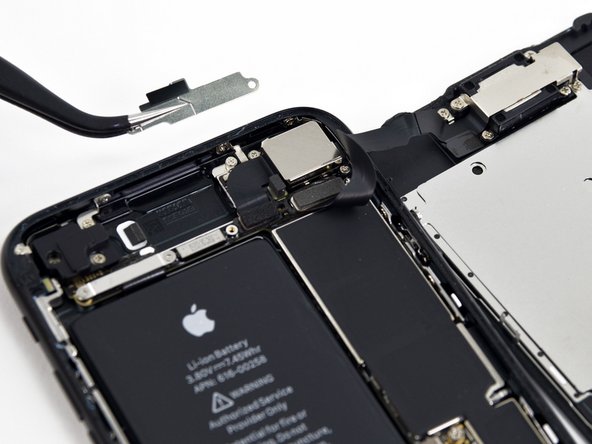
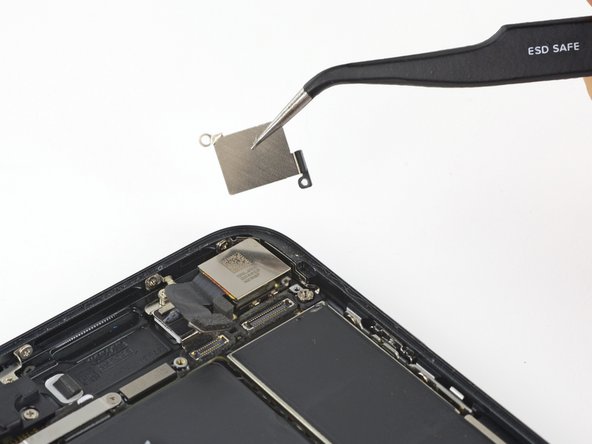
    • Remove the bracket.

  9. iPhone 7 camera lens replacement: 9 단계, 이미지 1/2 iPhone 7 camera lens replacement: 9 단계, 이미지 2/2
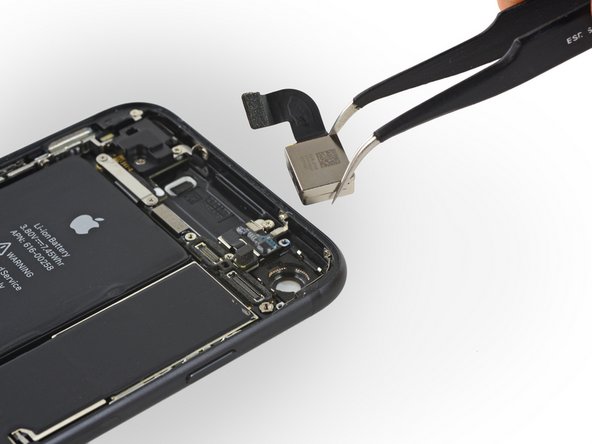
    • Remove the rear-facing camera.

  10. iPhone 7 camera lens replacement, Pentalobe screws: 10 단계, 이미지 1/1
    • Before starting, download the battery of your iPhone under 25%. A charged lithium-ion battery may ignite and / or explode if accidentally punctured.

    • Turn off your iPhone before starting to take it apart.

    • Disassembling the iPhone display will damage the waterproof seals. If you do not replace the gaskets, your phone will no longer be waterproof.

    • Remove the two 3.4 mm pentalobe screws at the bottom of your iPhone

  11. iPhone 7 camera lens replacement, Opening procedure: 11 단계, 이미지 1/1
    • Put the hot iOpener over the bottom of the phone to soften the adhesive that holds the display.

    • Wait for about a minute to allow the adhesive to warm up before going on to the next step.

  12. iPhone 7 camera lens replacement: 12 단계, 이미지 1/2 iPhone 7 camera lens replacement: 12 단계, 이미지 2/2
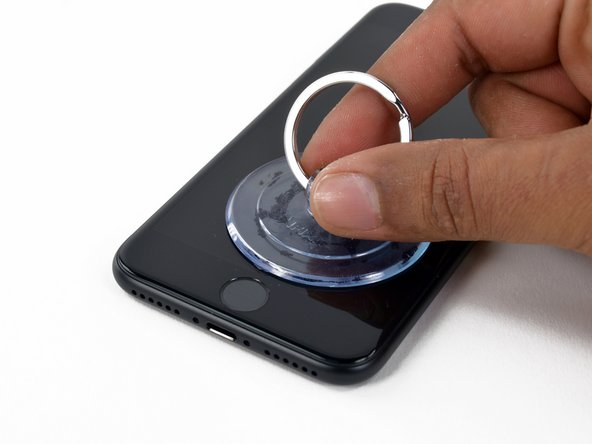
    • Apply a suction cup to the bottom half of the display assembly, just above the home button.

    • Make sure the suction cup does not overlap the home button, otherwise it will not have a tight seal.

  13. iPhone 7 camera lens replacement: 13 단계, 이미지 1/3 iPhone 7 camera lens replacement: 13 단계, 이미지 2/3 iPhone 7 camera lens replacement: 13 단계, 이미지 3/3
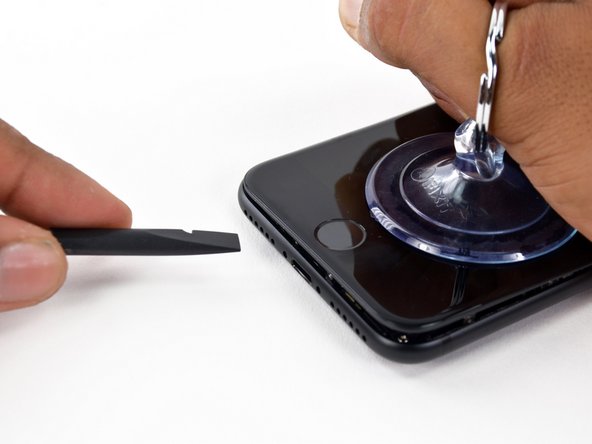
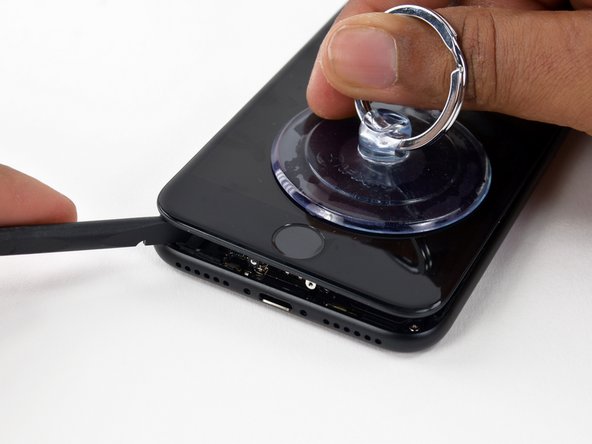
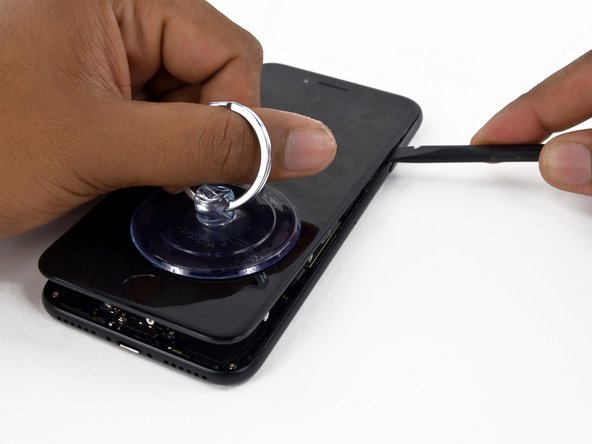
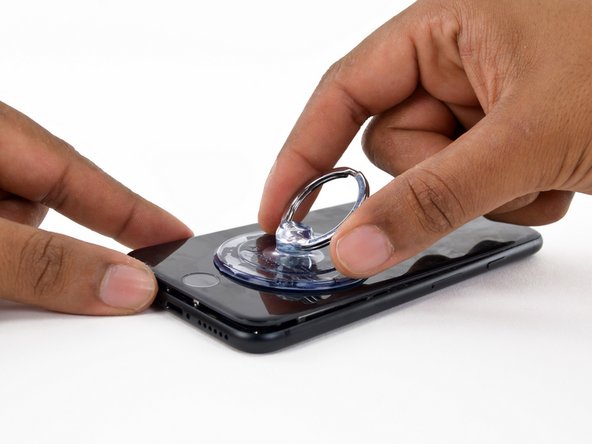
    • Pull the suction cup to create a small gap between the display assembly and the back case.

    • The waterproof adhesive that holds the display in place is very tough and the creation of this initial crack requires the application of a rather high force. If you find difficult to open a gap, move the screen up and down to weaken the sticker until you can insert the spudger.

  14. iPhone 7 camera lens replacement: 14 단계, 이미지 1/3 iPhone 7 camera lens replacement: 14 단계, 이미지 2/3 iPhone 7 camera lens replacement: 14 단계, 이미지 3/3
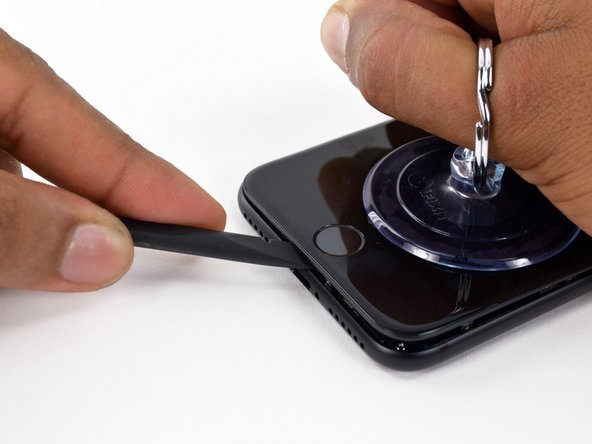
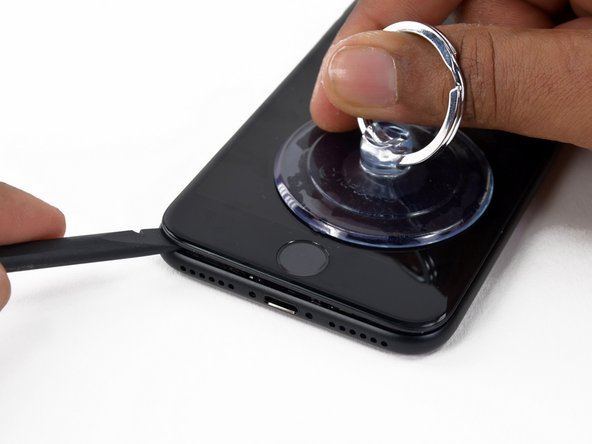
    • Slide the spudger to the left along the bottom side of the iPhone.

    • Twist the spudger to widen the gap between the display and the back case.

  15. iPhone 7 camera lens replacement: 15 단계, 이미지 1/3 iPhone 7 camera lens replacement: 15 단계, 이미지 2/3 iPhone 7 camera lens replacement: 15 단계, 이미지 3/3
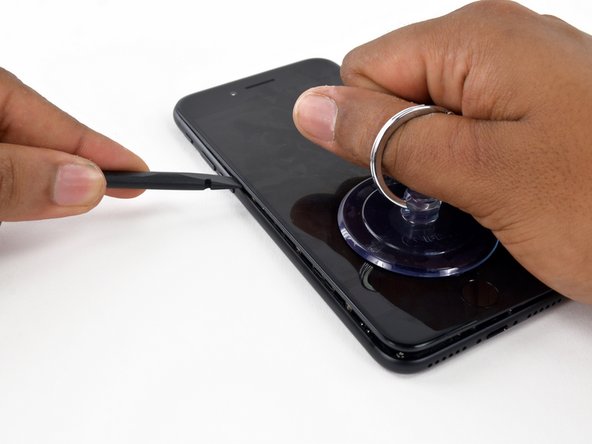
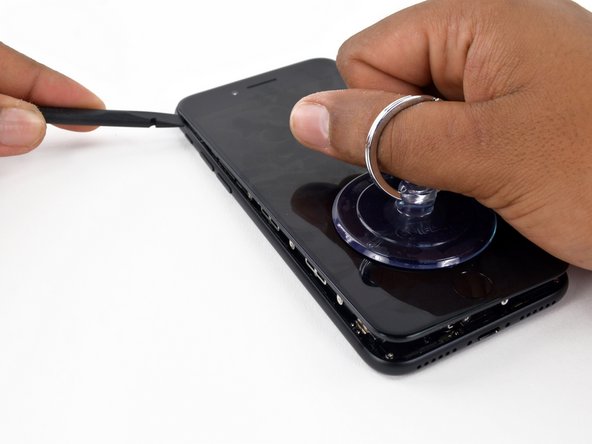
    • Slide the spudger along the left side of the iPhone, starting at the bottom and moving to the volume control buttons and the silent mode switch.

    • Do not try to force the top of the display up by lifting it from the back case, because it is locked in place by plastic clips that may break.

  16. iPhone 7 camera lens replacement: 16 단계, 이미지 1/3 iPhone 7 camera lens replacement: 16 단계, 이미지 2/3 iPhone 7 camera lens replacement: 16 단계, 이미지 3/3
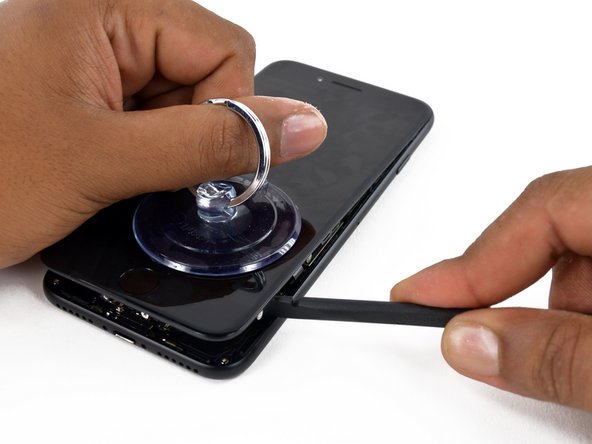
    • Remove the spudger from the left side of the iPhone and insert the flat end into the lower right corner of the device.

    • Rotate the spudger to widen the gap between the display assembly and the rear case.

    • Slide the flat end of the spudger to the right side of the phone to break the adhesive that holds the display in place.

  17. iPhone 7 camera lens replacement: 17 단계, 이미지 1/3 iPhone 7 camera lens replacement: 17 단계, 이미지 2/3 iPhone 7 camera lens replacement: 17 단계, 이미지 3/3
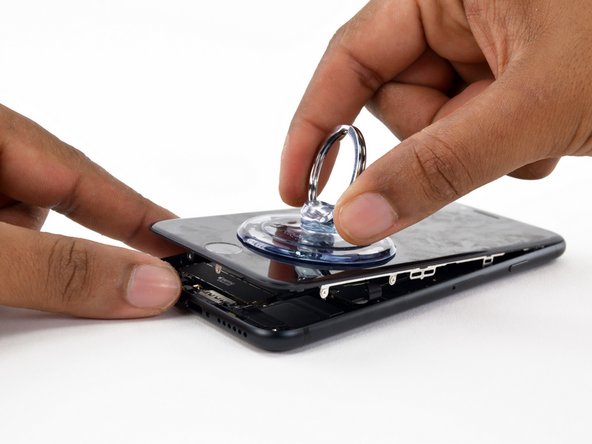
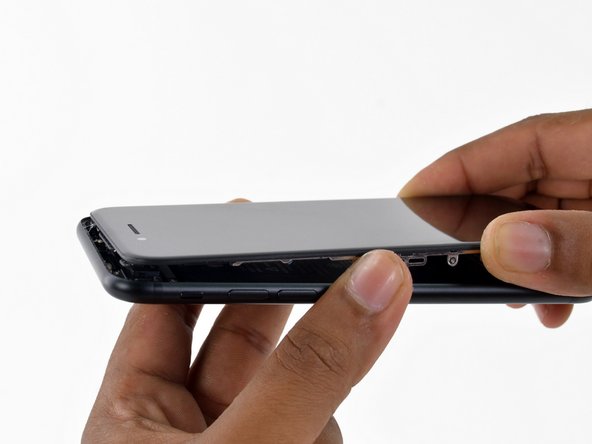
    • Pull the suction cup up to lift the display and open the iPhone.

    • Do not lift the display above 10 ° because there are ribbon cables along the right edge of the device that connect the display to the logic board.

  18. iPhone 7 camera lens replacement: 18 단계, 이미지 1/1
    • Lift the small appendage of the suction cup to remove the instrument from the front panel.

  19. iPhone 7 camera lens replacement: 19 단계, 이미지 1/2 iPhone 7 camera lens replacement: 19 단계, 이미지 2/2
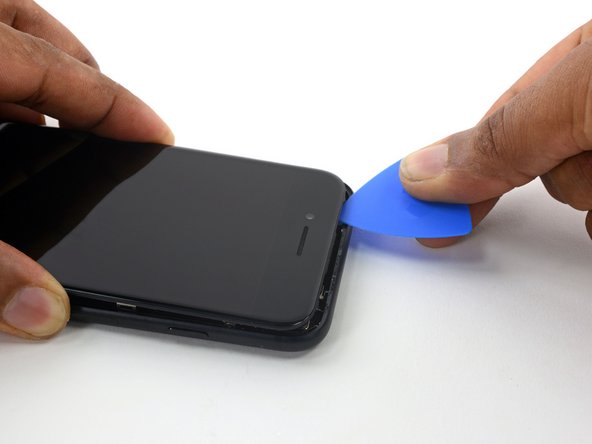
    • Slide an opening tool along the top side of the iPhone, between the back case and the front panel, to break the rest of the sticker that holds the screen in place.

  20. iPhone 7 camera lens replacement: 20 단계, 이미지 1/3 iPhone 7 camera lens replacement: 20 단계, 이미지 2/3 iPhone 7 camera lens replacement: 20 단계, 이미지 3/3
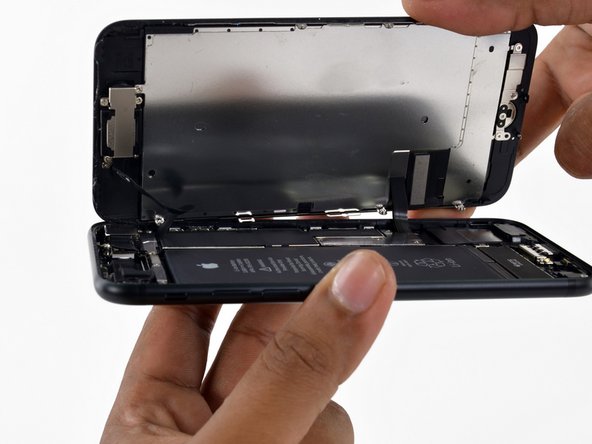
    • Carefully pull the display assembly horizontally to move it away from the top of the phone to disconnect the clips that lock the screen to the back case.

    • Open the iPhone lifting the display from the right side, like the back cover of a book.

    • In this step, do not try to completely separate the display because there are several fragile ribbon cables that still connect it to the iPhone logic board.

    • Now you can place the phone on a flat surface and keep it open like a book.

  21. iPhone 7 camera lens replacement, Battery Disconnect: 21 단계, 이미지 1/2 iPhone 7 camera lens replacement, Battery Disconnect: 21 단계, 이미지 2/2
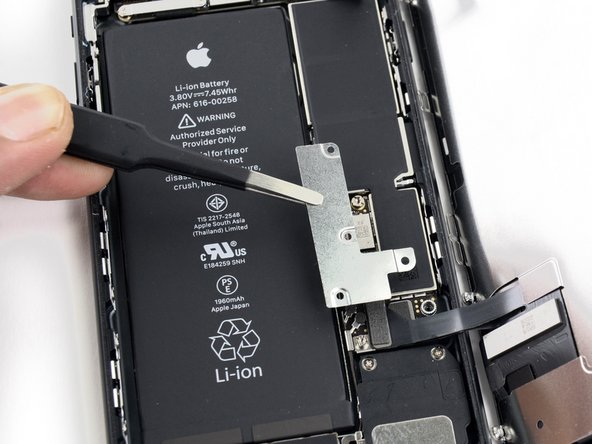
    • Remove the following Y000 tri-wing screws from the connector lower bracket:

    • Three 1.2 mm screws

    • One 2.4 mm screw

    • Remove the connector lower bracket.

  22. iPhone 7 camera lens replacement: 22 단계, 이미지 1/3 iPhone 7 camera lens replacement: 22 단계, 이미지 2/3 iPhone 7 camera lens replacement: 22 단계, 이미지 3/3
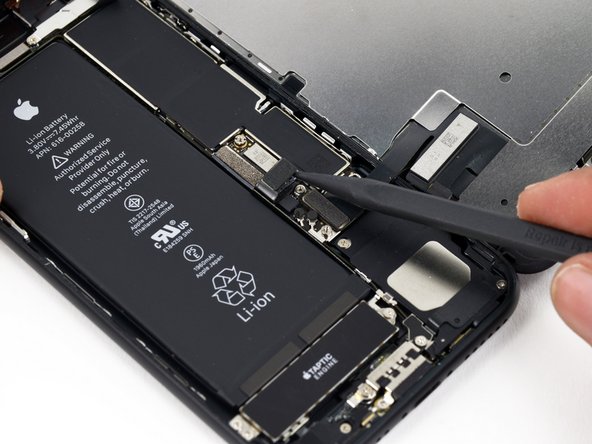
    • Use the pointed end of a spudger to lift the battery connector from its socket on the logic board.

    • Slightly bend the connector cable to prevent any contact with the socket and therefore power up the phone.

  23. iPhone 7 camera lens replacement, Display Group: 23 단계, 이미지 1/3 iPhone 7 camera lens replacement, Display Group: 23 단계, 이미지 2/3 iPhone 7 camera lens replacement, Display Group: 23 단계, 이미지 3/3
    • Use the flat end of a spudger or a fingernail to disconnect the two lower display connectors lifting them straight from their socket on the logic board.

    • To reconnect these cables, press from one end until you hear the click indicating the block, then repeat the operation on the other side. Do not press in the middle. If the connector is also slightly misaligned, the connector may bend, leading to permanent damage.

  24. iPhone 7 camera lens replacement: 24 단계, 이미지 1/3 iPhone 7 camera lens replacement: 24 단계, 이미지 2/3 iPhone 7 camera lens replacement: 24 단계, 이미지 3/3
    • Remove the two 1.3 mm Phillips screws securing the bracket to the front panel sensor assembly connector.

    • Remove the bracket.

  25. iPhone 7 camera lens replacement: 25 단계, 이미지 1/2 iPhone 7 camera lens replacement: 25 단계, 이미지 2/2
    • Detach the front panel sensor assembly connector from its socket on the logic board.

    • This pressure connector must be reconnected one end at a time to minimize the risk of bending.

  26. iPhone 7 camera lens replacement: 26 단계, 이미지 1/1
  27. iPhone 7 camera lens replacement, Rear Camera: 27 단계, 이미지 1/2 iPhone 7 camera lens replacement, Rear Camera: 27 단계, 이미지 2/2
    • Use the flat end of a spudger to detach the rear camera's pressure connector from its seat on the logic board.

  28. iPhone 7 camera lens replacement: 28 단계, 이미지 1/1
    • Remove the following Phillips screws that secure the rear camera bracket to the camera module:

    • A 1.3 mm screw

    • A 2.5 mm screw

  29. iPhone 7 camera lens replacement: 29 단계, 이미지 1/2 iPhone 7 camera lens replacement: 29 단계, 이미지 2/2
    • Remove the bracket.

  30. iPhone 7 camera lens replacement: 30 단계, 이미지 1/2 iPhone 7 camera lens replacement: 30 단계, 이미지 2/2
    • Remove the rear camera.

    • Remove the bracket. The inner edge of the bracket seems welded to the lens ring of the camera.

    • You will have to use a lot of force to remove it; do not be surprised if it breaks.

    • As a last step you will have to eject the broken lens.

    • First of all, look for an instrument that you prefer and that you can use strongly. Then he points the chosen instrument towards the lens to be replaced and press strongly until it is detached.

    • Place your hands so that the phone does not bend when you use force.

    • Pay attention to the phone and your hands.

결론

To reassemble your device, Follow these instructions in reverse order.

다음 번역가들에게 특별히 감사 드립니다:

it en

100%

이 번역자 분들은 저희가 세상을 수리하는데 동참해 주시는 분입니다! 기여하시겠습니까?
번역 시작하기 ›

jacopo

회원 가입일: 03/25/14

4,373 평판

안내서 3개 작성하였습니다

JappoTech JappoTech 회원

Business

1 회원

안내서 7개 작성하였습니다

댓글 0개

댓글 쓰기

조회 통계:

24 시간 전: 0

7일 전: 1

30일 전: 21

전체 시간: 1,262